
Why These Sugar-Free Cheesecake Bars Actually Satisfy
These ???? Sugar-Free Cheesecake Bars – A Guilt-Free Treat! work because they focus on texture and balance, not just swapping sugar for a substitute. Full-fat cream cheese and sour cream create a smooth, creamy base that still feels indulgent, even without traditional sugar. The sugar-free powdered sweetener dissolves more evenly than granular options, so you avoid that gritty, cooling aftertaste that can ruin low-sugar desserts. A touch of vanilla bean paste and lime juice brightens the flavor, giving the bars a clean finish instead of the heavy sweetness you might expect from classic cheesecake.
The method also keeps these bars achievable on a busy day. You blend everything into one silky filling, then let the refrigerator do the work—no water bath, no cracking worries, and no monitoring the oven for ages. Because the bars are thinner than a full cheesecake and chilled thoroughly, they set up beautifully, slice cleanly, and hold their shape, even at only about 126 calories per serving. That makes these ???? Sugar-Free Cheesecake Bars – A Guilt-Free Treat! realistic for weeknights, meal prep, or whenever you want something sweet that doesn’t derail your day.
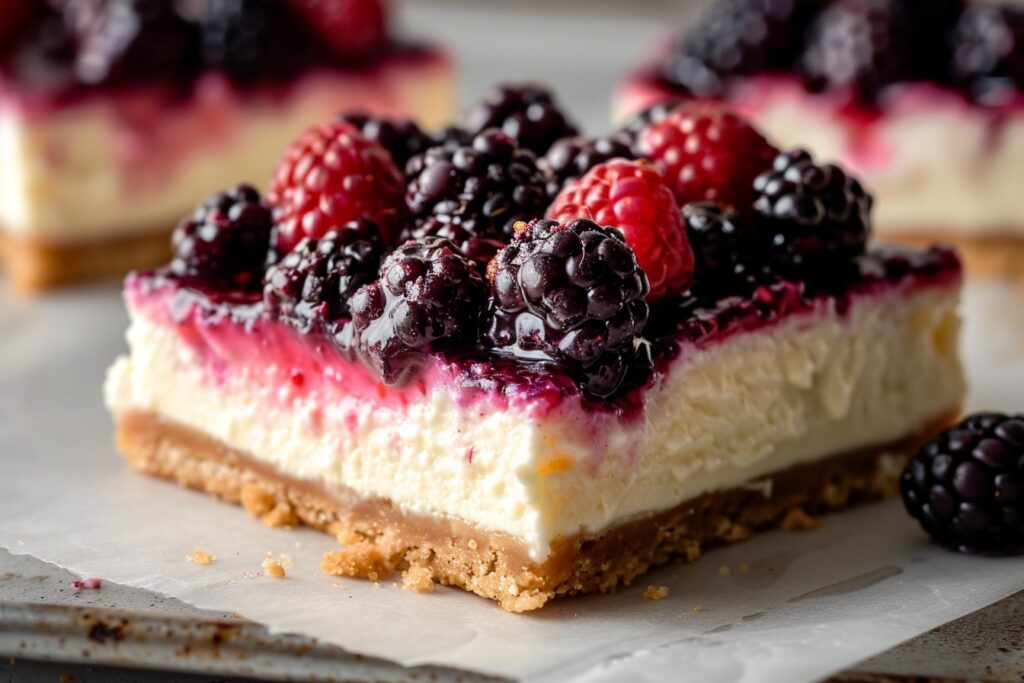
The optional mixed berry topping adds color, freshness, and natural tartness that pairs perfectly with the rich, creamy base. Using a sugar-free sweetener with the berries lets you adjust the sweetness to your taste without changing the structure of the recipe. The portioned bar format also helps with built-in portion control—each square feels like a complete dessert, not a compromise. Put simply, these bars respect both flavor and nutrition, so they taste like dessert first and “better-for-you” second.
How to Make These Sugar-Free Cheesecake Bars Turn Out Perfect Every Time
Once your crust is mixed and chilling, beat the softened cream cheese in a large bowl until completely smooth—any tiny lumps now will show up later, so take a full minute or two with a hand mixer on medium speed. Add the sugar-free powdered sweetener and mix again until fluffy and well combined, scraping down the sides of the bowl so nothing gritty hides at the bottom. Blend in the sour cream, vanilla bean paste, and lime juice just until the mixture looks silky and glossy; if you overmix at this stage, you’ll whip in extra air and your “???? Sugar-Free Cheesecake Bars – A Guilt-Free Treat!” can crack or look puffy after chilling. The batter should be thick but pourable, like slow-moving yogurt. If it seems too stiff, let it sit at room temperature for 3–5 minutes and stir again.
Take the crust from the fridge and firmly press it into a parchment-lined baking pan, making an even layer all the way into the corners so every bar has the same bite. Pour the cheesecake filling over the chilled crust and smooth the top with a spatula or the back of a spoon, tapping the pan gently on the counter to release any air bubbles. Cover the pan tightly with plastic wrap or foil and refrigerate for at least 4 hours, or until the center feels set and no longer wet when you nudge the pan. For the optional berry topping, toss the berries with your sugar alternative and let them sit for 10–15 minutes to create a light syrup, then spoon over the chilled bars just before serving. Use a sharp knife wiped clean between cuts to get those neat, bakery-style squares that make these “???? Sugar-Free Cheesecake Bars – A Guilt-Free Treat!” look as good as they taste.
Time-Saving Prep, Chilling, and Storage Guide
These ???? Sugar-Free Cheesecake Bars – A Guilt-Free Treat! are mostly hands-off, but they do reward a little planning. Hands-on prep is just about 10 minutes: mix the crust, beat the creamy filling, then spread and chill. The key time block is the 4-hour chill, which lets the bars set fully so they slice cleanly and hold their shape. You can make them in the morning for an evening dessert, or prep them the night before a busy day. If you’re entertaining, I recommend cutting them into 16 squares while they’re cold, then plating just before serving so you can focus on the rest of your menu, like a batch of baked chicken thighs or a fresh salad to keep things easy and balanced.
For make-ahead prep, you have options. You can prepare and press the crust up to 24 hours ahead, cover the pan tightly, and chill it until you’re ready to add the filling. You can also make the full batch of ???? Sugar-Free Cheesecake Bars – A Guilt-Free Treat! up to 2 days in advance, keep them covered in the fridge, and add the fresh berry topping right before serving for the best color and texture. Store leftovers in an airtight container in the refrigerator for up to 5 days; they stay smooth and creamy, and the flavor often improves by day two. If you use frozen berries for the topping, drain off any extra liquid before spooning them on, especially if you plan to store the bars longer.
Freezing works surprisingly well with this recipe when you follow a couple of simple rules. Freeze the bars without the berry topping, either in the pan well-wrapped or in a single layer in an airtight container, for up to 2 months. Thaw in the refrigerator overnight, not on the counter, to maintain that silky texture and prevent a watery top. For portion control, you can freeze individual squares, then pull out one or two when a craving hits—exactly what you want from a truly guilt-free dessert.
Flexible Options and Serving Notes
You can take these ???? Sugar-Free Cheesecake Bars – A Guilt-Free Treat! in a lot of different directions without sacrificing the clean, creamy texture. For a richer flavor, swap half of the sour cream for full‑fat Greek yogurt; it adds a light tang and a bit more protein. If you prefer a milder taste, use lemon juice instead of lime, or skip the citrus and lean on extra vanilla bean paste. Want to reduce the carbs even more? Cut the berry topping in half and spoon just a small amount over each bar, or serve the berries on the side so everyone can choose their own level of sweetness. You can also make a half batch in an 8×8 pan if you’re cooking for one or two and don’t want leftovers lingering.
When it comes to serving, chill the bars for the full time so they slice cleanly—cold cheesecake always cuts better. Use a sharp knife, wipe it between cuts, and you’ll get neat squares instead of ragged edges. I like to top these right before serving so the berry juices stay bright and don’t stain the surface; you can even offer bowls of mixed berries, toasted nuts, or a drizzle of sugar‑free chocolate sauce for a build‑your‑own dessert tray. These bars hold well in the refrigerator for 4–5 days, and you can freeze individual pieces tightly wrapped for up to 2 months—just thaw overnight in the fridge. If you’re planning a mixed dessert table alongside things like mini frittatas or stuffed peppers for a brunch spread, these ???? Sugar-Free Cheesecake Bars – A Guilt-Free Treat! balance everything with a lighter, cool finish that still feels completely satisfying.
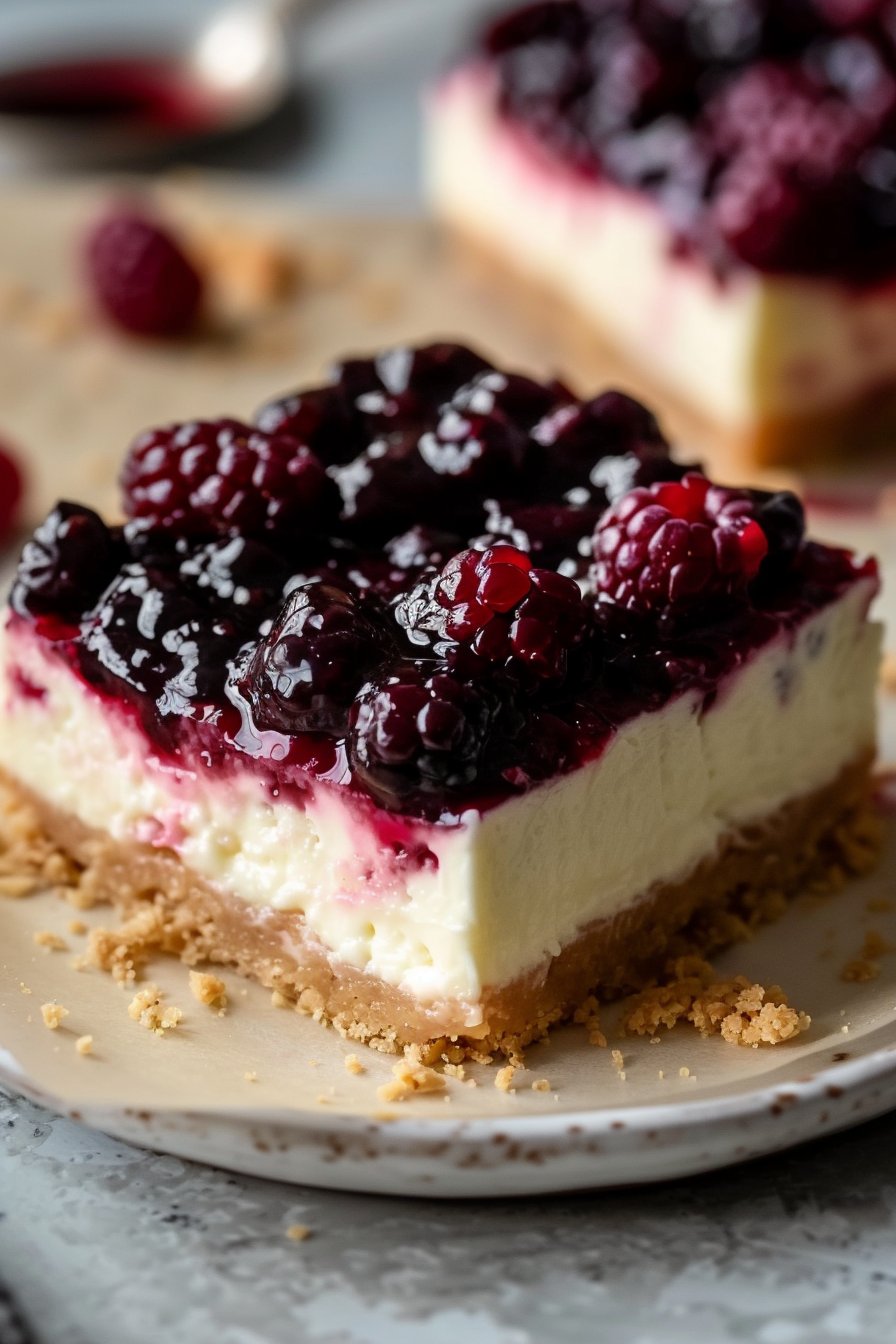
Serving of ???? Sugar-Free Cheesecake Bars – A Guilt-Free Treat!
Conclusion
These cheesecake bars prove that “better-for-you” and “deeply satisfying” can absolutely live on the same plate. When you pull a pan of these out of the fridge and cut into that creamy, smooth center with its clean, sweet finish, you get all the pleasure of dessert without feeling weighed down afterward. That’s exactly why I love making these on busy weeks and for casual get-togethers—they feel special, but they’re simple and manageable.
I’ve seen a batch of these disappear quickly at family movie nights, Sunday coffee with friends, and even as an easy bring-along dessert for work. They’re the kind of treat that makes people linger at the table a little longer, sharing one more square and one more story. If you’ve been looking for a dessert that fits your goals but still feels like a true indulgence, these ???? Sugar-Free Cheesecake Bars – A Guilt-Free Treat! belong in your rotation.
I’d love for you to try this recipe, make it your own, and share it with the people you care about most. For more delicious recipes like this, follow us on social media!
Instructions Process of ???? Sugar-Free Cheesecake Bars – A Guilt-Free Treat!
What makes these sugar-free cheesecake bars “a guilt-free treat”?
These cheesecake bars stay sugar-free by relying on a powdered sugar substitute in the filling instead of regular granulated or brown sugar. The optional berry topping also uses a sugar alternative, like monk fruit, rather than traditional sugar. This keeps the carbs and calories lower while still giving you a satisfying sweetness. Always read labels to be sure your sweetener is truly sugar-free and suitable for baking. If you track macros, plug in your specific brands to get the most accurate nutrition details.
Can I customize the sweetness or type of sweetener?
Yes, you can adjust the sweetness level to your taste by adding a little more or less sugar-free powdered sweetener to the filling. Start with the amount in the recipe, taste the mixture, and increase by 1 tablespoon at a time if needed. You can use any powdered, bake-friendly sugar alternative that measures like sugar, such as an erythritol or monk fruit blend. **Avoid liquid sweeteners** here, since they can thin the filling and affect how it sets. If your sweetener has a cooling aftertaste, balance it with an extra splash of vanilla or lime juice.
How should I chill and store these sugar-free cheesecake bars?
Chill the bars for at least 4 hours, or until fully set, before slicing; overnight is even better for the cleanest cuts. Once chilled, slice them into bars and store them in an airtight container in the refrigerator. They will keep well for about 4 to 5 days. If stacking, place parchment paper between layers to prevent sticking. For longer storage, you can freeze the bars (without the fresh berry topping) for up to 2 months and thaw them in the fridge before serving.
Recipe

Sugar-Free Cheesecake Bars – A Guilt-Free Treat!
Ingredients
Method
- Line an 8×8 inch square baking pan with parchment paper, leaving some overhang for easy lifting.
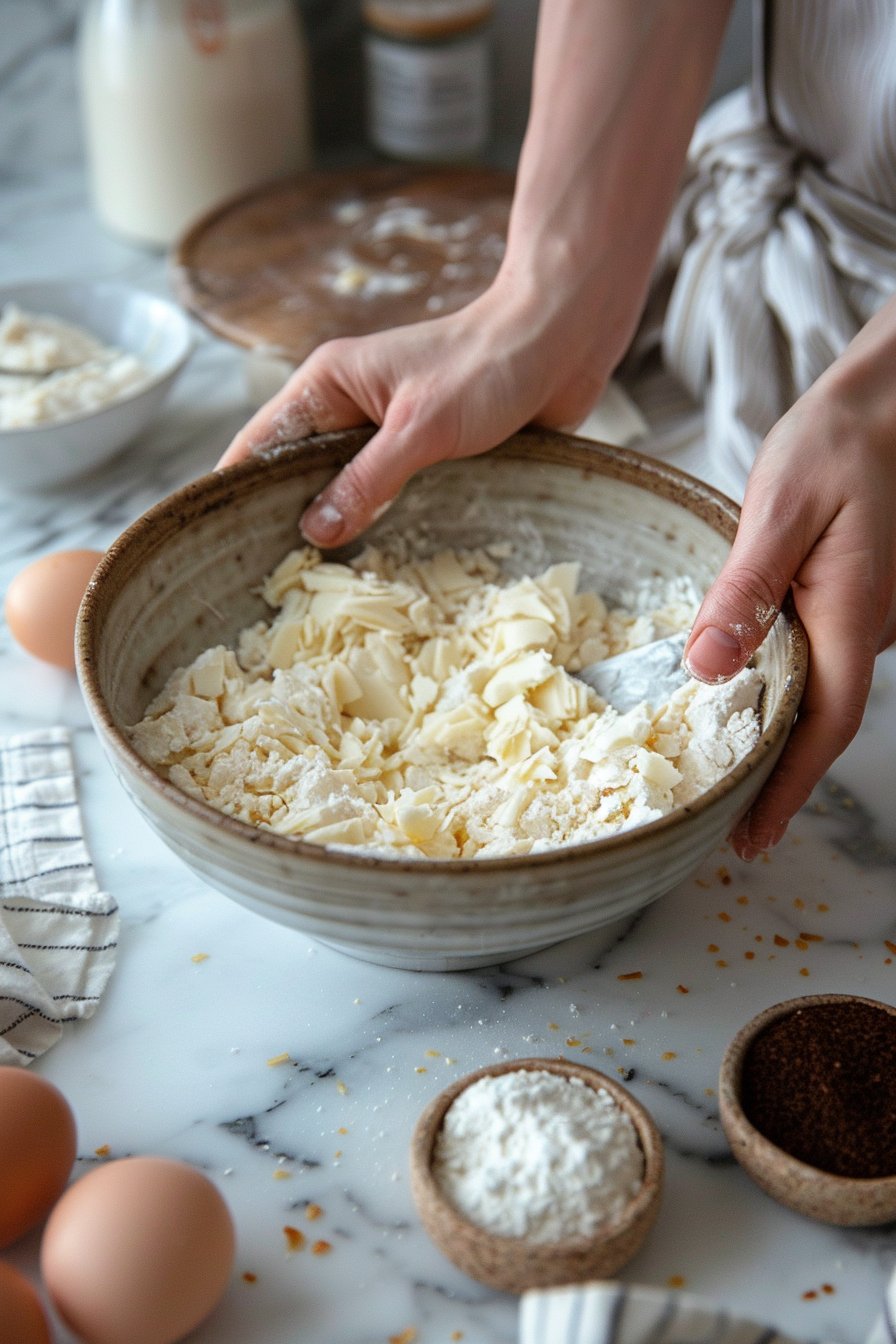
- In a medium bowl, combine the almond flour, melted butter, 3 tablespoons sugar-free powdered sweetener, 1/2 teaspoon vanilla bean paste, and salt, and mix until a crumbly dough forms.
- Transfer the crust mixture to the prepared pan and press it firmly and evenly into the bottom of the pan, pushing it into the corners to form a compact layer.
- Place the pan with the crust in the refrigerator to chill while you prepare the cheesecake filling.
- In a large mixing bowl, beat the softened cream cheese with a hand mixer on medium speed for 1 to 2 minutes until completely smooth and lump-free.
- Add 3/4 cup sugar-free powdered sweetener to the cream cheese and beat again until light and fluffy, scraping down the sides of the bowl as needed.
- Add the sour cream, 1 teaspoon vanilla bean paste, and lime juice to the bowl and mix on low speed just until the filling looks smooth, thick, and glossy.
- Remove the chilled crust from the refrigerator and pour the cheesecake filling over it, spreading it into an even layer with a spatula and smoothing the top.
- Tap the pan gently on the counter a few times to release any air bubbles from the filling.
- Cover the pan tightly with plastic wrap or foil and refrigerate for at least 4 hours, or until the cheesecake is fully set in the center.
- Just before serving, combine the mixed berries and 1 tablespoon sugar-free sweetener in a small bowl, stir, and let sit for 10 to 15 minutes to create a light syrup.
- Lift the cheesecake slab out of the pan using the parchment, place it on a cutting board, and cut into 16 squares with a sharp knife, wiping the blade clean between cuts.
- Spoon the macerated berries over the cheesecake bars just before serving or serve on the side.
Notes
- Do not overmix after adding sour cream and lime juice; too much air can cause a puffy or cracked surface.
- For clean slices, cut the bars while well chilled and wipe the knife between cuts.
- Store the bars covered in the refrigerator for up to 4 days; add the berry topping just before serving.


