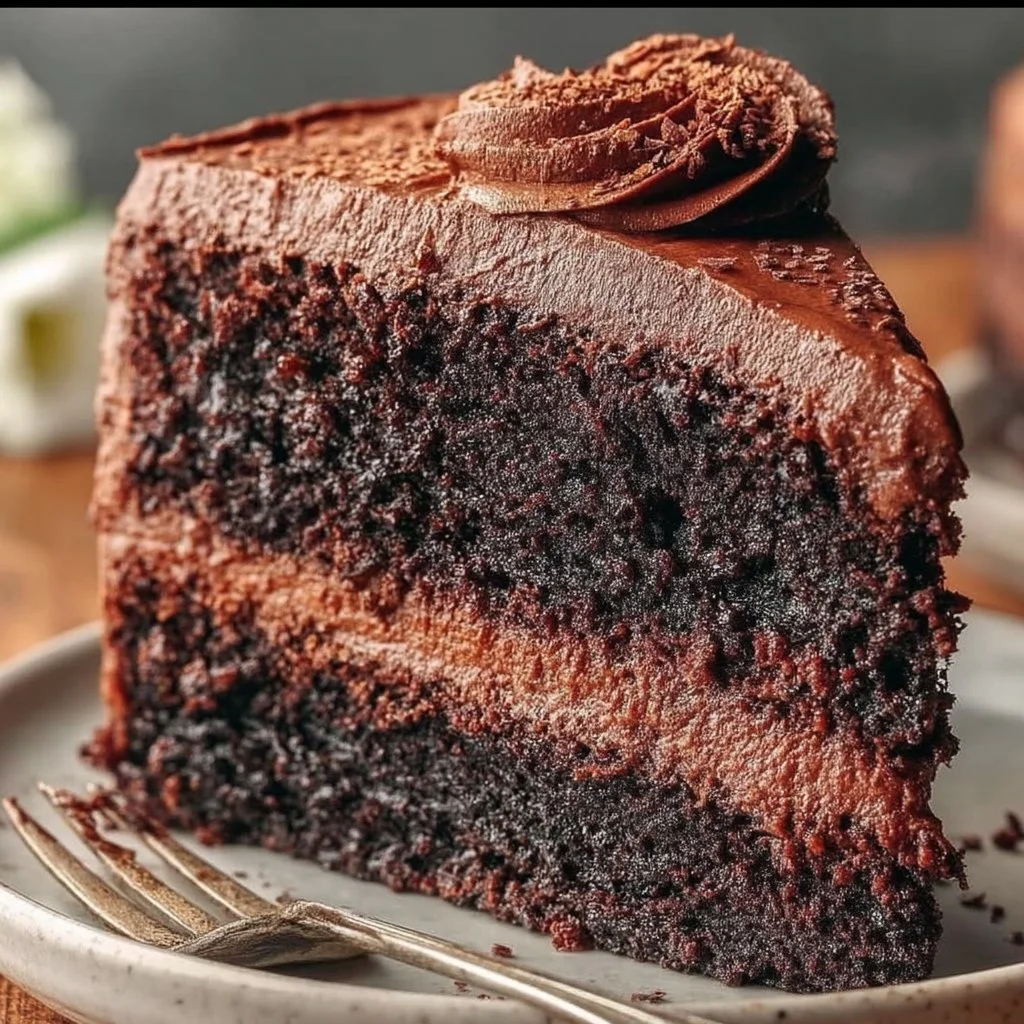
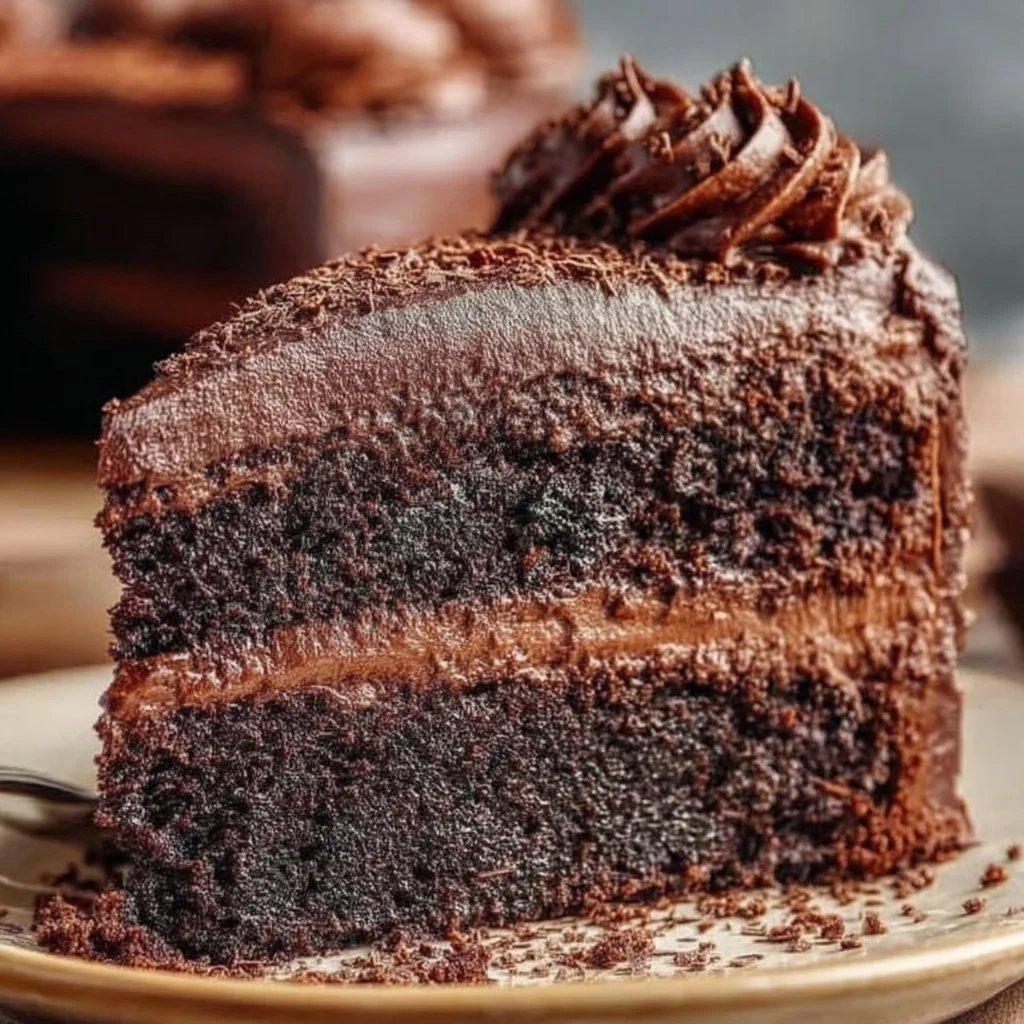
Some days you want a chocolate cake that feels like actual cake—tender, sliceable, and deeply cocoa-forward—without turning it into an all-day project. This one is built for that: one pan, one bowl for dry, one for wet, and a quick mix-and-bake routine that fits easily into a regular evening.
It’s especially useful when you need a simple, lower-sugar dessert option that still tastes rich. Almond flour keeps the crumb moist, applesauce adds softness, and cocoa brings the intensity. If you’ve made my diabetic-friendly sugar-free chocolate cake before, this version is even more streamlined—no frosting required to feel finished.
Why This Recipe Works
- Almond flour + eggs = reliable structure. This cake sets up firmly enough to slice, without needing extra steps or special techniques.
- Cocoa powder brings the main flavor. With ½ cup cocoa, the chocolate taste is bold and clear instead of faintly “chocolate-ish.”
- Applesauce keeps it tender. It adds moisture and a gentle fruit note that rounds out the cocoa without making the cake taste like apples.
- One straightforward batter. Dry ingredients mixed separately, wet ingredients whisked, then combined—no creaming, no melting, no fancy equipment.
- Quick bake window (25–30 minutes). It’s fast enough for a weeknight, but not so fast that you’re stuck hovering over the oven.
- Flexible sweetness level. Using a sugar substitute lets you dial the sweetness up or down depending on what you’re used to.
Quick Kitchen Note
I rely on this style of cake when I want something chocolatey that doesn’t require frosting, layering, or decorating—just a clean slice with a cup of coffee, or a simple dessert I can portion out over a few days.
What It Tastes Like
This cake tastes like dark cocoa with a light vanilla aroma and a balanced, not-overly-sweet finish. The texture is moist and tender with a slightly dense, brownie-adjacent crumb (in a good way), and the top bakes up matte and smooth rather than shiny or sticky.
Ingredients
This recipe is short on purpose, and each ingredient pulls its weight. Almond flour makes the base rich and moist; cocoa powder provides the chocolate backbone; applesauce and almond milk loosen the batter and keep it soft; eggs give the cake structure. For sweetness, use the sugar substitute you like best—erythritol tends to taste clean and measures easily, while stevia can be stronger (so follow your product’s guidance for equivalent sweetness). If you enjoy simple, no-fuss cakes like my no-sugar carrot cake, this one follows the same practical spirit.
- 1 ½ cups almond flour
- ½ cup unsweetened cocoa powder
- 1 teaspoon baking powder
- ½ teaspoon salt
- 3 large eggs
- ½ cup unsweetened applesauce
- ½ cup unsweetened almond milk
- 1 teaspoon vanilla extract
- 1/3 cup sugar substitute (e.g., erythritol or stevia)
Step-by-Step Instructions
- Heat the oven and prep the pan. Preheat to 350°F (175°C). Grease a 9-inch round cake pan well so the cake releases cleanly after cooling.
- Mix the dry ingredients. In a mixing bowl, combine the almond flour, cocoa powder, baking powder, and salt. Break up any visible cocoa lumps so the batter mixes evenly.
- Whisk the wet ingredients until smooth. In a second bowl, whisk together the eggs, applesauce, almond milk, vanilla extract, and sugar substitute. You’re looking for a cohesive, smooth mixture with no streaks of egg.
- Combine wet and dry. Pour the wet mixture into the bowl of dry ingredients. Stir until fully combined and you no longer see dry patches of almond flour or cocoa. The batter should look uniformly chocolate-brown and fairly thick, but spreadable.
- Fill the pan. Pour the batter into the prepared cake pan and smooth the top so it bakes evenly.
- Bake. Bake for 25–30 minutes, until the cake looks set in the center and a toothpick inserted in the middle comes out clean. (A few dry crumbs are fine; wet batter is not.)
- Cool before slicing. Let the cake cool before serving. This gives the crumb time to set so slices hold together neatly.
Common Mistakes to Avoid
- Under-greasing the pan. Almond-flour cakes can stick; grease thoroughly so the cake releases without tearing.
- Leaving cocoa lumps in the dry mix. Cocoa clumps can create bitter pockets; break them up before adding the wet ingredients.
- Overbaking “just to be safe.” A few extra minutes can dry the crumb; pull it when the center is set and the toothpick comes out clean.
- Slicing while warm. The cake finishes setting as it cools; cutting too early can make it crumble or compress.
- Overmixing once combined. Mix just until you don’t see dry streaks—extra stirring can make the texture heavier.
Variations and Swaps
- Choose your sweetness style: Erythritol tends to mimic sugar’s bulk more closely; stevia can be more concentrated. Either works—just aim for the same sweetness level as 1/3 cup of your chosen substitute.
- Make it cupcake-style (same bake temp): You can bake the batter in smaller portions; start checking earlier since they’ll bake faster than a 9-inch round.
- If you like no-bake desserts: For a different texture entirely, my low-carb no-bake chocolate cheesecake is a good alternative when you don’t want to turn on the oven.
Serving Suggestions
- Serve at room temperature for the cleanest slices and the fullest cocoa flavor.
- If you’re serving it after dinner, keep it simple—just cut thin wedges and let the chocolate do the work.
- For a make-ahead dessert table with minimal fuss, pair this with something chilled like my no-bake sugar-free jello cheesecake so you have two textures without extra baking.
Storage and Meal Prep
- Room temperature: If your kitchen is cool, you can keep the cake covered for short-term snacking.
- Refrigerator: For longer storage, cover and refrigerate. Cold slices can taste more firm; let a slice sit out briefly if you prefer a softer crumb.
- Meal prep: This is an easy one to portion—cool completely, then slice and store servings so dessert is already “done” for the next few days.

FAQs
Can I make this ahead of time?
Yes. Bake it, cool completely, then cover and store. The texture is often even better once it has fully set.
My cake seems a little dry—what happened?
The most common cause is baking a bit too long. Next time, start checking at 25 minutes and pull it as soon as a toothpick comes out clean.
Why do I need to cool it before slicing?
While it cools, the structure firms up. Cutting too soon can make the center compress or crumble instead of slicing cleanly.
Can I use a different sugar substitute?
Yes—use what you like, but keep the sweetness equivalent to the amount listed and whisk it thoroughly into the wet ingredients so it disperses evenly.
Final Tip
When you test for doneness, aim the toothpick right in the center and check more than once if needed—this cake can look set on top before the middle is fully baked, and pulling it at the right moment is the difference between tender and dry.
Conclusion
If you’re comparing approaches to a no-sugar chocolate cake, it’s helpful to see how different recipes balance cocoa intensity, moisture, and sweetness—this Sugar Free Chocolate Cake is one reference point, and this Healthy Chocolate Cake (No Sugar, No Flour) shows another style with a different texture strategy. For a more chocolate-on-chocolate direction, you can also look at a Sugar Free Double Chocolate Cake and note how added chocolate elements change richness and sweetness perception.
Sugar-Free Chocolate Cake
Ingredients
Method
- Preheat the oven to 350°F (175°C) and grease a 9-inch round cake pan well.
- In a mixing bowl, combine almond flour, cocoa powder, baking powder, and salt.
- In a second bowl, whisk together eggs, applesauce, almond milk, vanilla extract, and sugar substitute until smooth.
- Pour the wet mixture into the dry ingredients and stir until fully combined.
- Pour the batter into the prepared cake pan and smooth the top.
- Bake for 25–30 minutes, until the center is set and a toothpick comes out clean.
- Let the cake cool before slicing.