

Why These Killer Sugar Free Brownies Actually Taste Bakery-Style
These Killer Sugar Free Brownies work so well because the texture strategy is classic bakery technique, just adapted for a sugar-free kitchen. Melted butter (instead of creamed butter) gives you that dense, fudgy interior and shiny top, while the relatively low oven temperature (325°F) helps the brownies bake evenly without drying out the edges. Using real all-purpose flour, instead of only nut flours or coconut flour, also mimics traditional bakery crumb, so you get clean slices and a smooth bite that doesn’t crumble or feel gritty.
The sweetness and chocolate flavor are balanced on purpose, which is where many sugar-free brownies fail. A generous amount of unsweetened cocoa plus sugar free chocolate chips layers chocolate flavor the way a bakery does—deep cocoa base with pockets of soft, melty chips. The recipe leans on granulated Splenda (or your favorite granulated sugar alternative) to keep the structure similar to classic brownie batter; this helps prevent that icy or foamy texture that can happen with some powdered sweeteners. If you choose to make it keto or low carb with a different sweetener or flour, the base ratios and method stay the same, so you’re swapping ingredients without guessing on the rest of the formula.
Small but smart details give these Killer Sugar Free Brownies their “professional” finish while keeping them beginner-friendly. Vanilla bean paste adds bakery-style depth, so the chocolate tastes round and full rather than flat or bitter. A simple dry-mix step (combining flour, baking powder, and cocoa first) ensures no pockets of cocoa or uneven rise, something that can be very noticeable when you’re working sugar free. And because this batter comes together in one bowl plus one mixing step, it fits real weeknight baking—fast prep, consistent results, and brownies that actually scratch that bakery brownie craving without the sugar crash.
How to Make These Bakery-Style Brownies at Home
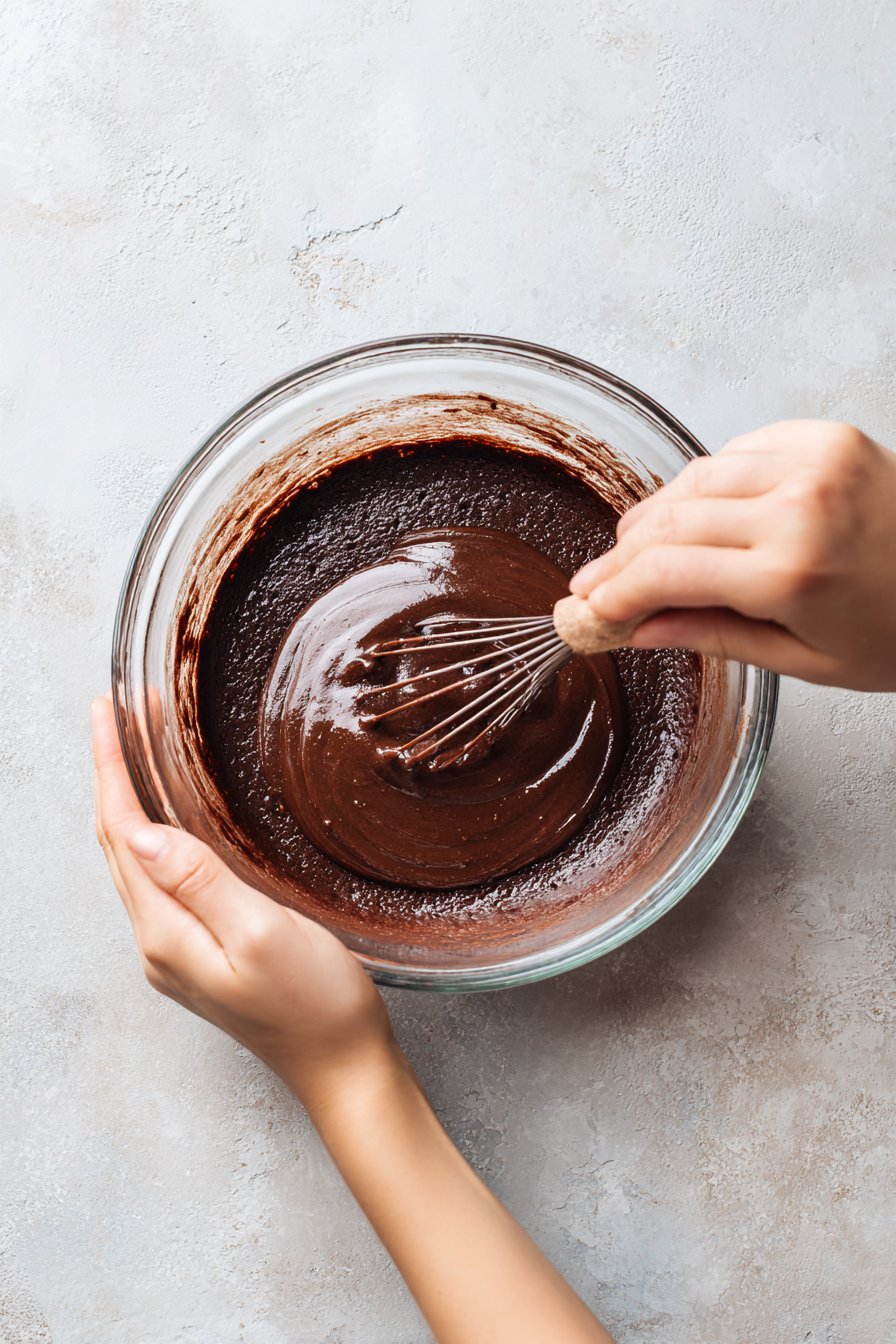
Start by getting your pan and oven set so the batter can go straight in once it’s mixed. Preheat your oven to 325°F and line a 9×9 square pan with parchment paper so it overhangs on two sides; this makes it easy to lift out the Killer Sugar Free Brownies in one piece. In a medium bowl, whisk together the flour and baking powder, then add the unsweetened cocoa powder and whisk just until the color looks even with no visible streaks. In a separate large bowl, combine the melted butter and Splenda, stirring until the mixture looks thick and glossy instead of grainy—this step helps the brownies bake up with that bakery-style sheen on top. Crack in the eggs one at a time, whisking well after each so the batter looks smooth and slightly thick, then stir in the vanilla bean paste until fully incorporated.
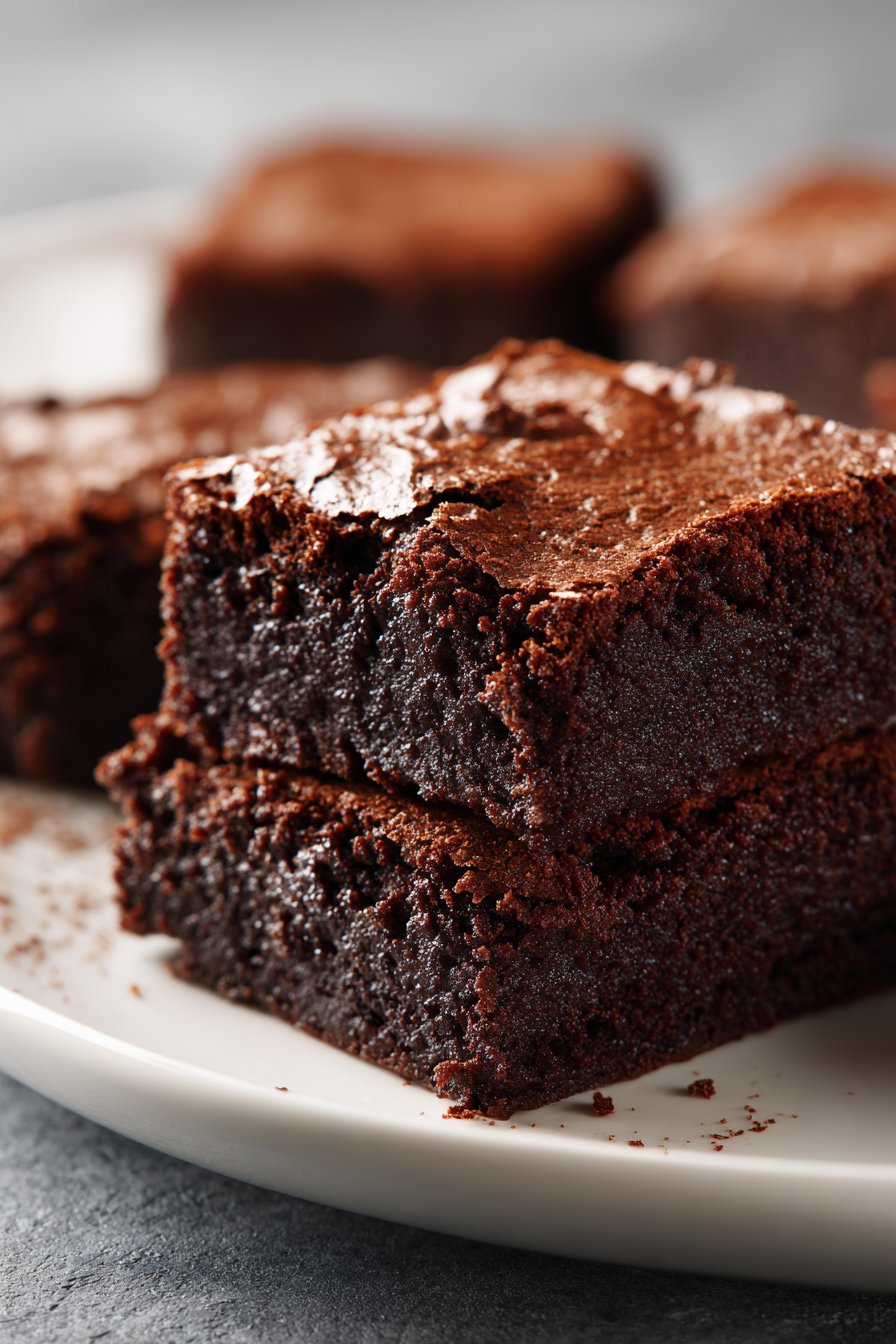
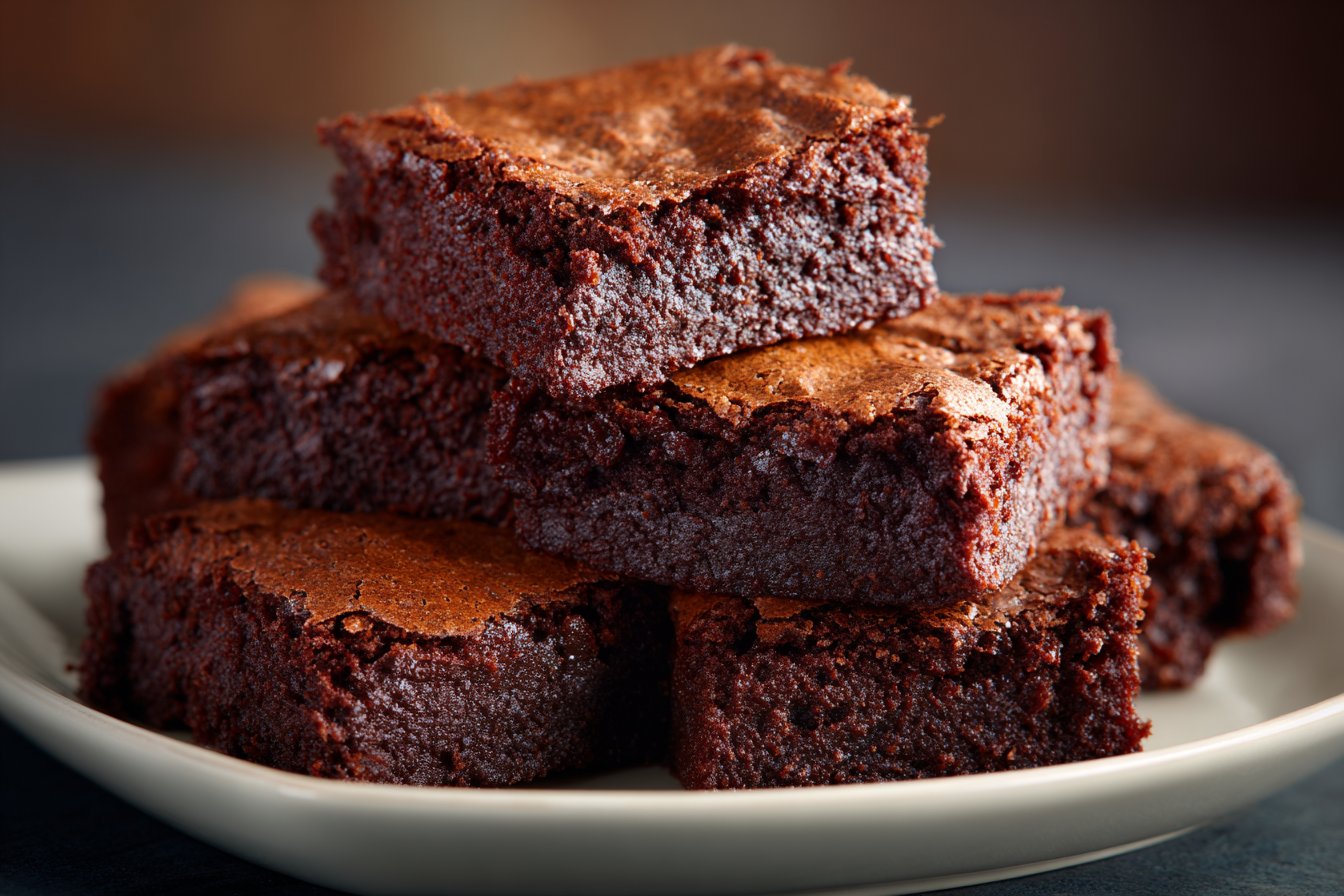
Once your wet base is ready, gently fold the dry ingredients into the large bowl using a spatula, working from the edges of the bowl toward the center. You want to mix only until you no longer see dry flour; over-mixing can make sugar free brownies feel tough rather than tender. Fold in the sugar free chocolate chips, making sure they’re evenly distributed so every square gets a few melty pockets. Scrape the batter into your prepared pan, smoothing the top into an even layer—this helps them bake uniformly with neat, squared-off edges. Bake for about 25 minutes, or until the edges are set and the center looks just slightly soft; a toothpick should come out with a few moist crumbs, not wet batter. Let the Killer Sugar Free Brownies cool completely in the pan before lifting them out and slicing—if you cut too soon, they’ll crumble instead of giving you those clean, bakery-style squares.
Time, Prep, and Storage Plan for Killer Sugar Free Brownies
You can have these Killer Sugar Free Brownies in the oven in about 15 minutes and fully baked in roughly 25, so I treat them as a 40-minute dessert start to finish. To keep things moving, measure the dry ingredients first, then melt the butter while you whisk the flour, baking powder, and cocoa together. Use that time to line your pan with parchment and lightly spray it, so as soon as the batter is ready, it goes straight into the oven. If you’re planning for guests, bake the brownies up to 1 day ahead, let them cool completely in the pan, then cover tightly; the texture actually improves slightly as they rest.
For slicing and storing, always let the pan cool to room temperature first; cutting too soon creates crumbs and tears. Once cooled, lift the brownies out using the parchment overhang and cut into 24 even squares for consistent portions and easier nutrition tracking. Store the brownies in an airtight container at room temperature for up to 3 days, separating layers with parchment so the tops don’t stick. For longer storage, refrigerate them for up to 1 week; they’ll firm up a bit but stay fudgy, and a 10–15 second zap in the microwave brings back the soft center. If you’re batch baking along with something like sugar free chocolate chip cookie bars, label containers clearly so you know what to grab when the craving hits.
These Killer Sugar Free Brownies also freeze very well, which makes them ideal for meal prep or snack prep. Freeze cut squares on a baking sheet until solid, then transfer them to a freezer bag or airtight container, pressing out excess air; they keep well for about 2 months. To serve from frozen, thaw a piece on the counter for 30–40 minutes, or microwave it in short bursts until just warm. If they look slightly dry after freezing, pair them with a spoonful of Greek yogurt or a drizzle of sugar free chocolate sauce to bring back a softer feel.
Flexible Options and Serving Notes for Killer Sugar Free Brownies
These Killer Sugar Free Brownies adapt easily to the way you eat and the people you’re serving. For a more keto-friendly version, swap the all-purpose flour with a fine almond flour (about 1:1 by volume, then reduce butter by 1–2 tablespoons if the batter seems very loose) and use a fully erythritol- or stevia-based sweetener instead of Splenda. If you need them gluten free, choose a 1:1 gluten-free baking blend and double-check your baking powder and chocolate chips are certified gluten free. To tone down the sweetness, you can cut the sweetener back by ¼ cup, especially if your sugar free chocolate chips are on the sweeter side. If you like deeper, more intense chocolate flavor, add 1–2 tablespoons of extra cocoa powder and 1–2 tablespoons of brewed coffee to balance the batter.
You can slice these brownies to match how you plan to serve them. For a snack platter or lunch box treat, cut the pan into 24 small squares so each piece stays around 117 calories and easy to grab. For a more bakery-style dessert plate, cut into 12 larger squares and serve warm with a scoop of sugar free vanilla ice cream or a dollop of whipped cream. They’re also great chilled: refrigerate the brownies for at least 2 hours for cleaner cuts and a fudgier texture, then serve straight from the fridge with a sprinkle of flaky sea salt on top. If you want a small tasting plate, pair a tiny square of these brownies with a slice of low carb cheesecake or a spoon of sugar free berry compote for contrast in flavor and texture.
Serving of Killer Sugar Free Brownies
Conclusion
These brownies are the kind of recipe you can rely on when you want something cozy, chocolatey, and just a little bit impressive—without a sugar crash tagging along. A pan of warm brownies on the counter has a way of pulling people into the kitchen, whether it’s kids sneaking a corner piece or friends lingering over coffee and “just one more bite.” That’s really what I love most about baking: a simple tray of bars can turn an ordinary day into a small occasion.
When you bake these bakery-style Killer Sugar Free Brownies, you’re not just making dessert—you’re giving yourself (and everyone around you) permission to slow down, share a plate, and enjoy a sweet moment that still aligns with your goals. If you’ve been on the fence about sugar free baking, let this be the recipe that changes your mind. Pull out a whisk, preheat the oven, and give them a try. You might be surprised how quickly they become a regular in your rotation.
For more delicious recipes like this, follow us on social media!
Instructions Process of Killer Sugar Free Brownies
Are these Killer Sugar Free Brownies OK for diabetics and low-carb diets?
These Killer Sugar Free Brownies are made with Splenda and sugar free chocolate chips, which significantly reduce sugar compared to classic brownies. That can make them a more blood-sugar-friendly option for many people, especially when portion sizes stay small. However, sugar substitutes and sugar alcohols can affect everyone differently, so some people may still see a glucose response. If you follow a strict diabetic, keto, or low-carb plan, always check your nutrition needs and talk with your healthcare provider or dietitian before adding them regularly. When in doubt, cut the brownies smaller and pair with protein to blunt any potential spike.
Can I swap Splenda for another sweetener in Killer Sugar Free Brownies?
You can replace Splenda with another **granulated 1:1 sugar substitute** such as a monk fruit–erythritol blend, stevia baking blend, or allulose blend. Always check the package for whether it measures cup-for-cup like sugar; if it doesn’t, adjust the amount according to the manufacturer’s baking guide. Allulose tends to make baked goods softer and can brown more, while erythritol can crystallize and feel a bit “cool” on the tongue. If you change the sweetener, bake a test batch first to learn how your preferred product behaves. You may need to add 1–2 extra tablespoons of flour if the batter looks very loose.
How can I make these Killer Sugar Free Brownies gluten-free or keto-friendly?
To make them gluten-free, swap the all-purpose flour for a **measure-for-measure gluten-free flour blend** that contains xanthan gum for structure. For a more keto-friendly version, use fine **almond flour** instead of all-purpose flour, then reduce the amount slightly so the batter stays thick but still spreadable. Almond flour brownies bake up more fudgy and dense, and they may need an extra few minutes in the oven to set. Always let alternative-flour brownies cool completely before cutting; they firm up as they cool. Expect a slightly different texture from classic bakery brownies, but still rich, chocolatey, and very satisfying.
Recipe
Killer Sugar Free Brownies
Ingredients
Method
- Preheat the oven to 325°F and line a 9x9-inch square baking pan with parchment paper, leaving an overhang on two sides for easy lifting. Lightly grease the parchment and exposed sides of the pan.
- In a medium bowl, whisk together the flour and baking powder until well combined. Add the cocoa powder and whisk until the mixture is evenly dark with no visible streaks.
- In a large mixing bowl, combine the melted butter and Splenda. Whisk until the mixture looks thick, glossy, and well blended.
- Add the eggs to the butter mixture one at a time, whisking well after each addition until the batter is smooth and slightly thick.
- Whisk in the vanilla bean paste until fully incorporated.
- Add the dry ingredients to the wet ingredients. Using a spatula, gently fold the dry mixture into the wet mixture just until no dry flour remains; do not overmix.
- Fold in the sugar free chocolate chips until they are evenly distributed throughout the batter.
- Scrape the batter into the prepared pan and spread it into an even layer, smoothing the top with a spatula.
- Bake for 25 minutes, or until the edges are set and a toothpick inserted in the center comes out with a few moist crumbs but no wet batter.
- Place the pan on a wire rack and let the brownies cool completely in the pan. Use the parchment overhang to lift the cooled brownies out, then slice into 24 squares and serve.
Notes
- Do not overbake; removing the brownies when the center is just set keeps the texture fudgy.
- Let the brownies cool completely before slicing to prevent crumbling.
- Store brownies in an airtight container at room temperature for up to 3 days, or refrigerate for up to 1 week.
