
I wanted a quick, lower-sugar chocolate treat that didn’t demand a bowlful of butter or a full day of attention. These brownies use vanilla-flavored Greek yogurt for structure and moisture, so you get fudgy texture with less added fat and a straightforward method that fits a busy afternoon.
They’re useful when you want something chocolatey that travels well — the batter comes together in one mixing bowl, the pan is small and portable, and cleanup is minimal. For a close reference, see my notes on other easy zero-sugar brownies: easy zero-sugar brownies.
Why This Recipe Works
- Yogurt replaces much of the fat while keeping brownies tender; it adds a slight tang that brightens cocoa without making the batter sour.
- Cocoa powder plus chopped chocolate creates a layered chocolate flavor: deep cocoa in the crumb and glossy pockets of melted chocolate.
- The crumb is fudgy rather than cakey because the recipe uses modest flour (3/4 cup) and a short bake time (about 25 minutes).
- One-bowl wet mixing and a small 8×8 pan means fast prep and very little cleanup.
- Sweetener of choice lets you control sugar level and type — use what you normally bake with for predictable sweetness.
- The optional chocolate chips make slices look and feel indulgent without changing technique.
Quick Kitchen Note
I rely on recipes like this when I want a reliable, low-fuss dessert: the steps are short, there’s no creaming or multiple stages, and the pan size keeps portions reasonable. If you prefer slightly denser brownies, check an alternate batch technique here: zero-sugar brownies with Greek yogurt.
What It Tastes Like
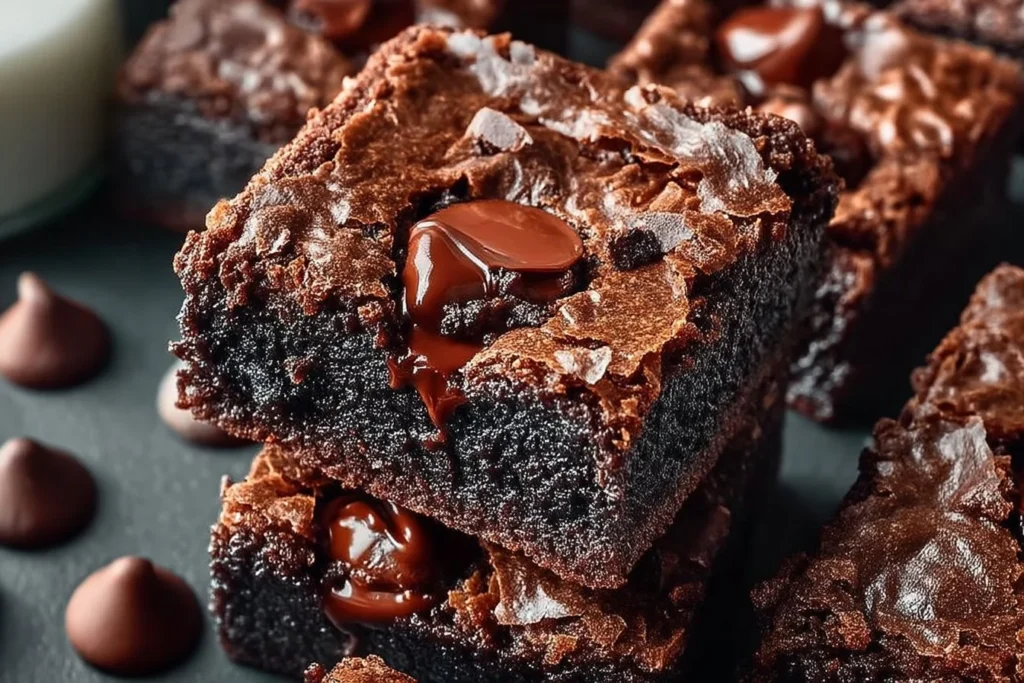
These brownies are chocolate-forward and moderately sweet, with a slightly tangy underpinning from vanilla-flavored yogurt. The interior is moist and fudgy with occasional molten chocolate from the chopped pieces and chips; the top is soft rather than crackly, and the aroma is pure cocoa with warm chocolate notes on the finish.
Ingredients
The key players are Greek yogurt for moisture and structure, cocoa for chocolate intensity, and chopped chocolate for melty pockets. The flour amount is low so the brownies stay dense; if you need gluten-free, swap in a 1:1 GF flour blend (the recipe volume remains the same).
- 1/2 cup chopped chocolate pieces
- 1 cup vanilla-flavored yogurt
- 1/2 cup sweetener of choice
- 3/4 cup all-purpose flour (gluten-free option available)
- 1/2 cup cocoa powder
- 1/2 teaspoon baking soda
- 1/2 cup milk (like unsweetened almond milk)
- Optional: 1 cup chocolate chips
Step-by-Step Instructions
- Preheat and prepare: Preheat the oven to 350°F (175°C). Grease an 8×8 inch baking pan or line it with parchment paper, leaving an overhang for easy removal.
- Mix wet ingredients: In a mixing bowl, whisk together the vanilla-flavored yogurt, your chosen sweetener, and the 1/2 cup milk until the mixture is smooth and slightly glossy. There should be no visible lumps of yogurt.
- Combine dry ingredients: In another bowl, sift (or whisk) together the flour, cocoa powder, and baking soda so the cocoa is evenly distributed and there are no clumps.
- Bring wet and dry together: Gradually add the dry ingredients to the wet mixture, stirring with a spatula until just combined. The batter will be thick but still pourable — stop mixing when you see no dry streaks to avoid a dry crumb.
- Add the chocolate: Fold in the chopped chocolate pieces and the optional chocolate chips. The chips will sink slightly and create pockets of melty chocolate; if you prefer even distribution, fold gently but thoroughly. For notes on texture variation try this other method: alternate batch notes.
- Bake: Pour the batter into the prepared pan and smooth the top. Bake for about 25 minutes. Start checking at 22 minutes — a toothpick inserted near the center should come out with a few moist crumbs but not wet batter. 25 minutes is a good target for fudgy brownies; longer will dry them out.
- Cool and cut: Let the pan cool on a wire rack for at least 10 minutes so the chocolate pockets set slightly and slices hold together. Use the parchment overhang to lift the slab out, cool a bit more if you want neat cuts, then slice.
Common Mistakes to Avoid
- Overmixing the batter: mixing until perfectly smooth will develop gluten and make the brownies cakier; stop when no dry streaks remain.
- Baking too long: the toothpick test should show moist crumbs, not a clean dry stick — overbaked brownies lose the fudgy texture.
- Using a thin pan: a very thin metal pan will bake faster and can dry the edges; use an 8×8 with standard sides.
- Skipping the chopped chocolate: those pieces add contrast in texture and flavor; if you omit them, reduce chips slightly to avoid overly sweet fudginess.
Variations and Swaps
- Yogurt swap: if you only have plain Greek yogurt, use it but expect a less sweet, tangier brownie — you can increase the sweetener a touch if desired.
- Flour option: use a 1:1 gluten-free all-purpose blend in the same amount if needed.
- Milk choice: any milk (dairy or unsweetened plant milk) works; whole milk will give a slightly richer mouthfeel.
- Add-ins: stir in chopped nuts or a tablespoon of instant coffee dissolved in the milk for a mocha note — keep quantities modest to preserve the fudgy texture.
Serving Suggestions
Serve warm with a scoop of plain yogurt or just a cup of coffee. These brownies also pair well with fresh berries or a small bowl of sliced fruit for balance.
Storage and Meal Prep
Store cooled brownies in an airtight container at room temperature for up to 2 days, or in the fridge for 4–5 days to keep them firmer. Reheat single slices briefly in the microwave (10–15 seconds) to refresh the melty chocolate. For longer storage, freeze whole or cut pieces wrapped tightly for up to 2 months; thaw in the fridge or at room temperature before warming. For notes on zero-sugar dessert storage and make-ahead tricks, see my related guide: zero-sugar dessert storage tips.

FAQs
Q: Can I make the batter ahead?
A: You can mix the batter and refrigerate it in the pan for a few hours, but bake from cold and expect an extra 3–5 minutes of baking time.
Q: Will plain yogurt work instead of vanilla-flavored?
A: Yes — plain works. The brownies will be less sweet and slightly tangier; adjust the sweetener by a tablespoon if you want a closer flavor.
Q: Why are my brownies crumbly?
A: Likely overbaked or overmixed. Reduce bake time slightly and stop mixing as soon as dry streaks disappear.
Q: Can I omit the chocolate chips?
A: Yes. The chopped chocolate already provides melty pockets; omit chips if you prefer less sweetness.
Final Tip
For even slices, chill the baked brownies for 30 minutes before cutting — the chocolate firms up and you get cleaner edges without changing texture.
Conclusion
If you’d like to compare texture or ingredient swaps, this recipe pairs well with other takes like Greek Yogurt Brownies (Gluten Free, High Protein) for a gluten-free approach, or a lower-calorie version such as Greek Yogurt Brownies (Under 100 Calories!) for different portioning ideas.

Lower-Sugar Chocolate Brownies
Ingredients
Method
- Preheat the oven to 350°F (175°C). Grease an 8×8 inch baking pan or line it with parchment paper.
- In a mixing bowl, whisk together the vanilla-flavored yogurt, sweetener, and milk until smooth and glossy.
- In another bowl, sift together the flour, cocoa powder, and baking soda.
- Gradually add the dry ingredients to the wet mixture, stirring until just combined.
- Fold in the chopped chocolate pieces and optional chocolate chips.
- Pour the batter into the prepared pan and smooth the top. Bake for about 25 minutes, checking at 22 minutes.
- A toothpick inserted near the center should come out with a few moist crumbs but not wet batter.
- Let cool on a wire rack for at least 10 minutes before slicing.


