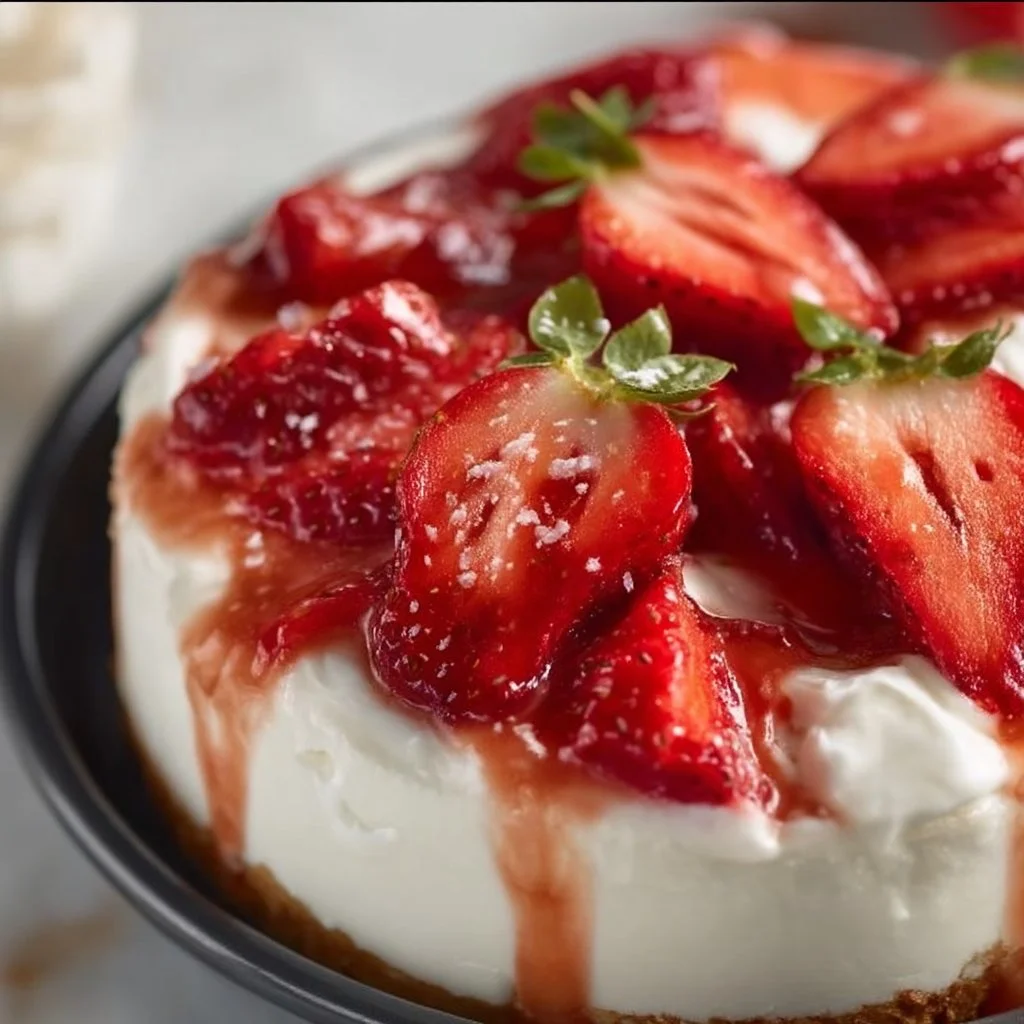
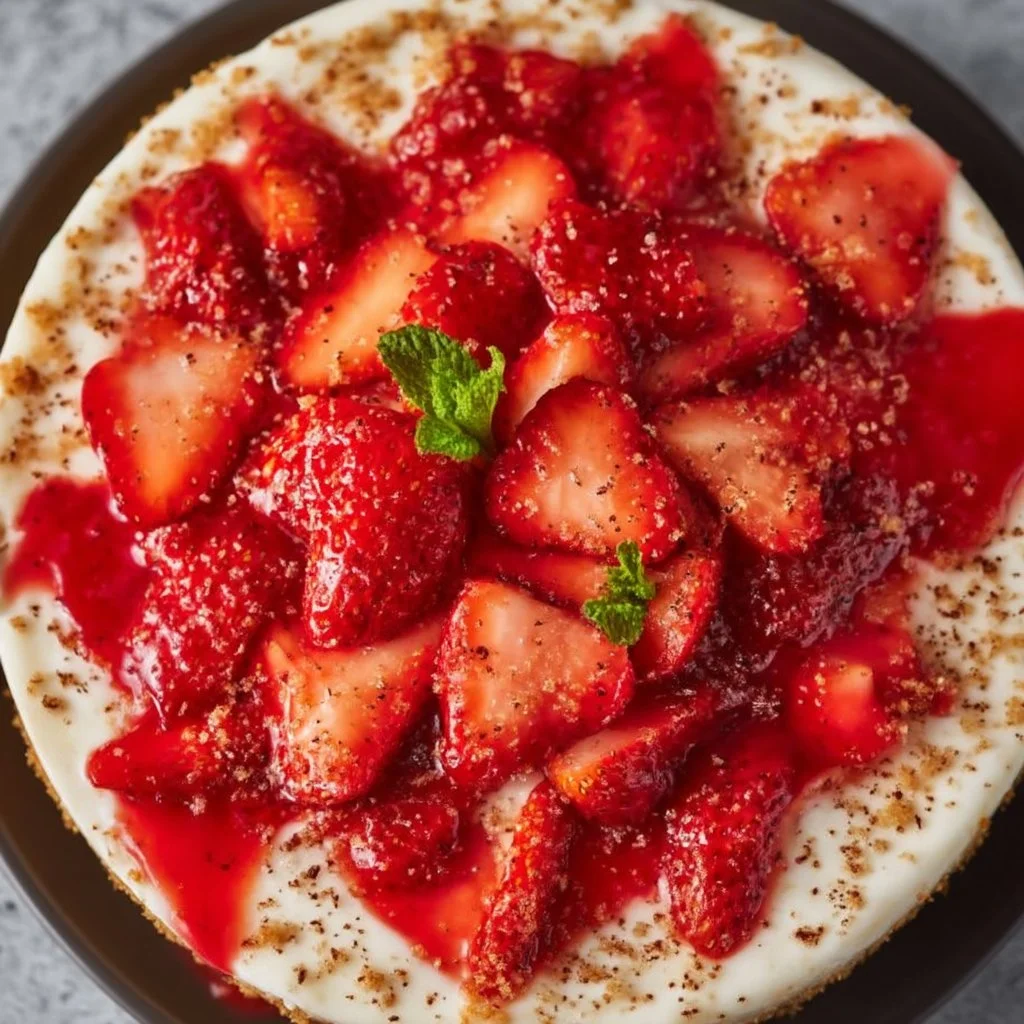
The days I reach for this no-bake strawberry cheesecake are the same days I want something cold, creamy, and tidy—without turning the kitchen into a project. It’s especially useful when you need a make-ahead dessert that sets in the fridge while you get on with dinner (or clean out the sink).
This version keeps things practical: a quick graham cracker crust with cinnamon and nutmeg, a smooth cream cheese filling that thickens with sugar-free instant pudding, and a simple layer-and-repeat finish with fresh strawberries. If you like the vibe of my no-bake sugar-free Jello cheesecake, this one lands in the same “reliable, low-effort, chill-and-serve” lane.
Why This Recipe Works
- The crust is fast and fragrant. Cinnamon and nutmeg give the graham crust a warm, bakery-style aroma without extra steps.
- The filling sets without baking. Sugar-free instant cheesecake pudding mix does the thickening, so you get sliceable texture after chilling.
- Fresh strawberries keep it bright. Two full layers of sliced berries cut through the richness and add a clean, juicy bite.
- It’s built for real schedules. You can assemble it in stages: crust first, filling next, then chill.
- Minimal cleanup. One bowl for crust, one bowl for filling, and a pie dish—no water bath, no oven, no cooling rack juggling.
Quick Kitchen Note
I rely on this style of dessert when I want something that feels “finished” but doesn’t require timing an oven or babysitting a bake; once it’s layered, the refrigerator does the work and the texture improves as it chills.
What It Tastes Like
This cheesecake is cool and creamy with a gentle tang from the cream cheese, a sweet vanilla-cheesecake note from the pudding, and a warm, spiced graham crust underneath. The strawberries add a fresh, slightly floral fruitiness and a juicy snap that keeps each bite from feeling heavy.
Ingredients
This recipe is short on purpose. The graham crumbs, butter, and spices create a crisp-tender crust that holds together once chilled. Softened cream cheese makes the filling smooth, while milk plus sugar-free instant cheesecake pudding mix turns it from loose to thick and spoonable. Fresh sliced strawberries bring the flavor and texture contrast. If you don’t have one of the spices, you can still make the crust—just use what you have and keep the ratios the same.
- 3/4 cup graham cracker crumbs
- 3 tablespoons butter, melted
- 1/4 teaspoon ground cinnamon
- 1/4 teaspoon ground nutmeg
- 1 (8 ounce) package cream cheese, softened
- 1 1/2 cups milk
- 1 (1 ounce) package cheesecake flavor sugar-free instant pudding mix
- 2 pints fresh strawberries, sliced
Step-by-Step Instructions
- Make the crust. In a bowl, mix the graham cracker crumbs with the melted butter, cinnamon, and nutmeg until the crumbs look evenly moistened (like damp sand with no dry patches).
- Press and chill. Press the crumb mixture firmly into an 8-inch pie dish, pushing it into an even layer across the bottom. Refrigerate the crust while you make the filling—this helps it hold together when you add the first layer.
- Soften the cream cheese. In a mixing bowl, beat the softened cream cheese on medium speed until it looks smooth and spreadable, with no obvious lumps clinging to the beaters.
- Add milk gradually (expect it to look loose at first). Reduce mixer speed to low. Gradually beat in the milk a little at a time. The mixture will look watery and thin during this stage—that’s normal. Stop once or twice to scrape down the sides with a rubber spatula so the cream cheese fully blends in.
- Thicken with pudding mix. Beat in the sugar-free instant cheesecake pudding mix until the filling becomes thick and smooth. You’re looking for a texture that holds soft peaks and doesn’t immediately level out when you stop mixing.
- Layer the cheesecake. Spoon half of the filling into the chilled crust and spread it into an even layer.
- Add strawberries. Spread half of the sliced strawberries over the filling, distributing them so you get fruit in every slice.
- Repeat layers. Add the remaining filling, smooth the top, then finish with the remaining strawberries.
- Chill until set. Refrigerate until set and cold, at least 1 hour. It’s ready when the filling looks firm (not sloshy) and the pie cuts cleanly with a steady hand.
Common Mistakes to Avoid
- Not softening the cream cheese first. Cold cream cheese tends to stay lumpy; let it soften so it beats smooth before you add any milk.
- Pouring all the milk in at once. The filling can get stubborn and uneven; add milk gradually on low speed and scrape the bowl so everything blends.
- Skipping the crust chill. A warm, loose crust can shift when you spread the filling; refrigerating it first helps it stay compact.
- Under-mixing after adding pudding mix. If the filling isn’t thick and smooth, it won’t set as nicely; mix until it clearly thickens and looks uniform.
- Slicing too soon. The minimum chill is 1 hour, but the pie cuts cleaner once it’s fully cold; if it’s soft, give it more fridge time.
Variations and Swaps
- Different no-bake format: Assemble the layers in a square dish and serve as scooped portions—similar idea to my sugar-free strawberry cheesecake squares, just with this specific crust and filling.
- Change the fruit: Keep the same method and swap the strawberries for another sliced fresh fruit you can layer (thin slices work best so the layers stay stable).
- Citrus direction: If you prefer something brighter and less berry-forward, my no-bake sugar-free lemon pie gives that sharper, tangy finish with a similar chill-and-serve payoff.
- Alternate crust style: For a nuttier base, see the approach in my lemon pie with almond flour crust—a useful reference if you like a less “graham” profile.
Serving Suggestions
Serve straight from the refrigerator for the cleanest slices and best texture. I like to cut with a steady downward motion (instead of sawing) so the strawberry layers stay neat. If you’re building a dessert table with other no-bake options, pair it with something like no-bake sugar-free cookies for contrast—creamy plus chewy works well.
Storage and Meal Prep
Store the assembled cheesecake covered in the refrigerator. Because the filling is dairy-based and the fruit is fresh, this is best kept cold and served cold—no reheating. For cleaner texture, slice only what you plan to serve and keep the rest intact in the pie dish; the layers hold together better that way. If your strawberries release a little juice over time, it’s not a failure—just a normal fresh-fruit effect; the flavor is still great.

FAQs
Can I make this ahead?
Yes. Assemble it, then refrigerate until set and cold (at least 1 hour). It also holds well made earlier in the day, as long as it stays chilled.
My filling looked watery after adding the milk—did I mess it up?
No. It’s expected to look loose when the milk goes in. The filling thickens after you beat in the instant pudding mix.
How do I know it’s set enough to slice?
The top should look firm and the filling shouldn’t ripple when you gently tap the dish. If it still feels soft, chill longer.
Do I have to do two layers?
The two-layer build gives better strawberry distribution, but you can keep it simple and do one layer of filling with strawberries on top—same ingredients, same chill time.
Final Tip
When you spread each filling layer, take an extra 20 seconds to smooth it all the way to the edge—those clean edges help the strawberries sit evenly, and you’ll get more consistent slices once it’s chilled.
Conclusion
If you want a dependable reference point for this exact style of dessert, compare notes with the No Bake Sugar Free Strawberry Cheesecake Recipe – Allrecipes; for a slightly different no-bake approach, it’s useful to look at a Sugar Free Cheesecake Recipe (Low Carb, No Bake); and if you’re curious how strawberry cheesecake looks in a keto-style format, see Keto Strawberry Cheesecake – Wholesome Yum.
No-Bake Strawberry Cheesecake
Ingredients
Method
- In a bowl, mix the graham cracker crumbs with the melted butter, cinnamon, and nutmeg until the crumbs look evenly moistened.
- Press the crumb mixture firmly into an 8-inch pie dish, refrigerate while preparing the filling.
- In a mixing bowl, beat the softened cream cheese until smooth.
- Gradually beat in the milk until fully incorporated.
- Beat in the sugar-free pudding mix until the filling thickens and holds soft peaks.
- Spoon half of the filling into the chilled crust and layer with half of the sliced strawberries.
- Add the remaining filling and top with the remaining strawberries.
- Refrigerate for at least 1 hour until set.