Some days you just want a warm slice of bread-like comfort without pulling out a whole pantry of flours and add-ins. This yogurt bread is what I make when I need something simple, savory-leaning, and dependable—especially when I’m low on ingredients but still want a sliceable loaf.
It’s a short list recipe with real payoff: a tender, eggy crumb, a lightly tangy yogurt aroma, and a golden top that makes it feel “baked” in a satisfying way. It also keeps cleanup minimal—one bowl, one whisk, one loaf pan. If you like having quick staples on hand, this fits nicely alongside my classic zero carb yogurt bread for everyday slicing.
Why This Recipe Works
- Greek yogurt does the heavy lifting. It brings tang, moisture, and structure without needing flour or extra fats.
- Eggs set into a sliceable loaf. With two large eggs, you get a firm, cohesive bake that still stays tender.
- Baking powder gives lift fast. Just 1/2 teaspoon is enough to aerate the batter and keep the loaf from baking up dense.
- Salt matters here. With such a short ingredient list, 1/2 teaspoon salt is what keeps it from tasting flat or overly “eggy.”
- One-bowl mixing means quick start to finish. Whisk, pour, bake—no stand mixer, no resting time, no shaping.
- The loaf pan makes it practical. It bakes evenly and slices cleanly once fully cooled, which makes it easy to portion.
Quick Kitchen Note
I rely on this recipe when I want something warm and homemade but don’t want a long project—especially when I’m already prepping other basics like Greek yogurt blueberry muffins and I’ve got yogurt out on the counter.
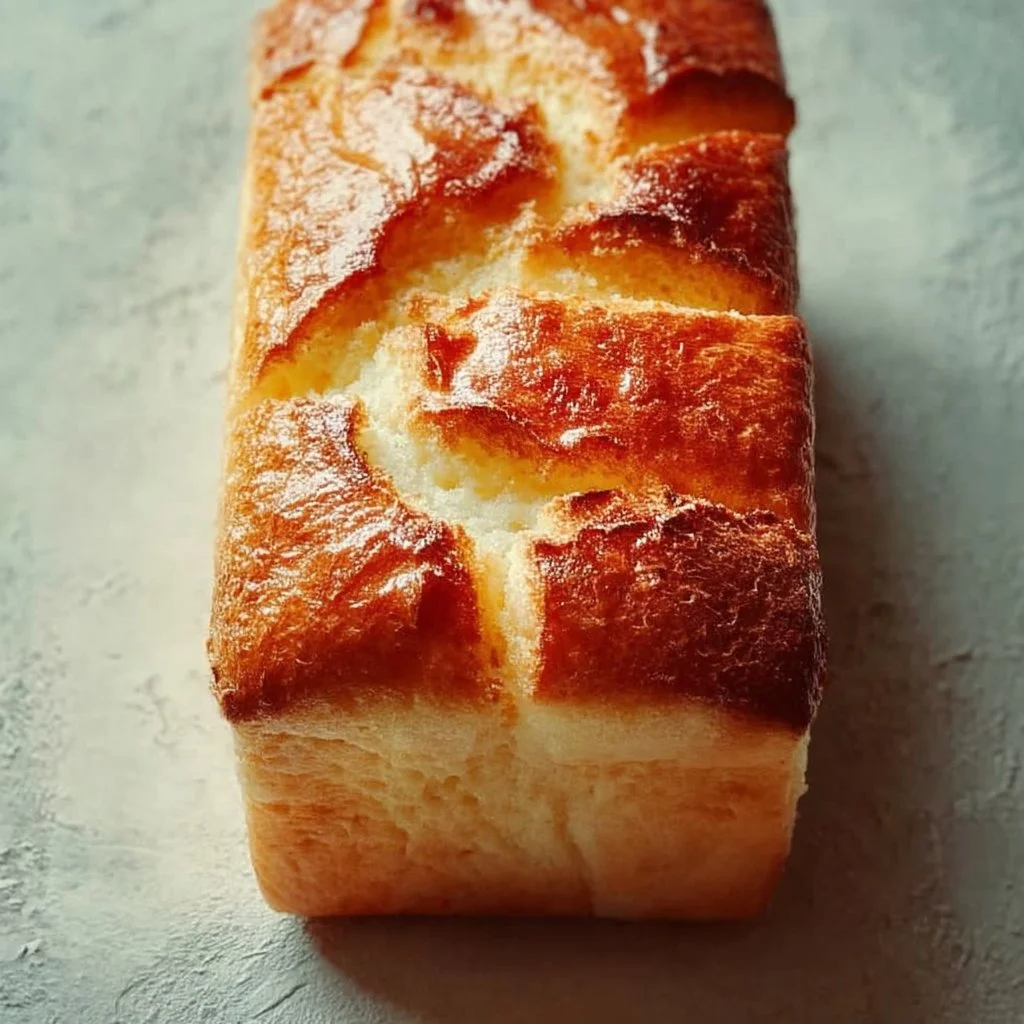
What It Tastes Like
This bread is gently tangy from the Greek yogurt with a savory, lightly salted finish. The texture is set and sliceable—more like a soft, egg-forward quick bread than a chewy, yeast-raised loaf—with a lightly golden top and a clean, simple aroma as it bakes (think warm yogurt and baked egg custard, but in “bread” form).
Ingredients
With only four ingredients, each one has a job: Greek yogurt provides moisture and tang, eggs give the loaf its structure, baking powder adds lift, and salt sharpens the overall flavor. For best results, use a thick Greek yogurt (thin yogurt can make the batter looser and the loaf more delicate).
- 1 cup Greek yogurt
- 2 large eggs
- 1/2 teaspoon baking powder
- 1/2 teaspoon salt

Step-by-Step Instructions
-
Heat the oven and prep the pan.
Preheat your oven to 350°F (180°C). Grease a loaf pan very well. This batter likes to cling, so take a minute to coat the bottom and corners thoroughly. -
Whisk the batter until smooth.
In a mixing bowl, whisk together the Greek yogurt, eggs, baking powder, and salt. Keep whisking until the mixture looks uniform and glossy, with no streaks of egg white or pockets of baking powder. The batter will be thick but pourable. -
Fill the loaf pan.
Pour the batter into the prepared pan, then spread it out evenly so the top is level. An even layer helps it bake and brown consistently. -
Bake until golden and set.
Bake for 25–30 minutes. You’re looking for a golden top and a loaf that looks set through the center. A toothpick inserted in the middle should come out clean (not wet batter). -
Cool properly before slicing.
Let the loaf cool slightly in the pan, then transfer it to a wire rack to cool completely before slicing. This is where the texture finishes setting—slicing too early can make it feel gummy or fragile.
Common Mistakes to Avoid
- Under-greasing the loaf pan. It matters because this batter can stick hard; fix it by greasing the bottom and corners thoroughly before you pour.
- Stopping the whisking too soon. Streaks of egg or uneven baking powder lead to uneven texture; whisk until the batter is completely smooth and consistent.
- Pulling it before the center is set. A pale top or wet toothpick means the middle will collapse as it cools; bake until golden and the toothpick comes out clean.
- Slicing while warm. The loaf needs time to firm up; cool completely on a rack for cleaner slices.
- Overbaking past the doneness cues. If it’s deeply browned and feels very firm, it can eat drier; start checking at 25 minutes and use the toothpick test.
Variations and Swaps
This is a very tight recipe, so keep changes small and realistic:
- Change the loaf shape, not the formula. You can bake it in a different oven-safe shape if you prefer, but expect the bake time to change—use the same golden-top and clean-toothpick cues.
- Adjust salt to your preference. If you know you’re sensitive to salt, reduce slightly; if you’re serving it with mild toppings, keeping the full amount helps the flavor land.
- For a slightly lighter crumb: Whisk very thoroughly to incorporate air before pouring—this helps the baking powder do its job without adding anything new.
If you’re comparing textures, my bakery-style yogurt bread leans more “loaf-like” in presentation, while this version is as streamlined as it gets.
Serving Suggestions
This bread is mild and savory, so it works best with simple pairings:
- Slice and serve alongside a bowl-style lunch (think soup or a salad) as your quick “bread” component.
- Toast or warm slices gently, then top with something salty or creamy (it’s a nice contrast to the slight yogurt tang).
- Use it as a base for an easy breakfast plate—slices on the side with eggs is a natural fit.
If you’re already baking with Greek yogurt, it also pairs nicely on a weekend spread with a small sweet bite like easy zero sugar Greek yogurt brownies for contrast.
Storage and Meal Prep
- Cool completely before storing. Trapping steam will soften the exterior and can make slices stick together.
- Refrigerator: Store sliced or whole loaf in a sealed container in the fridge so it stays firm and cleanly sliceable.
- Meal prep: Slice once fully cooled so you can grab portions quickly. If slices feel delicate, chill the loaf first, then slice.
- Reheating: Warm briefly to take the chill off and improve texture; avoid overheating, which can make it feel rubbery.

FAQs
Why is my loaf sticking to the pan?
Most often it’s not enough grease, especially in the corners. Grease the pan thoroughly before adding the batter.
Can I mix this by hand without a mixer?
Yes—this recipe is designed for a whisk. Just whisk until the batter is smooth and uniform.
How do I know it’s fully baked?
The top should be golden, the center should look set, and a toothpick inserted in the middle should come out clean.
Why does it seem gummy when I slice it?
It usually needs more cooling time. Let it cool completely on a wire rack so it can finish setting before slicing.
Final Tip
Treat the cooling step as part of the bake: once the loaf is out of the pan and on a rack, the texture tightens up and slices much more neatly. If you want especially clean slices, chill it first—then cut.
Conclusion
If you want to explore similar styles and textures, it’s useful to compare this loaf to a zero carb yogurt bread overview, a more classic low carb keto bread approach, or an airier, egg-forward cloud bread variation with Greek yogurt—they each handle structure a little differently, which helps you dial in the style you like.
Greek Yogurt Bread
Ingredients
Method
- Preheat your oven to 350°F (180°C). Grease a loaf pan very well.
- In a mixing bowl, whisk together the Greek yogurt, eggs, baking powder, and salt until the mixture is uniform and glossy.
- Pour the batter into the prepared pan and spread it evenly.
- Bake for 25–30 minutes until the top is golden and a toothpick inserted in the center comes out clean.
- Let the loaf cool slightly in the pan, then transfer it to a wire rack to cool completely before slicing.