
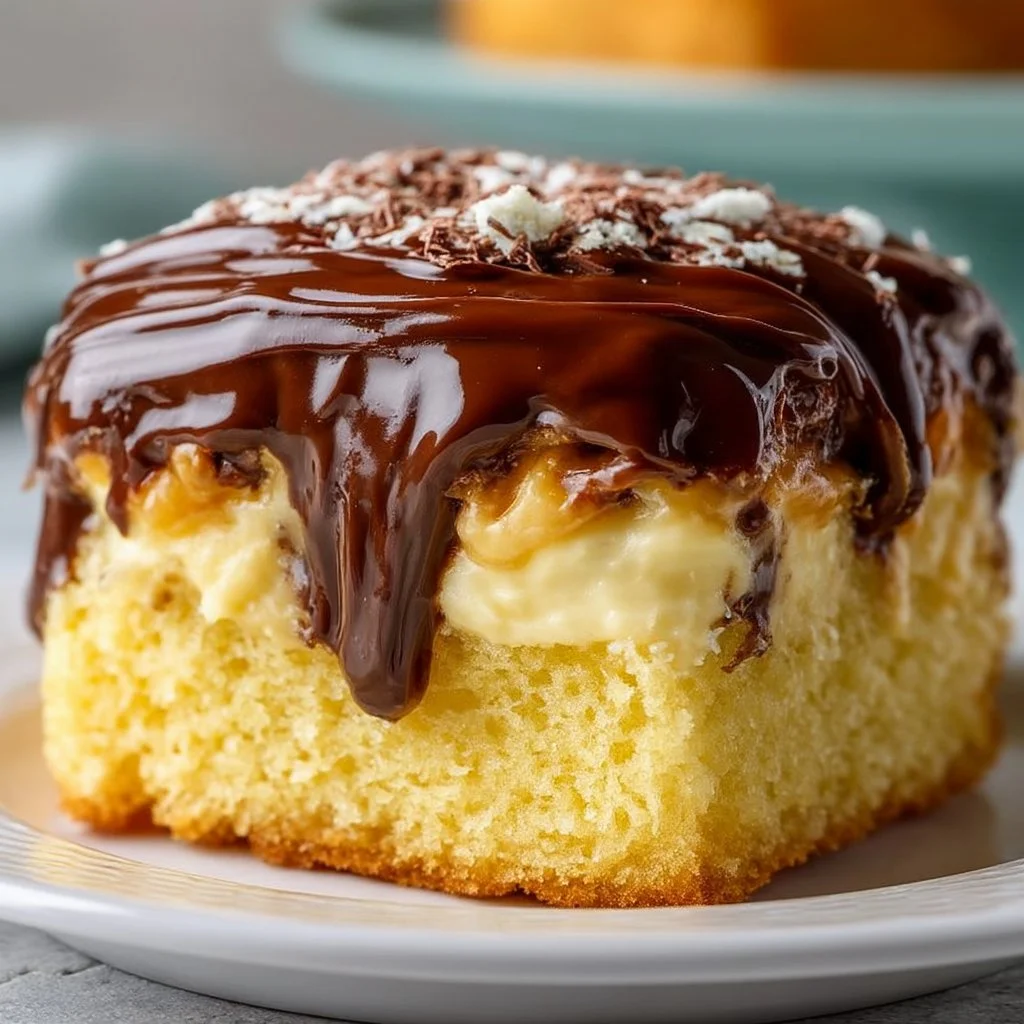
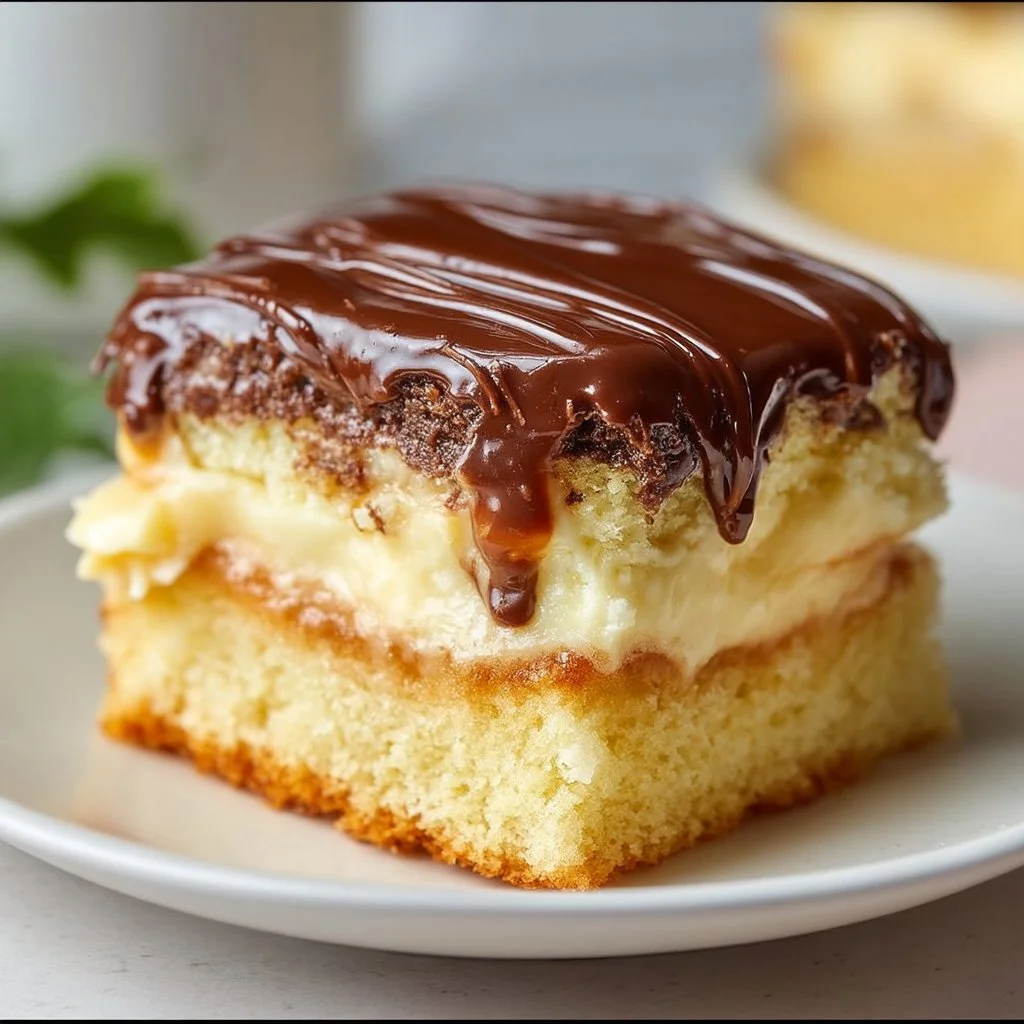
When I need a dessert that’s low-effort but still feels like a finished, “real” cake, I reach for a poke cake. You bake once, pour in something creamy, chill, and suddenly the texture does half the work for you. This sugar-free Boston cream version is especially useful when you want a make-ahead treat that slices cleanly and doesn’t require decorating skills.
This one leans practical: a sugar-free vanilla cake gets soaked with a dairy-free coconut custard (made from pudding mix + full-fat coconut milk), then finished with a quick chocolate-coconut ganache. The result is soft cake with pockets of cool vanilla custard and a thin, glossy chocolate layer on top. If you’ve made my sugar-free cream cheese pound cake for an easy dessert baseline, this is the chilled, layered cousin—same straightforward approach, just more contrast in texture.
Why This Recipe Works
- The poke method guarantees moisture. The custard doesn’t just sit on top; it fills the holes and keeps the cake tender after chilling.
- Full-fat coconut milk makes the custard set up thick. It gives the pudding mix enough richness to feel like classic pastry cream—without dairy.
- Two chill stages keep the layers distinct. A short chill sets the custard before you add the warm chocolate topping, so you don’t melt or smear the filling.
- The topping is fast and tidy. Heating coconut cream and melting chocolate into it creates a smooth, spreadable layer—no frosting bowls, no mixer.
- It’s genuinely make-ahead friendly. Once chilled, it slices neatly and holds up well in the fridge for planned servings.
Quick Kitchen Note
I like desserts like this when I want something that can sit in the fridge until I’m ready—because the chilling is part of the recipe, not an afterthought. It’s the same reason I keep no-bake options like my no-bake sugar-free lemon pie with coconut cream in rotation: minimal last-minute work, consistent results.
What It Tastes Like
Think vanilla cake with a cool, creamy vanilla center and a light snap of dark chocolate on top. The coconut milk and coconut cream add a subtle coconut aroma (not overpowering), and the chocolate layer finishes slightly bittersweet, which keeps the whole slice from tasting flat.
Ingredients
This recipe stays tight: vanilla cake for structure, coconut milk + sugar-free pudding mix for a thick dairy-free custard, and dark chocolate + coconut cream for a simple ganache-style topping. If you want the thickest, cleanest-set custard, use full-fat coconut milk as listed—thin coconut milk can leave the filling looser.
- 1 sugar-free vanilla cake (homemade or mix)
- 400 ml coconut milk (use full-fat for thickness)
- 1 sugar-free vanilla pudding mix
- 120 g dairy-free dark chocolate
- 100 ml coconut cream
Step-by-Step Instructions
-
Bake the cake and cool it slightly.
Bake your sugar-free vanilla cake (homemade or mix) according to the recipe/package directions. Once baked, let it cool until it’s still a little warm but no longer hot. You want the cake set and stable, but not so cold that the custard struggles to sink in. -
Poke holes evenly across the surface.
Use the handle of a wooden spoon or a similar blunt tool to poke holes all over the top of the cake. Aim for an even grid so each slice gets custard. Push down deep enough to create channels for the filling, but don’t tear the cake into ragged craters—clean holes help the custard settle in neatly. -
Mix the coconut custard and fill the holes.
Prepare the sugar-free vanilla pudding mix using the 400 ml full-fat coconut milk. Stir until smooth and thickened (it should look like pudding, not like milk). While it’s still pourable, pour the custard over the cake, letting it run into the holes. If it pools on top, give it a minute—then gently spread it so it can find the holes rather than sitting in one spot. -
Chill for 1 hour to set the filling.
Refrigerate the cake for 1 hour. This step matters: it firms the custard inside the cake so the topping goes on cleanly instead of mixing into the filling. -
Make the chocolate topping.
Heat the coconut cream, then add the dairy-free dark chocolate and melt it into the warm cream. Stir until the mixture looks glossy and uniform, with no streaks. You’re looking for a smooth, spreadable chocolate layer—not grainy and not separated. -
Spread the topping over the chilled cake.
Pour or spoon the chocolate topping onto the cake and spread it evenly across the surface. Work steadily; the topping will thicken as it cools. -
Chill for 2 hours before serving.
Refrigerate the finished cake for 2 hours. The topping should set into a neat sliceable layer, and the custard will finish firming inside the cake. For the cleanest pieces, slice once fully chilled.
Common Mistakes to Avoid
- Poking too few holes (or poking them unevenly). You’ll end up with slices that are dry in some areas and overly soft in others. Fix: poke a consistent pattern across the entire cake.
- Using coconut milk that’s too thin. The custard can set loose and seep rather than staying in pockets. Fix: stick with full-fat coconut milk as written.
- Skipping the first chill. Warm custard + warm-ish cake can blur into a messy top layer when you add chocolate. Fix: chill the custard-filled cake for the full 1 hour.
- Overheating the coconut cream for the topping. If it’s scorching hot, chocolate can melt too aggressively and turn the topping greasy. Fix: warm the cream just enough to melt the chocolate smoothly, then stir until glossy.
Variations and Swaps
- Cake base: Homemade or mix both work here; the main goal is a baked sugar-free vanilla cake with a fairly even crumb so the holes don’t collapse.
- Chocolate intensity: Use a darker dairy-free chocolate if you want a more pronounced bittersweet finish; use a milder dark chocolate for a softer contrast.
- Thicker topping: If you prefer a slightly thicker chocolate layer, spread it carefully edge-to-edge once it’s melted and glossy (it will continue to set as it chills).
If you like desserts that rely on simple structure and chill time (rather than frosting work), my 3-ingredient creamy yogurt cake is another good low-maintenance option for a clean slice.
Serving Suggestions
Serve this straight from the fridge so the custard stays set and the chocolate layer stays neat. For the cleanest look, wipe your knife between cuts. If you’re building a dessert spread, pair it with something small and simple like my sugar-free oatmeal cookies with peanut butter so you have both creamy and chewy options.
Storage and Meal Prep
- Refrigerator: Store the cake covered in the fridge. Because this is a custard-filled cake, keeping it chilled is part of maintaining the texture.
- Make-ahead: This is a strong make-ahead dessert. You can bake, fill, and top it, then let it chill until you’re ready to slice.
- Serving timing: For the sharpest layers and cleanest slices, serve cold. If it sits out too long, the custard softens and the chocolate layer loses its crisp set.

FAQs
Can I make this the day before?
Yes—this recipe is designed to chill and set. It’s often easier to slice once it’s fully cold.
My custard looks thin—what happened?
Thin custard is usually from using coconut milk that isn’t full-fat. Use full-fat coconut milk for a thicker set.
Do I have to chill for both times?
The 1-hour chill helps the custard set before topping, and the 2-hour chill sets the chocolate layer and firms everything for slicing. If you rush, the layers can smear.
Why did my topping look dull instead of glossy?
The chocolate and coconut cream may not have fully emulsified. Warm gently and stir until the mixture is completely smooth and uniform before spreading.
Final Tip
When you spread the custard, give it a minute to sink into the holes before smoothing what’s left on top—this small pause helps keep the filling where it belongs: inside the cake, not as a thick layer that can slide under the chocolate.
Conclusion
If you want to compare approaches, it’s useful to look at a classic-style Boston Cream Poke Cake Recipe alongside lower-sugar adaptations like Keto Boston Cream Poke Cake and Keto Boston Cream Poke Cake—then come back to this coconut-custard version when you want a dairy-free filling with the same chilled, sliceable payoff.
Sugar-Free Boston Cream Poke Cake
Ingredients
Method
- Bake your sugar-free vanilla cake according to the recipe/package directions. Once baked, let it cool until it’s still a little warm but no longer hot.
- Use the handle of a wooden spoon to poke holes evenly across the surface of the cake.
- Prepare the sugar-free vanilla pudding mix using the full-fat coconut milk. Stir until smooth and thick.
- Pour the custard over the cake, letting it run into the holes.
- Refrigerate the cake for 1 hour to set the filling.
- Heat the coconut cream and add the dark chocolate, stirring until melted and uniform.
- Pour the chocolate topping onto the cake and spread it evenly across the surface.
- Refrigerate for 2 hours before serving.


