

What Makes This Recipe Reliable
I built these Sugar Free Chocolate Muffins to behave like a classic bakery batch, just without the added sugar. The wet to dry ratio has been tested so the cocoa stays moist and tender, not chalky or crumbly, even though we use a granulated sugar alternative. Yogurt and a touch of milk add both fat and acidity, which react with the baking soda and help the muffins rise with a high dome and a soft, even crumb. You get the familiar look and texture of bakery style chocolate muffins, so they feel like a treat and not a compromise.
This batter also gives you clear, forgiving structure, which makes it easy to swap ingredients without wrecking the final result. You can trade the all purpose flour for a gluten free blend or a low carb option because the yogurt, oil, and cocoa help keep things moist and stable. Using a baking temperature of 375°F lets the tops set quickly for those rounded, slightly cracked muffin crowns while the centers stay soft. If you have made my lower sugar banana muffins or healthy breakfast brownies, you will notice the same balance of tenderness and structure here.
I also favor specific, everyday ingredients you probably already have, which cuts down on surprises. A standard granulated sweetener like Splenda measures close to sugar, so you do not have to rethink the entire recipe just to go sugar free. Vanilla bean paste boosts chocolate flavor so the muffins taste rich and full, rather than flat as some sugar free bakes can. I include visual cues in the full recipe, like noting that the batter will be thick but scoopable, so you know you are on the right track even if you are new to sugar free baking.
The Method (Step by Step)
Start by preheating your oven to 375°F so the temperature is stable when your Sugar Free Chocolate Muffins go in. Prep a 12 cup muffin pan with liners or a light spray of oil, making sure to reach the corners so the low sugar batter does not stick. In a medium bowl whisk together the flour and baking soda until you see no streaks of leavening. Whisk or sift in the cocoa powder so it blends fully with the flour. You want a uniform, dark cocoa color with no pale patches. Set this dry mixture aside for a moment while you build flavor in the wet bowl.
In a large bowl beat the granular sweetener with the vegetable oil until it looks a bit creamy and sandy. This extra minute of mixing helps the sweetener dissolve, which matters in Sugar Free Chocolate Muffins because you do not have real sugar to melt and smooth things out. Stir in the yogurt, milk, egg, and vanilla bean paste until the mixture looks glossy and consistent, with no streaks of egg. Gently add the dry ingredients to the wet in two or three additions, folding with a spatula or spoon. Stop mixing as soon as no dry flour is visible, or the muffins can turn dense and tough.
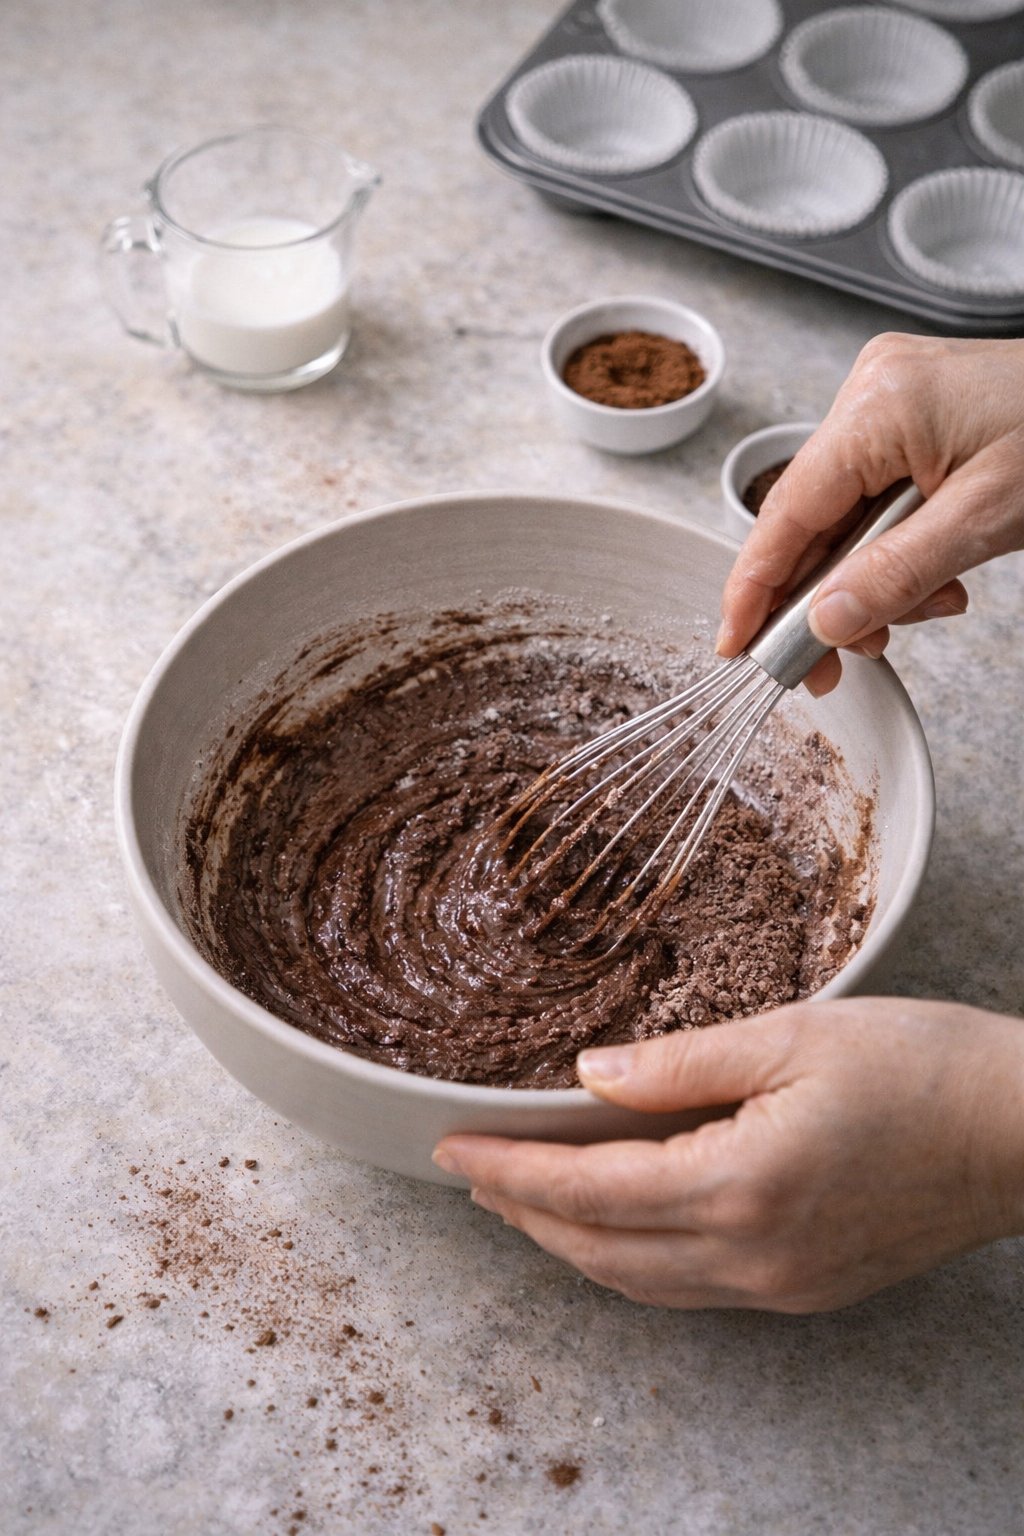
Process Image of Sugar Free Chocolate Muffins
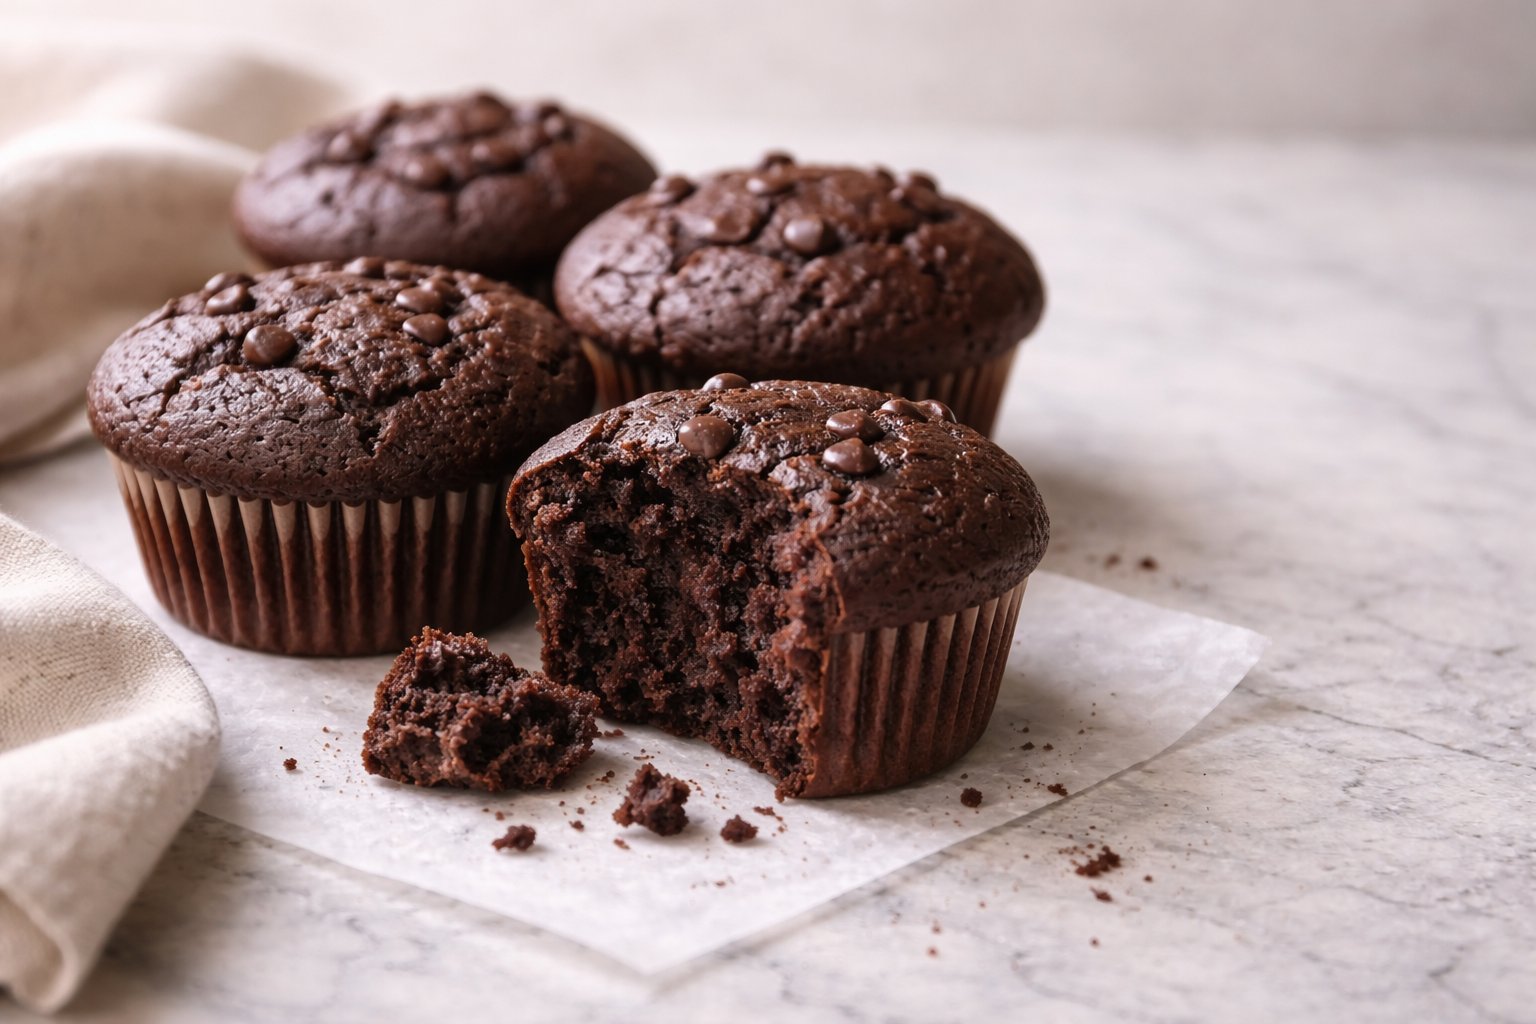
Use a scoop or spoon to portion the batter evenly into the muffin cups, filling each about two thirds to three quarters full so they have room to rise with nice rounded tops. If the batter sits for more than a few minutes, give it one gentle fold at the bottom of the bowl before finishing. Bake on the center rack until the muffin tops look set with slightly darker, firm edges, and a toothpick comes out with a few moist crumbs, about 18 to 22 minutes depending on your oven. Let the Sugar Free Chocolate Muffins cool in the pan for 5 minutes, then transfer them to a rack so the bottoms do not steam and turn soggy. If they seem a touch soft when you pull them from the oven, remember they continue to set as they cool, so resist the urge to overbake.
Keep It Fresh: Timing and Storage
Sugar Free Chocolate Muffins taste best within the first 24 hours, when the tops are set and the centers stay soft and tender. Let them cool completely in the pan for about 5 to 10 minutes, then move them to a wire rack so the bottoms do not steam and turn soggy. For the best texture, keep them at room temperature and enjoy them within 3 days. If your kitchen runs warm, keep the container in a cooler part of the room, away from direct sun or the stove. These muffins already stay nicely moist from the yogurt and oil, so you do not need to wrap them individually unless you plan to freeze them.
Once cooled, store your Sugar Free Chocolate Muffins in an airtight container lined with a paper towel, then place another paper towel on top before sealing the lid. This helps absorb any extra moisture from the sweetener and cocoa so the muffin tops do not get sticky. Keep them at room temperature for 2 to 3 days, or refrigerate for up to 5 days if you like a slightly firmer crumb. To freeze, wrap each muffin in plastic or parchment, place them in a freezer bag, and freeze for up to 2 months. Reheat frozen muffins in a 300 degree oven for 8 to 10 minutes, or microwave one muffin at a time for 15 to 20 seconds, just until warm and fragrant, so they taste freshly baked again.
Swaps, Variations, and Serving Ideas
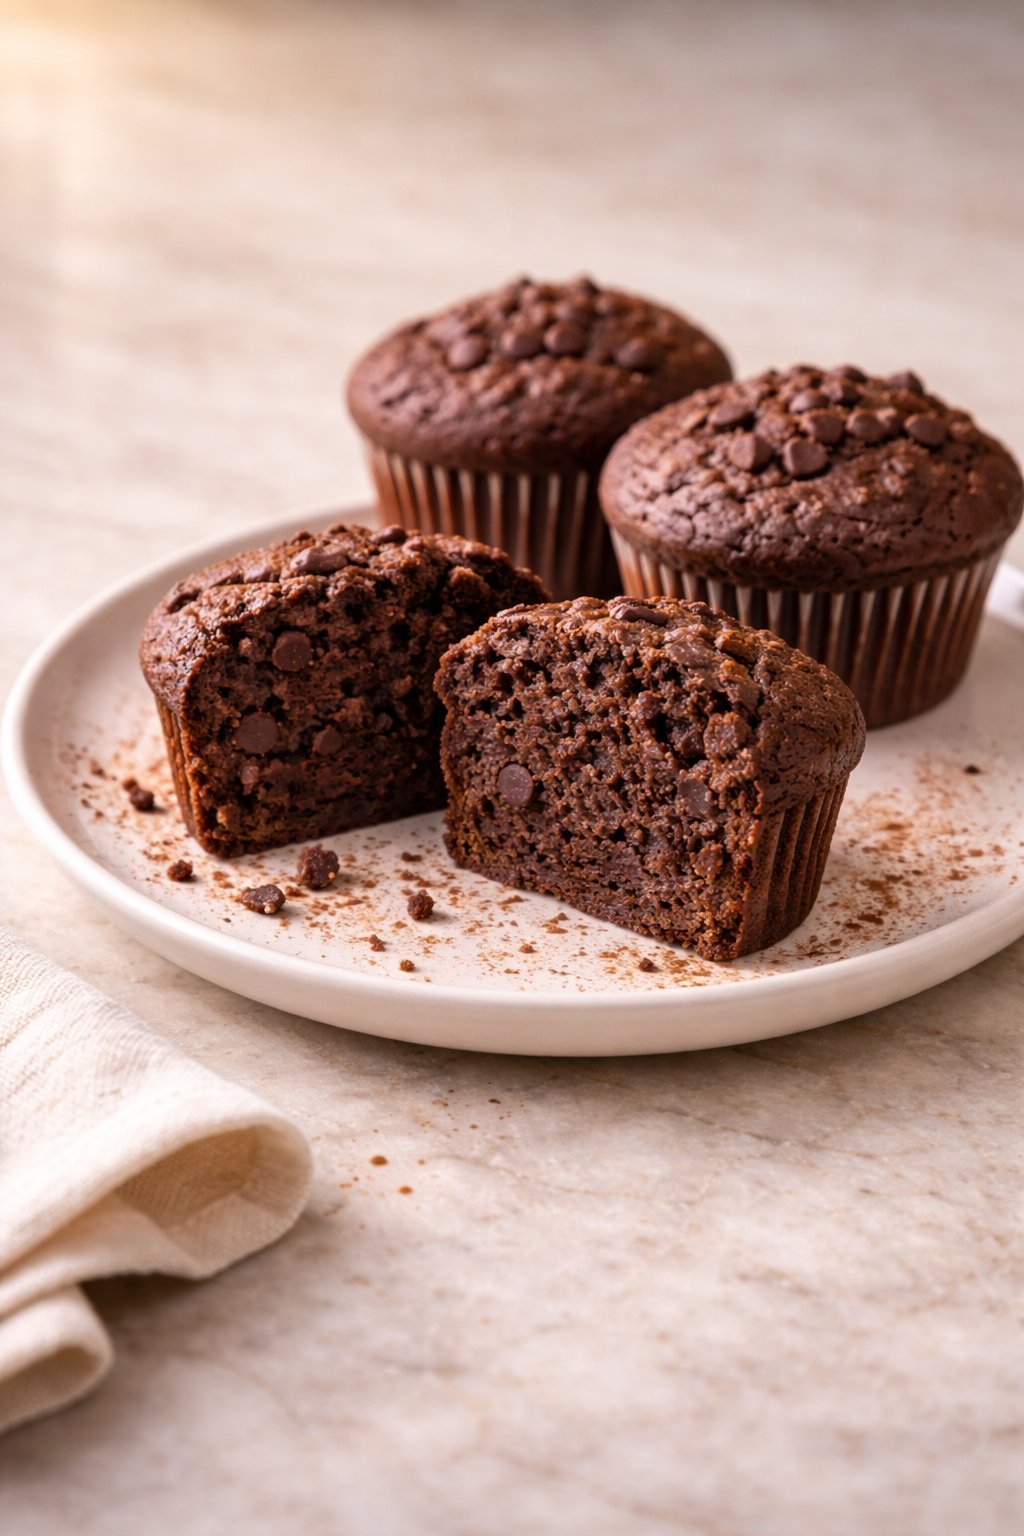
Serving Image of Sugar Free Chocolate Muffins
You can take these Sugar Free Chocolate Muffins in a lot of directions without losing the soft crumb or chocolate flavor. For the flour, use a 1 to 1 gluten free blend, or try half all purpose flour and half almond flour for a slightly denser, lower carb version. If you avoid Splenda, swap in another granulated sweetener that measures like sugar, such as monk fruit blend or erythritol, and taste the batter so you can adjust sweetness. For the yogurt, use Greek yogurt for extra protein, regular yogurt for a lighter crumb, or dairy free yogurt if you need to keep things lactose free. Stir in a handful of sugar free chocolate chips, chopped walnuts, or shredded coconut to give your muffins more texture and richness.
For flavor variations, add ½ teaspoon of espresso powder to deepen the cocoa, or ½ teaspoon of peppermint extract for a simple holiday style twist. Fold in orange zest for bright, bakery style Sugar Free Chocolate Muffins that pair well with brunch recipes like egg muffins or savory frittata. If you like extra chocolate, drizzle melted sugar free chocolate over cooled muffins or top the batter with a few chips before baking so you get glossy bits on top. To serve, enjoy them warm with a spoonful of Greek yogurt and berries for breakfast, or split and toast leftovers, then spread with nut butter for a more filling snack. These also freeze well, so you can keep a stash ready for quick, portion controlled treats that still feel like they came from a bakery case.
Conclusion
Baking a batch of warm muffins has a way of slowing everyone down for a moment, and these Sugar Free Chocolate Muffins do exactly that. I love how a simple tray of chocolatey goodness can bring people into the kitchen, spark conversation, and turn an ordinary day into something just a little more special. They are the kind of treat you feel good about sharing with family, friends, or coworkers, because they balance comfort with a lighter, everyday feel.
If you have been waiting for a sign to preheat your oven, consider this it. Pull out your mixing bowl, follow the steps, and see how easily these come together. You might be surprised how quickly they become a regular in your rotation, whether for weekend baking, meal prep, or a last minute treat.
When you make them, I would love for you to trust your senses, have fun with small tweaks, and enjoy the process as much as the first bite.
For more delicious recipes like this, follow us on Facebook and Pinterest!
Recipe
Sugar Free Chocolate Muffins
Ingredients
Method
- Preheat the oven to 375°F. Lightly grease a 12 cup muffin pan with nonstick spray or line with paper liners.
- In a medium bowl whisk together the flour and baking soda until well combined. Whisk in the cocoa powder until the mixture is an even dark color with no streaks.
- In a large bowl beat the Splenda and vegetable oil together until the mixture looks slightly creamy and sandy.
- Add the yogurt, milk, egg, and vanilla bean paste to the sweetener mixture and whisk until smooth and glossy with no visible streaks of egg.
- Add the dry ingredients to the wet ingredients in 2 to 3 additions, gently folding with a spatula just until no dry flour remains. Do not overmix.
- Divide the batter evenly among the 12 muffin cups, filling each about two thirds to three quarters full.
- Bake on the center rack for 18 to 22 minutes, until the tops are set with slightly darker edges and a toothpick inserted in the center comes out with a few moist crumbs.
- Cool the muffins in the pan for 5 minutes, then transfer them to a wire rack to cool completely before serving.
Notes
- For a lower carb option, use a finely milled low carb baking blend in place of the flour, and ensure your sweetener is low carb.
- The batter will be thick but scoopable; if it seems very stiff, add 1 to 2 teaspoons of milk and fold gently.
- Store cooled muffins in an airtight container at room temperature for up to 2 days or refrigerate for up to 5 days.


