
The Practical Why Behind It
A Sugar Free Graham Cracker Crust gives you a dependable, crisp base for pies and cheesecakes without the sugar crash. You get the same toasty, buttery flavor you expect from a classic graham crust, but with better control over carbs and sweetness.
By using Catalina Crunch Honey Graham cereal instead of traditional graham crackers, you keep that familiar graham flavor while cutting back on added sugar. This makes it a smart option for diabetic friendly desserts and anyone watching sugar without wanting a “diet” taste. The crust bakes up sturdy enough for chilled cheesecakes, cream pies, and freezer pies, and it does not turn soggy under most fillings. You can also fine tune the sweetness by adjusting the Splenda instead of being stuck with whatever is in a store bought crust.
A short bake time of about 10 minutes sets the butter and cereal crumbs so the crust slices cleanly once cooled. The oven time dries the crumbs just enough to keep the crust from crumbling under moist fillings. You get a crisp edge, a tender center, and a base that releases neatly from the pie plate instead of sticking. It also holds well, so you can bake the crust in the morning, cool it, and fill it later in the day. Once you have this basic Sugar Free Graham Cracker Crust down, you can use it under no bake cheesecake, chocolate silk filling, or any number of sugar free desserts without reworking the crust every time.
Step-by-Step Method
Start by heating your oven to 350 °F (175 °C) so it is ready as soon as your Sugar Free Graham Cracker Crust is pressed into the pie plate. Add the Catalina Crunch Honey Graham cereal to a food processor or blender and pulse in short bursts until you have fine, sand like crumbs with just a few slightly larger bits for texture. Pour the crumbs into a medium mixing bowl, then whisk in the Splenda granulated sweetener so it distributes evenly and you do not end up with overly sweet pockets in the baked crust.
Drizzle the melted butter over the crumb mixture and use a spatula or spoon to stir from the bottom of the bowl up, pressing gently as you go. The mixture should look evenly moistened and hold together when you pinch it between your fingers, similar to damp sand for a sandcastle. If it feels dry and crumbly, add a teaspoon or two more melted butter. Transfer the crumbs to your pie plate, then use your fingers or the flat bottom of a measuring cup to press the crumbs firmly across the bottom and up the sides. Pay extra attention to the edges so they are not too thin, since those areas brown and crumble first.

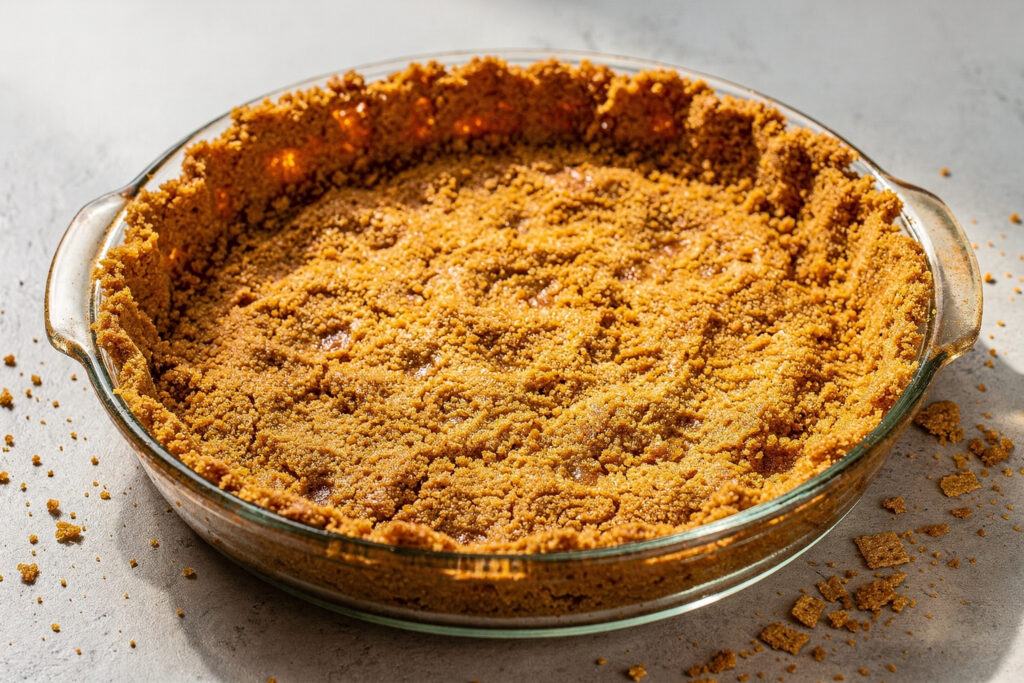
Process Image of Sugar Free Graham Cracker Crust
Bake the Sugar Free Graham Cracker Crust for about 10 minutes, just until it smells toasty and the edges look slightly deeper golden. Rotate the pan once if your oven has hot spots. Place the crust on a cooling rack and let it cool completely before adding any filling, especially if you are using a no bake filling like sugar free cheesecake or chocolate cream pie. A fully cooled crust stays crisp and gives you neat, clean slices.
Make-Ahead and Storage Notes
You can absolutely make this Sugar Free Graham Cracker Crust ahead of time, which makes dessert nights much easier. For a simple make ahead plan, bake the crust as directed, let it cool completely, then cover the pie plate tightly with plastic wrap followed by a layer of foil. Store it at room temperature for up to 2 days if your kitchen is cool and dry, or in the refrigerator for up to 4 days. If the crust softens a little in the fridge, place it in a 300 °F oven for 5 to 7 minutes, then cool again before filling to refresh the texture.
For longer storage, you can freeze this Sugar Free Graham Cracker Crust, baked or unbaked. To freeze unbaked, press the crumb mixture into your pie plate, wrap well in plastic, then foil, and freeze for up to 2 months. Bake from frozen at 350 °F, adding 2 to 4 extra minutes, and cool fully before adding your filling. To freeze a baked crust, cool it completely first, wrap tightly the same way, and freeze for up to 2 months. Thaw in the refrigerator or at room temperature before you fill it. Avoid storing the crust with a very wet or custard style filling for more than 24 hours, since the crumb base will gradually soften and lose that pleasant crisp edge you want in a sugar free crumb crust.
Variations and How to Serve It

Serving Image of Sugar Free Graham Cracker Crust
You can easily adapt this Sugar Free Graham Cracker Crust to fit what you have on hand. For a warmer flavor, swap half of the Catalina Crunch Honey Graham with their cinnamon cereal and add a pinch of ground cinnamon to the crumbs. If you like a firmer, more cookie like texture, bake the crust for 2 to 3 extra minutes, watching closely for deep golden edges so it does not burn. For a nutty version, stir in 2 to 3 tablespoons of very finely chopped pecans or almonds with the crumbs, or replace a couple of tablespoons of cereal with almond flour for a slightly richer, more tender crust. To keep the crust completely sugar free, stick with non sugar sweeteners such as Splenda, erythritol, or a monk fruit blend, and taste the crumb mixture before you press it into the pan so you can adjust the sweetness.
This crust works best with smooth, creamy fillings that set in the fridge, such as sugar free chocolate silk pie, peanut butter pie, or a no bake cheesecake filling. Cool the crust completely, then chill it for an extra 15 minutes to help it stay crisp before adding anything loose, like a lemon or key lime custard. For freezer pies, fill the cooled crust, set it on a small baking sheet, and freeze until firm so the slices cut cleanly. You can also press this crust into the bottom of an 8 by 8 square pan for bar desserts, such as a layered cheesecake bar or a sugar free chocolate pudding layer bar. If you make a lighter dessert like a yogurt or whipped cream pie, pile fresh berries on top right before serving to balance the richness of the crust and keep the overall flavor bright and fresh.
Conclusion
Every time I pull this crust from the oven, I am reminded how a small, simple recipe can make dessert feel special without a lot of work. Whether you are layering it with a silky cheesecake filling, a bright citrus custard, or a no bake mousse, you are setting the stage for people to gather and linger a little longer around the table. A homemade Sugar Free Graham Cracker Crust feels thoughtful, but it still fits into real life, even on a busy weeknight.
I hope you feel ready to try this and make it your own. Invite your kids to help press the crumbs into the pan, surprise a friend with a slice of pie, or build a dessert bar for your next family night. The crust is simple, forgiving, and a reliable base recipe you can return to again and again.
If you do make it, take a picture, share your spin, and let me know how it went. I love seeing what you create and how you serve the people you care about.
Recipe

Sugar Free Graham Cracker Crust
Ingredients
Method
- Preheat the oven to 350 °F.
- Add the Catalina Crunch Honey Graham cereal to a food processor or blender.
- Pulse until the cereal forms fine crumbs with a few slightly larger pieces.
- Transfer the crumbs to a medium mixing bowl.
- Add the Splenda granulated sweetener and stir until evenly combined.
- Pour the melted butter over the crumb mixture.
- Stir until all crumbs are evenly moistened and the mixture holds together when pinched.
- Pour the mixture into a standard 9 inch pie plate.
- Press the crumbs firmly and evenly over the bottom and up the sides of the pie plate.
- Place the pie plate on the center rack of the oven.
- Bake for 10 minutes, or until the crust is fragrant and lightly golden at the edges.
- Remove from the oven and place on a cooling rack.
- Let the crust cool completely before adding any filling.
Notes
- You can make the crust ahead, cool it completely, then cover and store at room temperature for up to 2 days or refrigerate for up to 4 days.
- If the mixture seems too dry to hold together, add 1 to 2 teaspoons more melted butter and stir again.
- This crust works well for no bake cheesecakes, cream pies, and other sugar free chilled pie fillings.


