

The Practical Why Behind It
I like these 3-Ingredient Peanut Butter Cookies because they solve several everyday problems at once: time, budget, and pantry fatigue. With only natural peanut butter, an egg, and a little flour, you can make a real dessert without pulling out a mixer, chilling dough, or managing multiple bowls. Everything happens in one bowl, in about 10 minutes of hands-on time, and you’re in the safe zone even if you’re not a confident baker—no creaming butter, no worrying about overmixing sugar, and no complex ingredient list.
From a texture and structure standpoint, this recipe stays simple but smart. Natural peanut butter brings both fat and flavor, so you don’t need extra butter or oil, and the egg gives just enough protein to bind everything into a cohesive dough. The small amount of flour stabilizes the cookies so they hold their shape in the oven, bake up with light golden edges, and don’t crumble the second you pick them up. Because the ingredient list is so short, it’s easy to troubleshoot: if the dough feels too sticky, you know it needs a touch more flour; if it’s too dry, you can work in a spoonful of peanut butter until it feels soft and pliable.
These cookies also make “healthier dessert” feel realistic instead of aspirational. There’s no added sugar in the base recipe, so the sweetness comes naturally from the peanut butter itself—and you control any extra add-ins. That makes them a solid option for lunch boxes, quick after-school snacks, or a portion-controlled treat with coffee when you don’t want a sugar crash. Because 3-Ingredient Peanut Butter Cookies use standard pantry staples and bake at a gentle 350°F, you can double the batch, freeze the dough balls, and always have a ready-to-bake, low-effort dessert waiting—no last-minute grocery run required.
Step-by-Step Method for Easy 3-Ingredient Peanut Butter Cookies
Start by preheating your oven to 350°F (175°C) and lining a baking sheet with parchment paper so the cookies don’t stick or over-brown on the bottom. In a medium bowl, add the natural peanut butter and egg, then whisk or stir until the mixture looks completely smooth and glossy with no streaks of egg. This step matters: if the egg isn’t fully incorporated, your 3-Ingredient Peanut Butter Cookies can bake up with oily patches or dry spots. Once smooth, gradually sprinkle in the flour while stirring, rather than dumping it in all at once. You’re looking for a soft, cohesive dough that pulls away from the sides of the bowl; if it feels crumbly, keep mixing for another 15–20 seconds before deciding it needs any adjustment.
Use a small cookie scoop or a spoon to portion the dough into 12 even pieces, then roll them into balls with your hands and arrange them on the prepared baking sheet, leaving a little space between each one. Gently press the tops with a fork in one direction, then again in the other direction to create the classic crisscross pattern and flatten each to about ¼ inch thick—this helps the cookies bake evenly and cook through the center. Slide the tray into the oven and bake for 10–12 minutes, watching for lightly golden edges and a matte, set center; they should look just cooked, not dry. Let the cookies cool on the baking sheet for 5 minutes (they’re very soft when hot), then transfer them carefully to a wire rack to cool completely. They firm up as they cool, so if they seem a little tender at first, give them that extra time—once cooled, your 3-Ingredient Peanut Butter Cookies will be perfectly soft in the middle with just the right bite around the edges.
Make-Ahead and Storage Notes for 3-Ingredient Peanut Butter Cookies
These 3-Ingredient Peanut Butter Cookies actually taste better after they’ve had time to fully cool and settle, which makes them perfect for baking ahead. Once completely cooled, store them in an airtight container at room temperature for 4–5 days. I recommend separating layers with a small piece of parchment if you stack them, especially if your kitchen runs warm, so they don’t stick together. For a softer cookie, keep the container fully sealed; for a slightly drier, crispier edge, you can leave the lid slightly ajar for the first hour. If your cookies seem extra soft on day one, don’t worry—this simple dough firms up nicely as it rests.
These naturally sweet 3-Ingredient Peanut Butter Cookies also freeze well. Arrange the cooled cookies in a single layer on a baking sheet and freeze until solid, then transfer them to a freezer-safe bag or container. Label with the date and use within 2–3 months for the best flavor and texture. When you’re ready to eat, thaw at room temperature for 20–30 minutes, or warm gently in a 300°F (150°C) oven for 3–5 minutes to refresh the texture. If you like to plan snack options for the week—like a batch of baked oats or a pan of roasted chickpeas—adding a batch of these freezer-friendly cookies gives you an easy, portion-controlled treat that’s always ready.
Variations and How to Serve It
These 3-Ingredient Peanut Butter Cookies are simple by design, but you can still customize them without losing that easy, everyday feel. For a hint of sweetness while staying refined-sugar-free, stir in a tablespoon of maple syrup or honey and add an extra teaspoon of flour if the dough feels too soft. If you prefer a firmer, more “bakery-style” texture, use ⅓ cup flour instead of ¼ cup and bake on the longer side of the time range. You can swap in natural almond butter or cashew butter for a different flavor, but choose nut butters with no added sugar and the same drippy consistency as natural peanut butter. For a fun twist, add 2 tablespoons of dark chocolate chips or cacao nibs to make a healthier “chocolate chip” variation, or sprinkle a tiny pinch of flaky sea salt on top before baking.
To serve, treat these as a flexible snack or dessert you can dress up or keep totally simple. For an afternoon pick-me-up, pair a cookie or two with coffee, tea, or a cold glass of milk or a dairy-free alternative. For a family-friendly dessert, sandwich two cookies around a spoonful of Greek yogurt, frozen yogurt, or a small scoop of banana ice cream and freeze for 20–30 minutes. You can also crumble a warm cookie over a bowl of plain yogurt with sliced banana for a quick high-protein breakfast that still feels like a treat. If you’re planning a healthier dessert spread, these 3-Ingredient Peanut Butter Cookies sit nicely next to lighter options like baked fruit desserts or a fresh berry platter, giving everyone a satisfying, nutty bite without being heavy.
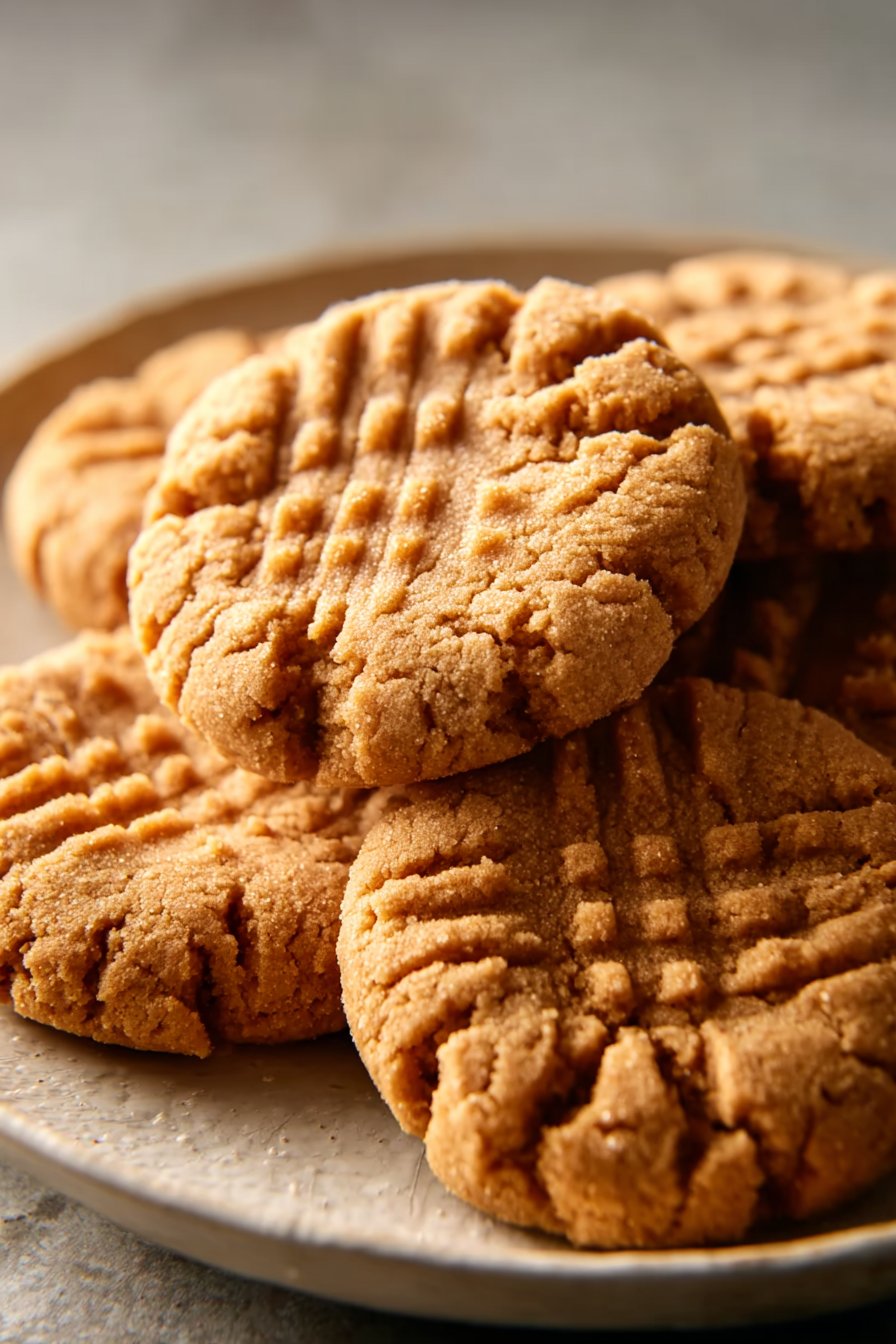
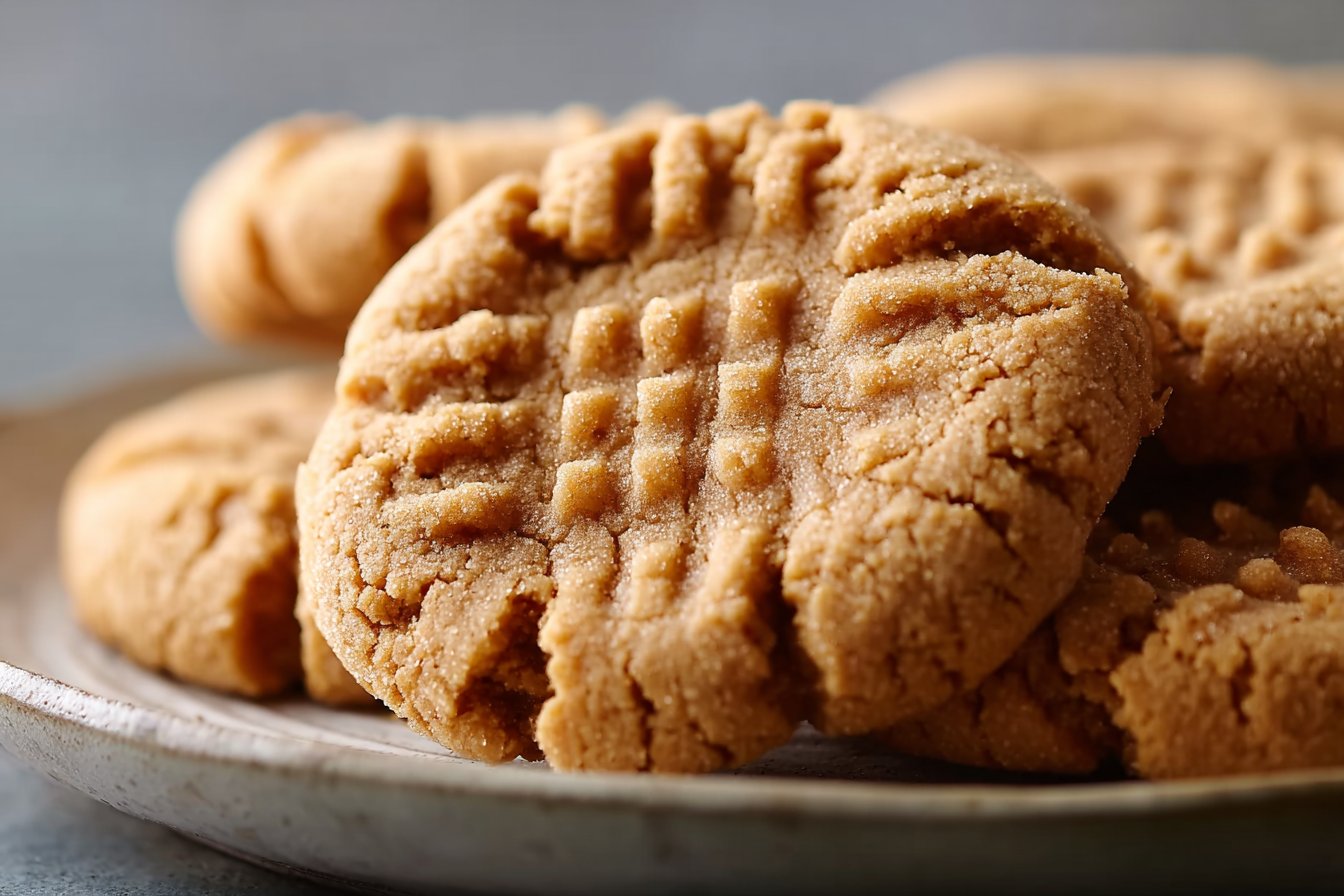
Serving of 3-Ingredient Peanut Butter Cookies
Conclusion
These simple, cozy moments in the kitchen are often the ones we remember most. A small bowl, a spoon, and a warm baking sheet are all you need to turn a busy afternoon into something a little softer and sweeter. Whether you’re baking with kids, surprising a friend, or just treating yourself after a long day, these cookies have a way of slowing things down and bringing people together around the table.
I love how something as effortless as 3-Ingredient Peanut Butter Cookies can create such special little rituals—waiting by the oven, sharing the first warm cookie, packing a few into a lunchbox for later. You don’t need a huge block of time or a long ingredient list to make something that feels homemade and thoughtful.
If you haven’t tried this recipe yet, I encourage you to preheat the oven, grab a jar of peanut butter, and see just how simple and satisfying it can be. Then, share a batch with someone you love.
For more delicious recipes like this, follow us on social media!
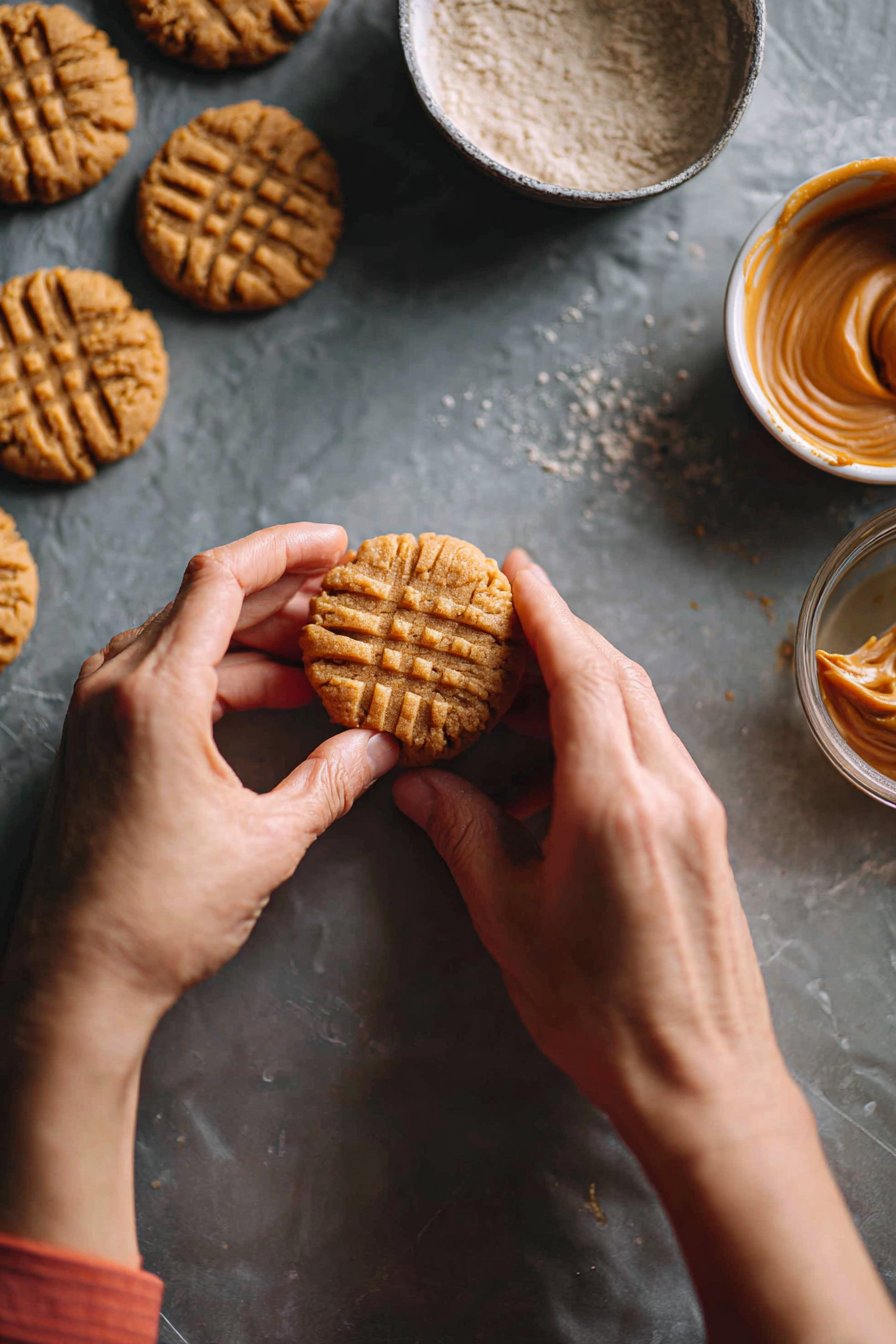
Instructions Process of 3-Ingredient Peanut Butter Cookies
Recipe
3-Ingredient Peanut Butter Cookies
Ingredients
Method
- Preheat the oven to 350°F and line a baking sheet with parchment paper.
- In a medium mixing bowl, combine the peanut butter and egg and stir until completely smooth and well blended.
- Gradually add the flour to the peanut butter mixture, stirring until a soft, cohesive dough forms and pulls away from the sides of the bowl.
- Divide the dough into 12 even portions, roll each into a ball, and place them on the prepared baking sheet, spacing them slightly apart.
- Use a fork to gently press down on each dough ball in one direction, then again in the opposite direction to create a crisscross pattern, flattening each cookie to about 1/4 inch thickness.
- Bake for 10 to 12 minutes, until the edges are lightly golden and the centers look set and matte.
- Remove the baking sheet from the oven and let the cookies cool on the sheet for 5 minutes.
- Transfer the cookies to a wire rack and let them cool completely before serving or storing.
Notes
- If the dough feels too sticky to roll, stir in an additional teaspoon of flour at a time until it is easy to handle.
- Store completely cooled cookies in an airtight container at room temperature for up to 4 days.


