
Why These 3-Ingredient Bites Actually Taste Bakery-Quality
These 3-Ingredient No Bake Brownie Bites work because they lean on fat, cocoa, and natural sweetness in the right balance. Almond butter gives you the rich, fudgy body that baked brownies usually get from butter and flour, so you still get that tender, truffle-like center without turning on the oven. Maple syrup doesn’t just sweeten; it adds moisture and a subtle caramel note that keeps the bites soft even after chilling. Cocoa powder steps in for both chocolate flavor and structure, thickening the mixture so it firms up without any eggs or baking time. You get a clean ingredient list and a snack that feels indulgent instead of “healthy-but-sad.”
From a practical standpoint, these bites are built for real-life kitchens and tight schedules. You mix everything in one bowl, so there’s minimal cleanup and zero special equipment required—no food processor, stand mixer, or heat. The batter comes together in about a minute and you can adjust it on the fly: if it looks too loose, add a spoonful of cocoa; if it feels a bit dry, stir in a drizzle more maple syrup. Because the base is naturally gluten-free and has no refined sugar or flour, it fits into a lot of routines, from after-school snacks to a quick dessert alongside something like my no bake chocolate oat bars. They keep well in the fridge or freezer, so you can roll a batch once and have grab-and-go treats ready whenever a chocolate craving hits.
From Prep to Finish
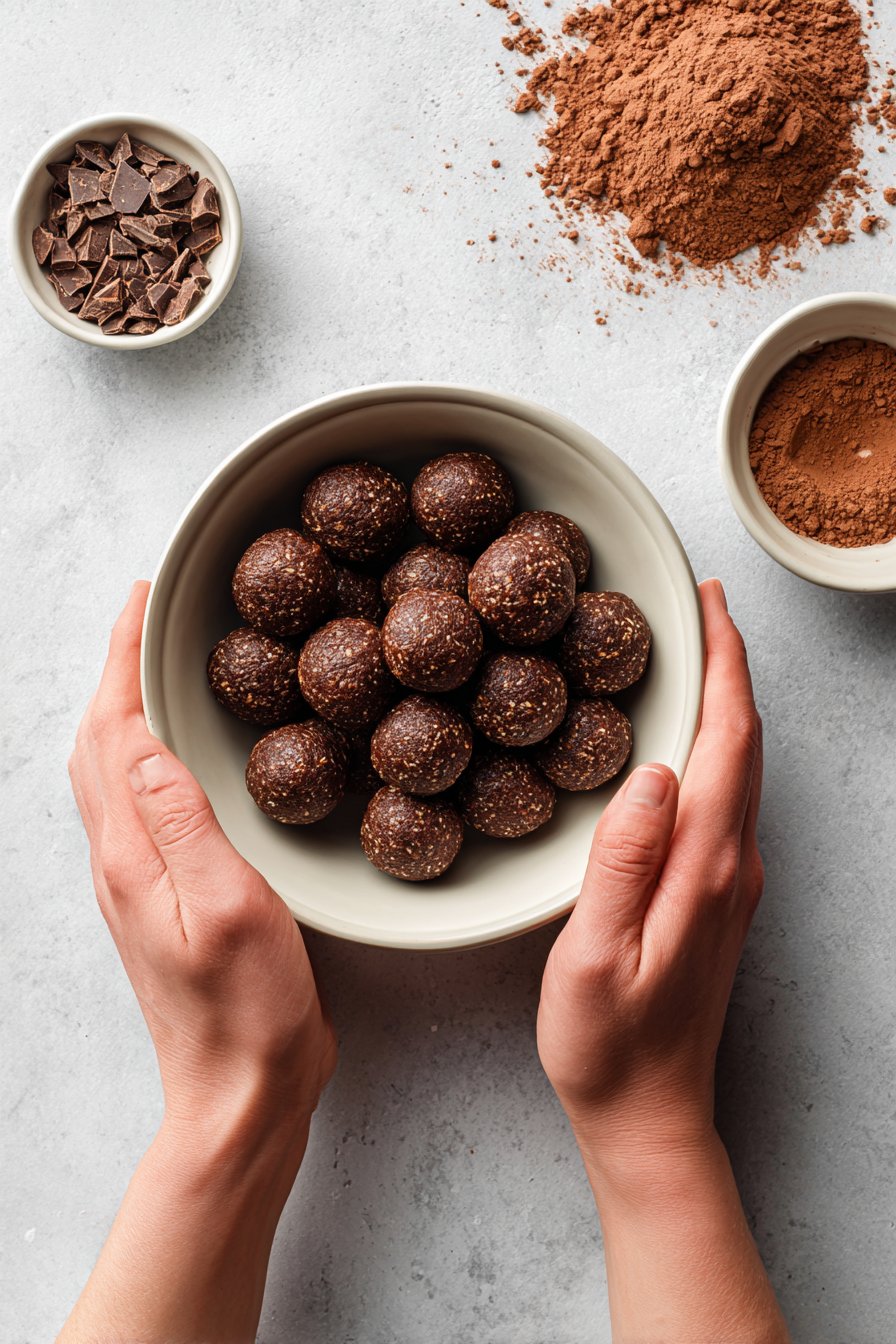
Once you have your three ingredients measured, making these 3-Ingredient No Bake Brownie Bites moves very quickly. Line a plate or small tray with parchment so the bites don’t stick and you can transfer them easily. In a mixing bowl, stir together the almond butter and maple syrup first until smooth; this makes it much easier to blend in the cocoa without dry pockets. Sprinkle in the cocoa powder gradually, stirring or folding as you go, until the mixture turns thick, glossy, and fudge-like. If the mix looks too soft to roll, let it sit for 2–3 minutes—cocoa absorbs moisture and the texture firms up fast.
When the dough holds together and feels slightly tacky but not wet, it’s ready to roll. Scoop out small portions with a teaspoon or mini cookie scoop to keep the bites even in size—this helps them chill at the same rate and keeps the nutrition per bite consistent. Roll between your palms until smooth; if the mixture sticks, lightly dampen your hands or chill the bowl briefly. Arrange each ball on your parchment-lined plate, leaving a little space so they don’t fuse together as they set. At this point, you can press in mini chocolate chips, shredded coconut, or a pinch of flaky salt on top for extra texture and flavor.
To finish, chill the brownie bites in the refrigerator for at least 20–30 minutes, or in the freezer for about 10–15 minutes if you want them extra firm and fudgy. They’re ready when they feel set on the outside but still soft when you press gently in the center. Store your 3-Ingredient No Bake Brownie Bites in an airtight container in the fridge for up to one week, or freeze them for quick, portion-controlled treats. They’re ideal as a make-ahead dessert alongside fruit, or as a small sweet bite packed in lunchboxes when you want something fast but still homemade.
Timing, Storage, and Make-Ahead Tips for Brownie Bites
These 3-Ingredient No Bake Brownie Bites move fast: once you mix the batter, you can roll all 24 bites in about 5–10 minutes, depending on your pace. The mixture may feel a bit sticky at first; if that bothers you, chill the bowl for 10–15 minutes, then roll. They firm up in the fridge in about 30 minutes, or in the freezer in roughly 15 minutes, so you can realistically make and serve them in under an hour, start to finish. If you’re planning these for guests or meal prep, I recommend making them earlier in the day so they’re fully chilled and set when you need them.
For storage, keep your 3-Ingredient No Bake Brownie Bites in an airtight container in the refrigerator for up to 1 week. Layer them with small pieces of parchment if you’re stacking, so they don’t smush together. They freeze very well: arrange them on a lined plate or tray, freeze until solid, then transfer to a freezer-safe container or bag. Store frozen for up to 2–3 months, and thaw a few bites at a time in the fridge or at room temperature for 10–15 minutes. The texture stays fudgy, not icy, because there’s no added water in the recipe.
To make ahead for parties, meal prep, or lunch boxes, prepare the full batch of 3-Ingredient No Bake Brownie Bites and chill them completely before packing. For the longest shelf life and best texture, I prefer to freeze in portions—12 per container works well for quick snacks or dessert. If you’re pairing them with other no-bake desserts, you can store them together on a platter, just keep everything well covered to avoid drying out. And if the bites ever feel a touch too soft after sitting out, a quick 10-minute chill in the fridge brings them right back to that dense, truffle-like center.
Ingredient Swaps and Easy Serving Ideas
These 3-Ingredient No Bake Brownie Bites are flexible, so you can adjust them to what you have on hand while keeping that fudgy texture. If you don’t have almond butter, use peanut butter for a classic flavor, or cashew butter for something milder and extra creamy. For a nut-free option, sunflower seed butter works well, but you may want to add a pinch of salt to balance its natural sweetness. You can swap maple syrup with honey or date syrup; just know honey will make the bites slightly firmer, while thinner liquid sweeteners may need an extra teaspoon of cocoa to hold shape. For the cocoa powder, use Dutch-process cocoa if you like a deeper, “bakery-style” chocolate flavor, or mix in a spoonful of cacao powder for a more intense bite.
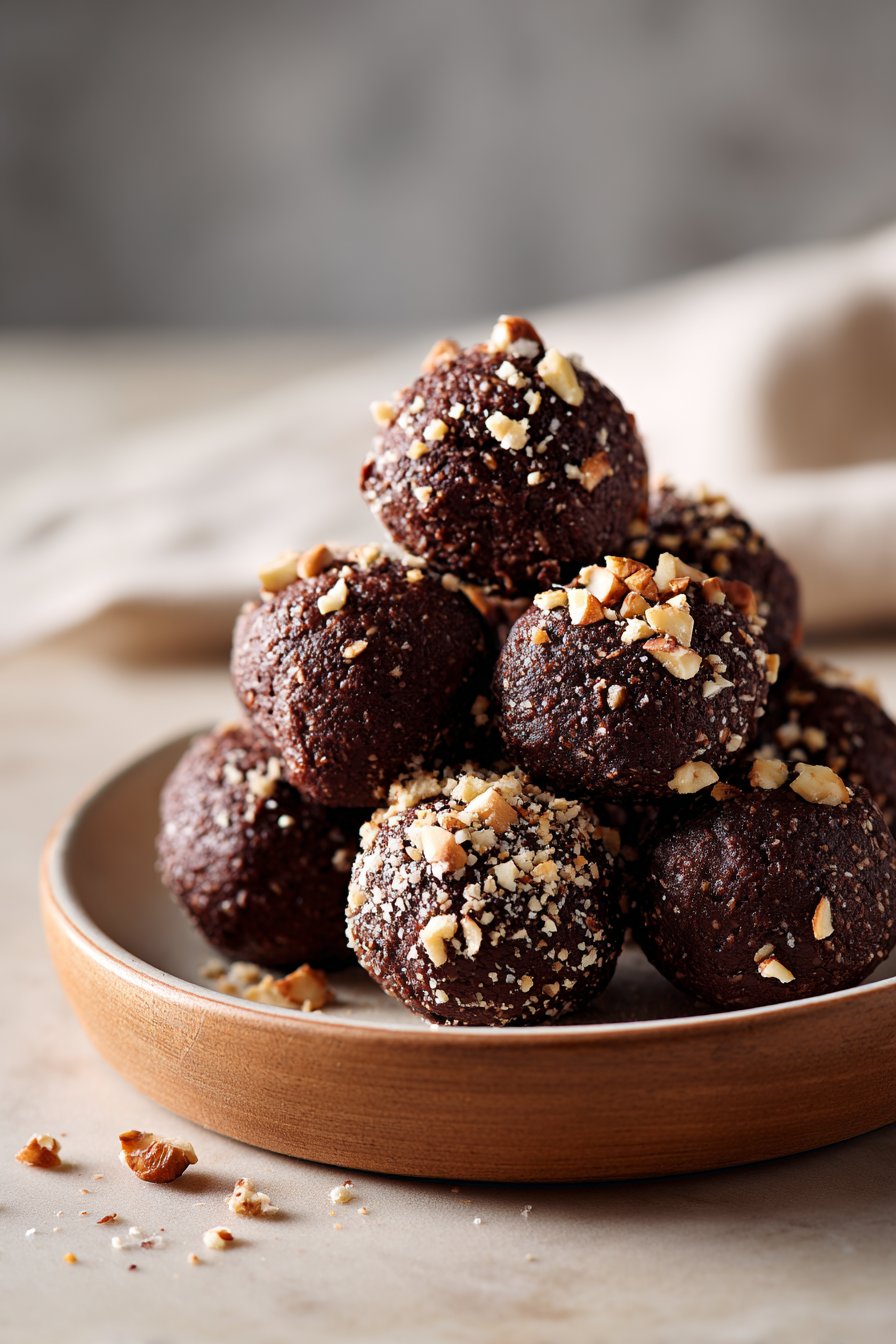
How you serve these 3-Ingredient No Bake Brownie Bites can completely change how they feel on the table. For everyday snacking, keep them plain and stash them in the fridge for grab-and-go treats or a lunchbox dessert. To dress them up, roll the chilled bites in cocoa powder, finely shredded coconut, or crushed nuts for a more finished, truffle-like look. You can also serve them as part of a dessert board with fresh berries, sliced bananas, and maybe a plate of no-bake cookie dough bites or simple chocolate-dipped strawberries. For a small dinner party, I like to plate 2–3 brownie bites with a spoonful of Greek yogurt or whipped cream and a drizzle of extra maple syrup—simple, but it feels like a complete dessert without any baking.
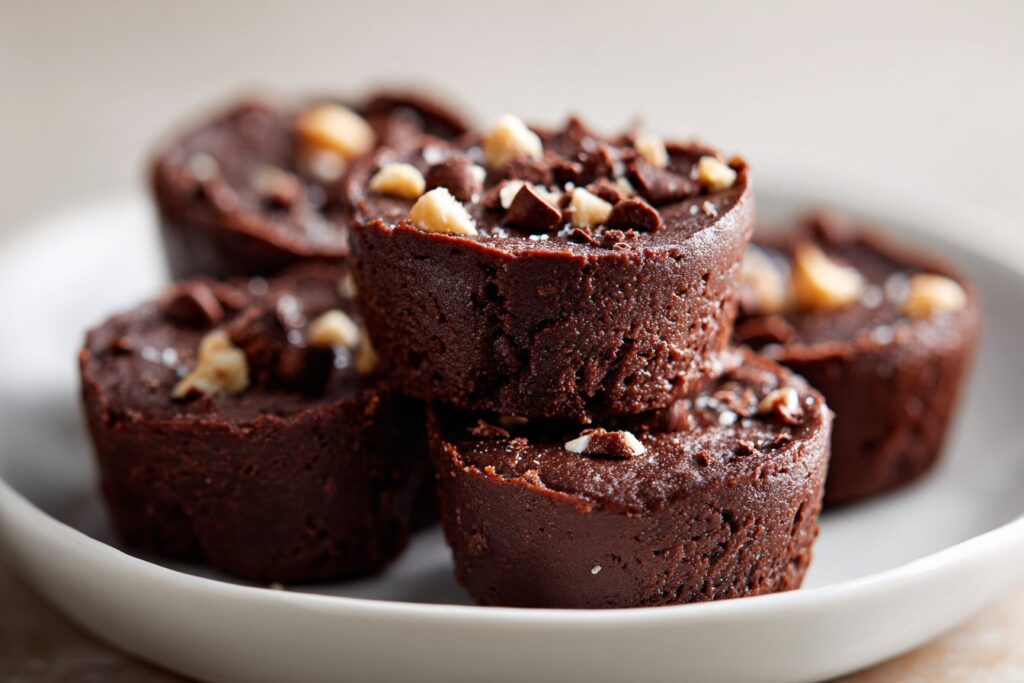
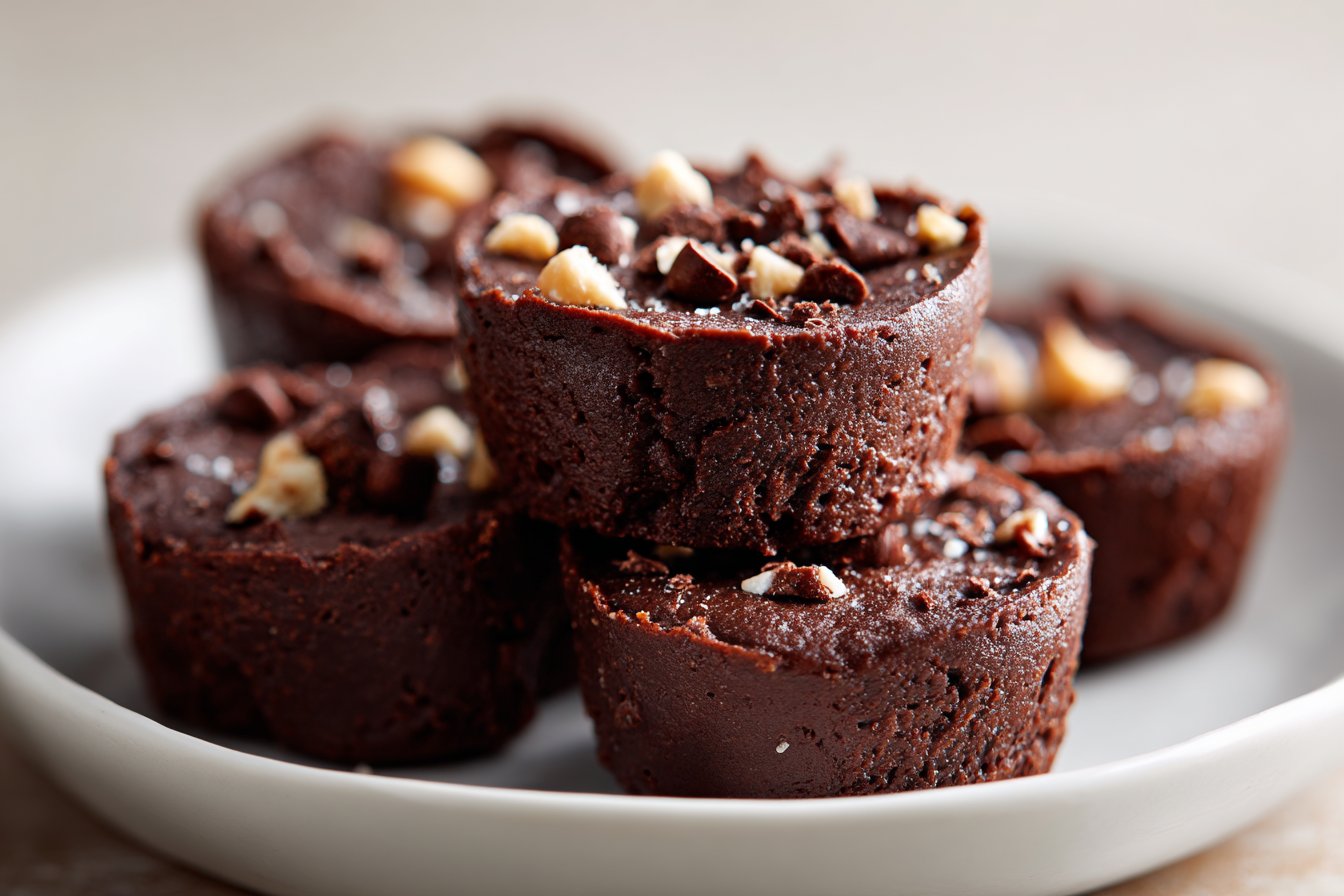
Serving of 3-Ingredient No Bake Brownie Bites
Conclusion
For me, little recipes like these are what keep everyday life feeling special. A single bowl, a handful of minutes, and you suddenly have a plate of rich, fudgy bites ready to share. Whether you set them out after dinner, pack them into lunchboxes, or bring them to a last-minute get-together, they have a way of disappearing quickly and starting conversations. That’s the kind of easy kitchen win I want you to feel confident about.
I love how something as simple as these 3-Ingredient No Bake Brownie Bites can turn an ordinary afternoon into a mini celebration. Make them with kids, prep a batch for a movie night, or tuck a few into a friend’s day as a small surprise. However you enjoy them, I hope they bring a little more ease and joy into your routine.
If you haven’t tried them yet, this is your sign to grab a bowl and start stirring—you’ll be amazed by how quickly they come together.
For more delicious recipes like this, follow us on social media!
Instructions Process of 3-Ingredient No Bake Brownie Bites
What ingredients do I need for 3-Ingredient No Bake Brownie Bites?
You only need three basic pantry ingredients: creamy almond butter, pure maple syrup, and unsweetened cocoa powder. Use a drippy, room-temperature almond butter so the mixture comes together smoothly. I recommend real maple syrup, not pancake syrup, for the best texture and clean sweetness. For a deeper chocolate flavor, choose a high-quality cocoa powder. You can also fold in a handful of mini chocolate chips or chopped nuts, but those are optional and not part of the base 3 ingredients.
How long should 3-Ingredient No Bake Brownie Bites chill before serving?
Once you roll the mixture into balls, chill them until they’re firm to the touch. In the refrigerator, this usually takes about 30 to 60 minutes, depending on the size of your bites and how soft your almond butter was. In the freezer, they firm up faster, typically in about 20 to 30 minutes. If you like a chewier, softer brownie bite, aim for the lower end of the chill time. For a more truffle-like texture, let them go a bit longer.
Can I substitute almond butter in these 3-Ingredient No Bake Brownie Bites?
Yes, you can swap almond butter with peanut butter, cashew butter, or another smooth nut or seed butter. Choose one that’s unsweetened and not too stiff so the batter stays fudgy, not crumbly. Peanut butter will give the strongest, most noticeable flavor shift, while cashew butter keeps things more neutral. If your chosen butter is very thick, add an extra teaspoon or two of maple syrup to loosen the mix. Always taste and adjust sweetness and cocoa at the end before rolling.
Recipe
3-Ingredient No Bake Brownie Bites
Ingredients
Method
- Line a large plate or small tray with parchment paper and set aside.
- In a large mixing bowl, add the almond butter and maple syrup and stir until completely smooth.
- Gradually add the cocoa powder, mixing until the mixture is thick, glossy, and forms a soft dough.
- Let the dough rest for 2 to 3 minutes to allow the cocoa powder to absorb moisture and firm up slightly.
- Scoop out portions of dough using a teaspoon or mini cookie scoop and roll between your palms to form smooth, bite-sized balls.
- Place each ball on the parchment-lined plate, leaving a little space between them.
- Refrigerate the brownie bites for 30 minutes, or freeze for 15 minutes, until set and firm on the outside but soft in the center.
- Store in an airtight container in the refrigerator for up to 1 week, or freeze for longer storage.
Notes
- If the mixture feels too soft to roll, chill the bowl for 10 to 15 minutes before shaping.
- Lightly dampen your hands if the dough sticks while rolling.
- For extra flavor and texture, press a few mini chocolate chips, shredded coconut, or a pinch of flaky salt on top before chilling.


