

Why This One Delivers Real Bakery-Style Results
This Sugar Free Chocolate Cake works because it uses the same structure and techniques as a classic bakery chocolate cake, just with smart swaps. The Splenda replaces sugar without changing the volume, so you still get a proper batter consistency and good rise. Strong hot coffee blooms the cocoa and thins the batter, which might look alarming at first but actually gives you that ultra-moist, tender crumb. Buttermilk adds gentle tang and acidity, which reacts with the baking soda for extra lift and keeps the cake soft instead of dry or chalky (a common sugar-free problem). The result tastes like a “real” chocolate cake, not like a compromise.
The fat and liquid balance also stays very intentional here. Canola oil, rather than butter, keeps the cake moist even after chilling, which is important for a Sugar Free Chocolate Cake you might store a day or two ahead. Using room-temperature eggs helps the batter emulsify so you get an even, fine crumb instead of big air pockets or tunnels. The two 9-inch layers bake quickly and evenly, so you avoid domed tops that need heavy trimming. That makes assembly simpler and gives you more neat, bakery-style height once you stack and frost.
Finally, the frosting formula works hard for both flavor and structure. Softened cream cheese gives you body and a slight tang to balance the sweetness of the sweetener and pudding mix. The sugar-free pudding thickens the frosting without cups of powdered sugar, while Lite Cool Whip lightens everything so it spreads smoothly and holds up on the cake. Because you’re not relying on sugar for stability, the frosting stays creamy in the fridge instead of turning stiff or grainy. You end up with a cleanly slicing, fully frosted Sugar Free Chocolate Cake that feels special enough for a celebration but practical for everyday dessert.
From Prep to Finish: Baking a Smooth Sugar Free Chocolate Cake
Start by getting your pans and ingredients truly ready—this is what turns a simple Sugar Free Chocolate Cake into something that looks bakery-made. Grease and flour your 2 round 9-inch pans thoroughly, making sure the corners and edges are coated so the layers release cleanly. Whisk together the dry ingredients until the cocoa looks evenly distributed with no pale streaks of flour; this step prevents pockets of bitterness or bland bites later. In your stand mixer, blend the buttermilk, oil, room-temperature eggs, and vanilla on medium-low just until smooth. When you add the dry mixture, keep the mixer on low and pour it in gradually, scraping the bowl once or twice so nothing sticks to the bottom. Slowly stream in the hot coffee last; the batter will look very thin, and that’s exactly what gives you a moist, tender crumb instead of a dense cake.
Divide the batter evenly between the pans (I like to use a measuring cup or weigh the pans to keep layers even), then bake until a toothpick comes out with just a few moist crumbs, about 22–25 minutes. Let the cakes cool in the pans for 10 minutes, then turn them out onto a rack and cool completely before frosting—if the layers are even slightly warm, the cream cheese topping will slide and melt. For the frosting, beat the softened cream cheese first until it’s completely smooth with no lumps, then whisk the pudding mix with the milk in a separate bowl until thickened. Add the pudding to the cream cheese one spoonful at a time, beating well after each addition so it stays silky instead of grainy. Gently fold in the whipped topping with a spatula, working from the bottom of the bowl up so you don’t deflate it. Frost between the layers and over the top and sides, then chill the finished cake for at least 30 minutes so it slices cleanly and shows off those neat, dark chocolate layers you baked.
Timing, Storage, and Make-Ahead Tips for Sugar Free Chocolate Cake
Your Sugar Free Chocolate Cake bakes in about 22–25 minutes at 350°F for two 9-inch layers, but ovens vary, so start checking at the 20-minute mark. The cakes are done when a toothpick comes out with a few moist crumbs, not wet batter. Let the layers cool in the pans for 10 minutes, then move them to a rack to cool completely before frosting; warm cake will melt the cream cheese whipped frosting and make the layers slide. Once frosted, let the cake chill for at least 30–45 minutes so the structure sets and slices cleanly.
For short-term storage, keep your Sugar Free Chocolate Cake covered in the refrigerator because of the cream cheese and whipped topping. It will stay soft and moist for 3–4 days when stored in an airtight container or cake dome. To avoid that “fridge taste,” I like to double-wrap individual slices in plastic wrap, then place them in a container. Before serving, let slices sit at room temperature for 15–20 minutes so the crumb softens and the chocolate flavor comes forward.
This recipe works very well as a make-ahead dessert. You can bake the cake layers up to 2 days ahead, cool them completely, then wrap each layer tightly in plastic wrap and refrigerate, or freeze them for up to 2 months. Frosting also keeps nicely: prepare it the day before, cover the bowl tightly, and refrigerate, then give it a quick whisk before spreading. If you want a “bakery-style” finish for a special occasion, assemble the chilled layers, frost the cake, and refrigerate again for at least an hour so the frosting firms up before you decorate or transport.
Ingredient Swaps and Serving Options for This Sugar Free Chocolate Cake
You can tailor this Sugar Free Chocolate Cake around what you have on hand without losing the fluffy, bakery-style texture. For the sweetener, you can swap Splenda for another granulated, 1:1 sugar-free sweetener like erythritol or a stevia blend; just avoid liquid drops here, as they change the batter consistency. If you do not have buttermilk, mix 1 cup milk with 1 tablespoon white vinegar or lemon juice, let it sit for 5–10 minutes, and use that instead. Any neutral oil (avocado, light olive, sunflower) will work in place of canola, and you can use decaf coffee or even hot brewed chicory if you want to avoid caffeine while keeping that deep cocoa flavor. For the frosting, swap Lite Cool Whip with any stabilized sugar-free whipped topping, and use lactose-free milk if needed—just keep the same volume so the pudding sets correctly.
To keep this Sugar Free Chocolate Cake low-effort for gatherings, bake it in a 9×13-inch pan and spread the cream cheese pudding frosting on top as a single layer. For a lighter option, you can skip the frosting and serve each slice with a spoonful of lightly sweetened Greek yogurt and fresh berries. Turn it into a more impressive dessert by adding a thin layer of sugar-free raspberry jam between the cake layers before frosting. You can also serve small squares with a scoop of sugar-free vanilla ice cream and a drizzle of melted sugar-free chocolate for something closer to a restaurant-style plated dessert. If you enjoy this recipe, it also pairs well on a dessert table next to a simple sugar free vanilla cake or a light lemon yogurt loaf so guests can choose their favorite flavor profile.

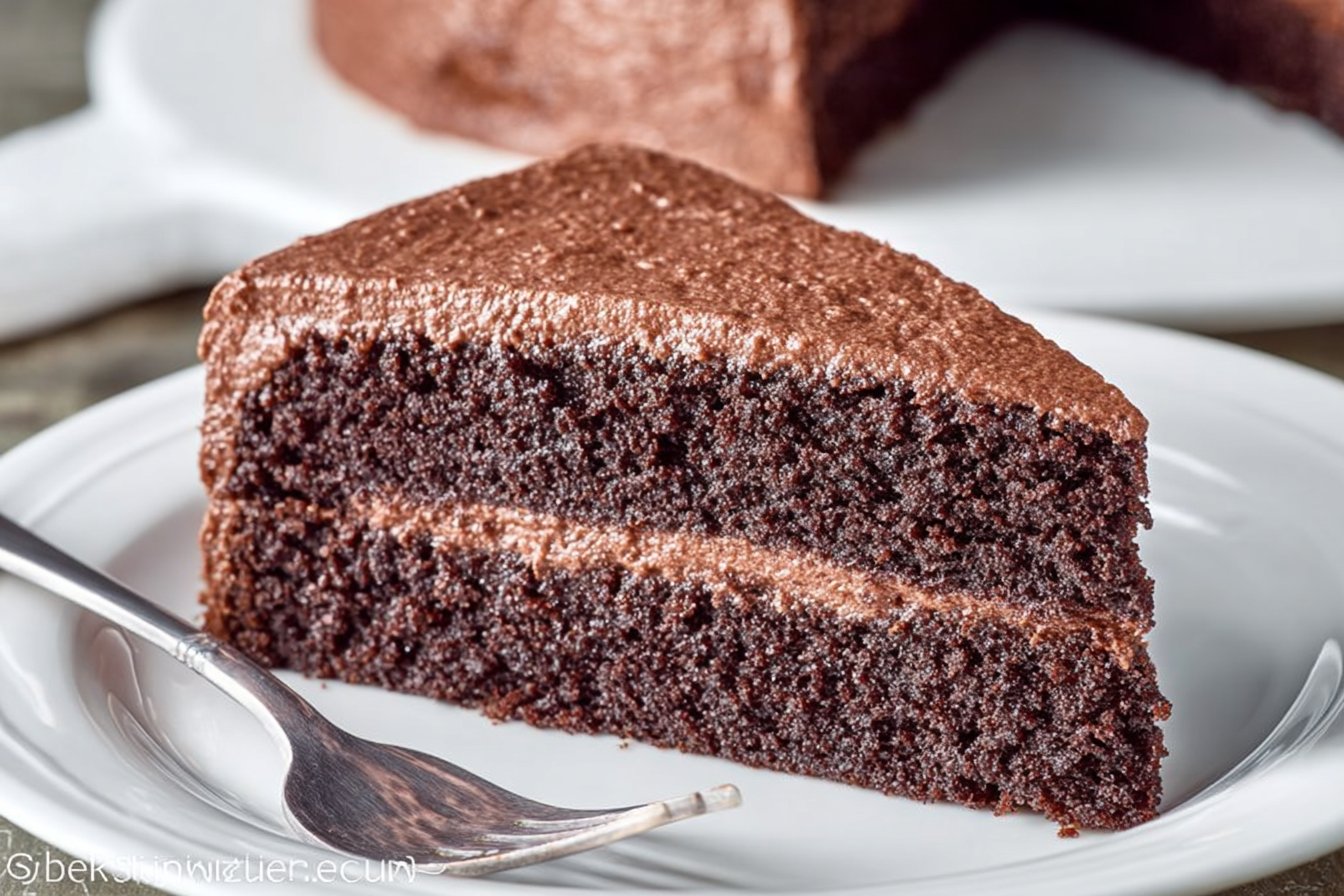
Serving of Sugar Free Chocolate Cake
Conclusion
I love this recipe because it proves you don’t have to give up comfort baking to feel good about what you’re serving. A simple, bakery-style Sugar Free Chocolate Cake has a way of turning an ordinary evening into something a little more special—whether you’re celebrating a birthday, cheering up a long day, or just sitting down with coffee and someone you care about. It’s the kind of dessert that invites people to linger at the table a bit longer.
When you pull this cake from the oven, you’re not just making a treat—you’re creating a small moment everyone can share. Slice it warm, pass the plates around, and let people be surprised that something this rich and chocolatey can still fit your goals. If you’ve been unsure about sugar-free baking, this is a safe, reliable place to start.
Give it a try, make it your own, and don’t be afraid to bake it again and again until it feels like one of your “house classics.”
For more delicious recipes like this, follow us on social media!
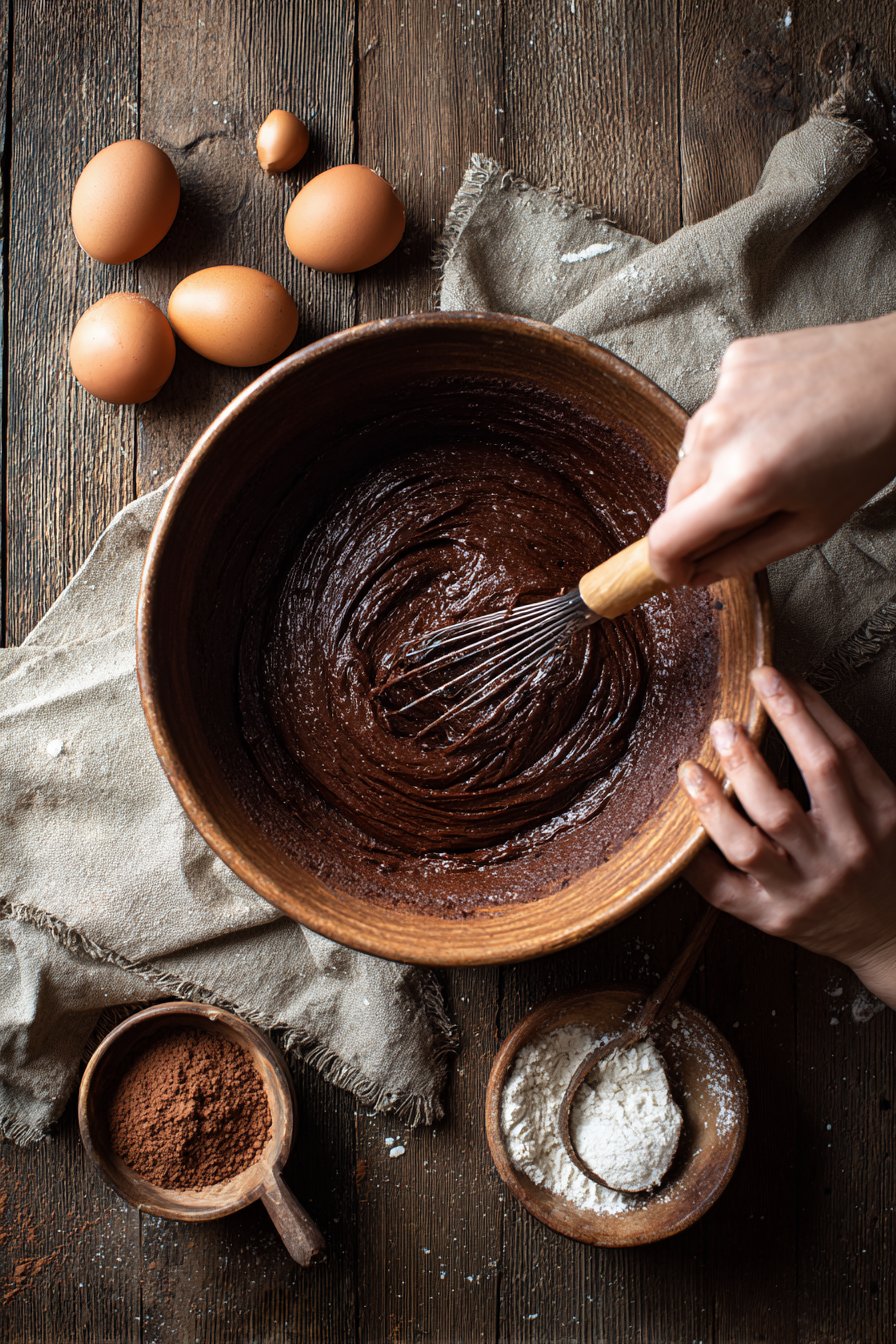
Instructions Process of Sugar Free Chocolate Cake
Can I use a different sweetener in this Sugar Free Chocolate Cake?
You can swap Splenda for another granulated, cup‑for‑cup sugar substitute such as erythritol, allulose blends, or stevia blends. **Always** check the package for conversion guidance, because some sweeteners measure differently than sugar. If your sweetener is sweeter than sugar, start with less and adjust over a few bakes to find your preferred level. Avoid liquid sweeteners here, as they can throw off the batter’s texture and rise. If you notice the cake browning faster with a different sweetener, tent it loosely with foil near the end of baking.
Is this Sugar Free Chocolate Cake appropriate for people with diabetes?
This Sugar Free Chocolate Cake uses Splenda and sugar free pudding mix, which many people with diabetes include in their meal plans. However, the cake still contains carbohydrates from flour, milk, and whipped topping, so portion size matters. Everyone’s blood sugar response is different, so it is wise to check your usual carb limits and test your response. I recommend discussing this recipe with a healthcare provider or dietitian if you follow a specific plan. When in doubt, cut smaller slices and pair the cake with a protein‑rich meal.
How should I store and freeze Sugar Free Chocolate Cake?
Because of the cream cheese–based frosting, store the frosted cake covered in the refrigerator for up to 4 days. Let slices sit at room temperature for 15 to 20 minutes before serving so the texture softens and the flavors open up. To freeze, chill the cake until firm, then wrap individual slices tightly and place them in an airtight container. They keep well for about 2 months. Thaw slices overnight in the refrigerator, then let them warm slightly on the counter before enjoying.
Recipe
Sugar Free Chocolate Cake
Ingredients
Method
- Preheat oven to 350°F. Grease and flour two 9-inch round cake pans and set aside.
- In a large bowl, whisk together the flour, Splenda, cocoa powder, baking powder, baking soda, and salt until well combined.
- In the bowl of a stand mixer, add the buttermilk, canola oil, eggs, and vanilla. Mix on medium-low speed until smooth.
- With the mixer on low speed, gradually add the dry ingredient mixture to the wet ingredients, mixing just until combined and scraping down the bowl as needed.
- With the mixer still on low, slowly pour in the hot coffee and mix until the batter is smooth and evenly combined. The batter will be thin.
- Divide the batter evenly between the prepared pans and smooth the tops.
- Bake for 22 to 25 minutes, or until a toothpick inserted into the center comes out clean or with a few moist crumbs.
- Cool the cakes in the pans for 10 minutes, then carefully turn them out onto a wire rack and let them cool completely.
- While the cakes cool, prepare the frosting. In a large bowl, beat the softened cream cheese with a hand mixer until smooth and creamy.
- In a separate bowl, whisk together the milk and sugar free chocolate pudding mix until thick and smooth.
- Add the pudding mixture to the cream cheese one spoonful at a time, beating well after each addition until fully incorporated and smooth.
- Gently fold the Lite Cool Whip into the cream cheese mixture with a spatula until no streaks remain and the frosting is fluffy and uniform.
- Place one cooled cake layer on a serving plate or cake stand.
- Spread 1 to 1 1/2 cups of frosting evenly over the top of the first layer.
- Place the second cake layer on top, aligning the edges.
- Spread the remaining frosting over the top and sides of the cake, smoothing with an offset spatula if desired.
- Refrigerate the frosted cake for at least 30 minutes before slicing to help the frosting set and the layers hold cleanly.
Notes
- Do not skip cooling the cake layers completely before frosting or the cream cheese frosting may soften and slide.
- Strong, hot coffee deepens the chocolate flavor but does not make the cake taste like coffee.
- Store the finished cake covered in the refrigerator for up to 3 days.


