Some days you want brownies, but you don’t want a sink full of bowls or a grocery run for specialty ingredients. These Greek yogurt brownies are my go-to when I have yogurt in the fridge, cocoa in the pantry, and about half an hour to get something chocolatey into a pan.
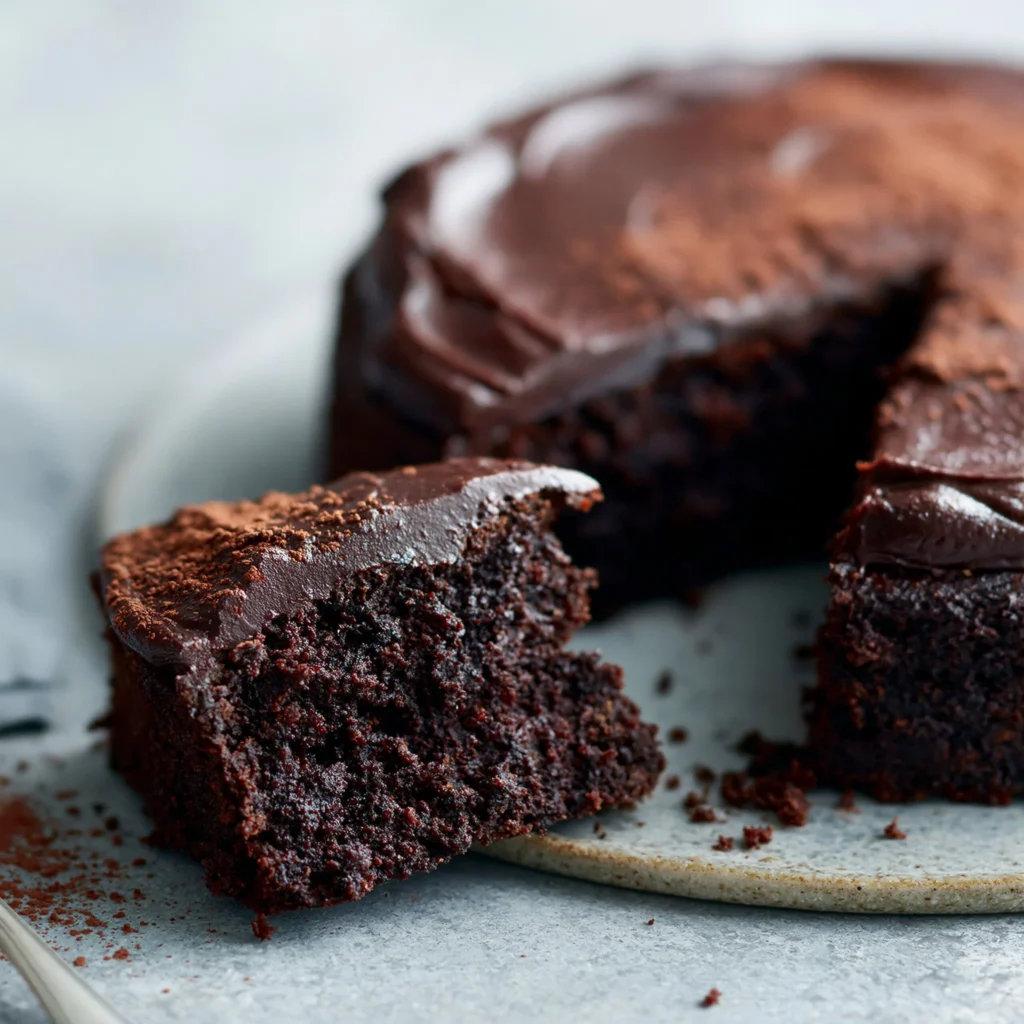
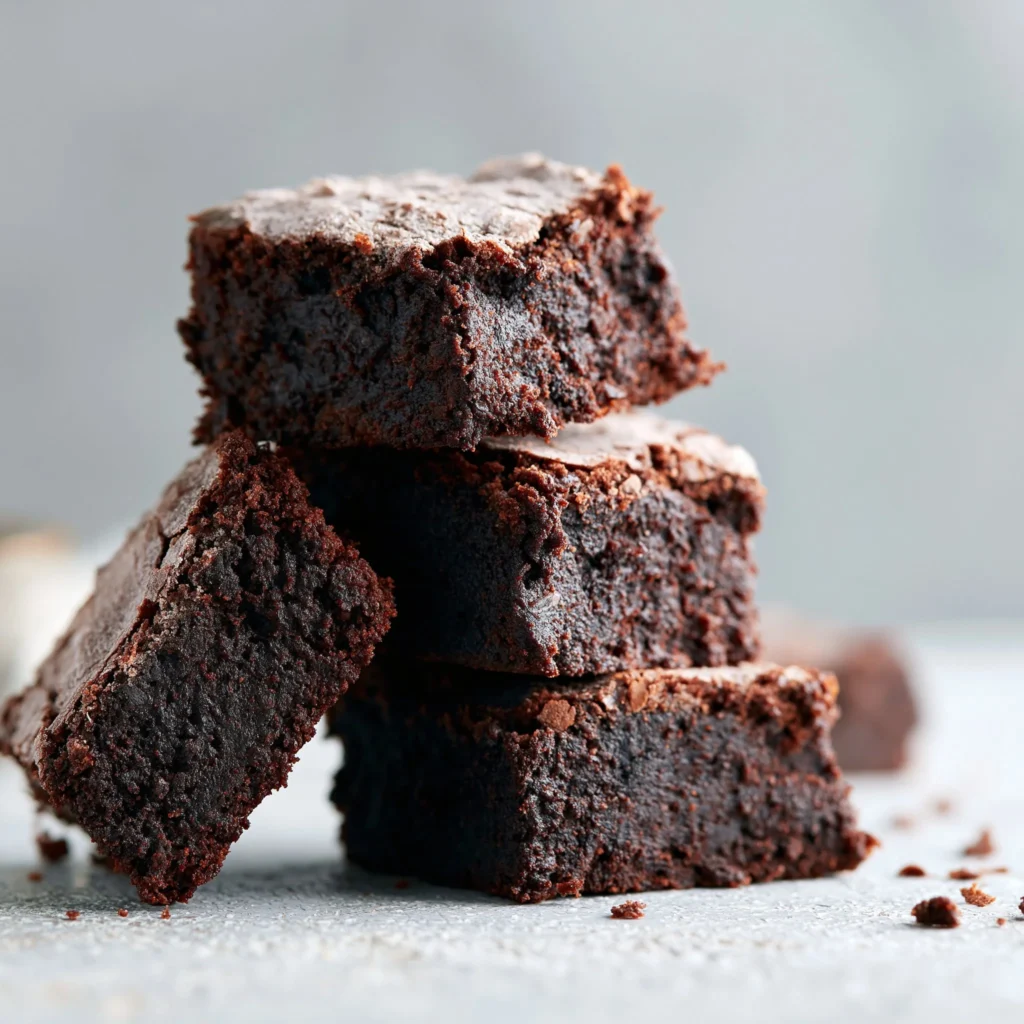
They bake up deeply cocoa-forward with a fudgy-leaning center and clean edges. The batter comes together fast (two bowls, one pan), and the ingredients are straightforward enough that I’ll often make them alongside lunch prep—right next to a batch of chewy Greek yogurt brownies when I’m testing small tweaks for the week.
Why This Recipe Works
- Greek yogurt does the heavy lifting: it gives the brownies moisture and structure so the crumb stays tender without a complicated ingredient list.
- Cocoa powder brings real chocolate flavor: you get a bold, brownie-style cocoa hit (not just “chocolate cake” vibes), especially once it cools.
- Honey or maple syrup sweetens and smooths: both blend easily into the wet mix and balance cocoa’s bitterness without extra steps.
- Whole wheat flour keeps the batter sturdy: it bakes into clean-cut squares that don’t crumble apart when you slice.
- Minimal cleanup, realistic workflow: one bowl for wet, one for dry, then straight into the baking dish—easy to slot in after dinner dishes.
- Optional chocolate chips = flexible finish: fold them in when you want pockets of melted chocolate, skip when you want a cleaner cocoa bite (similar idea to these easy Greek yogurt brownies I make when I’m keeping things simple).
Quick Kitchen Note
I like recipes like this because they’re dependable when time is tight: mix, bake, cool, done. The key is to stop mixing as soon as the flour disappears—overmixing is the fastest way to lose that brownie texture and end up with something tougher.
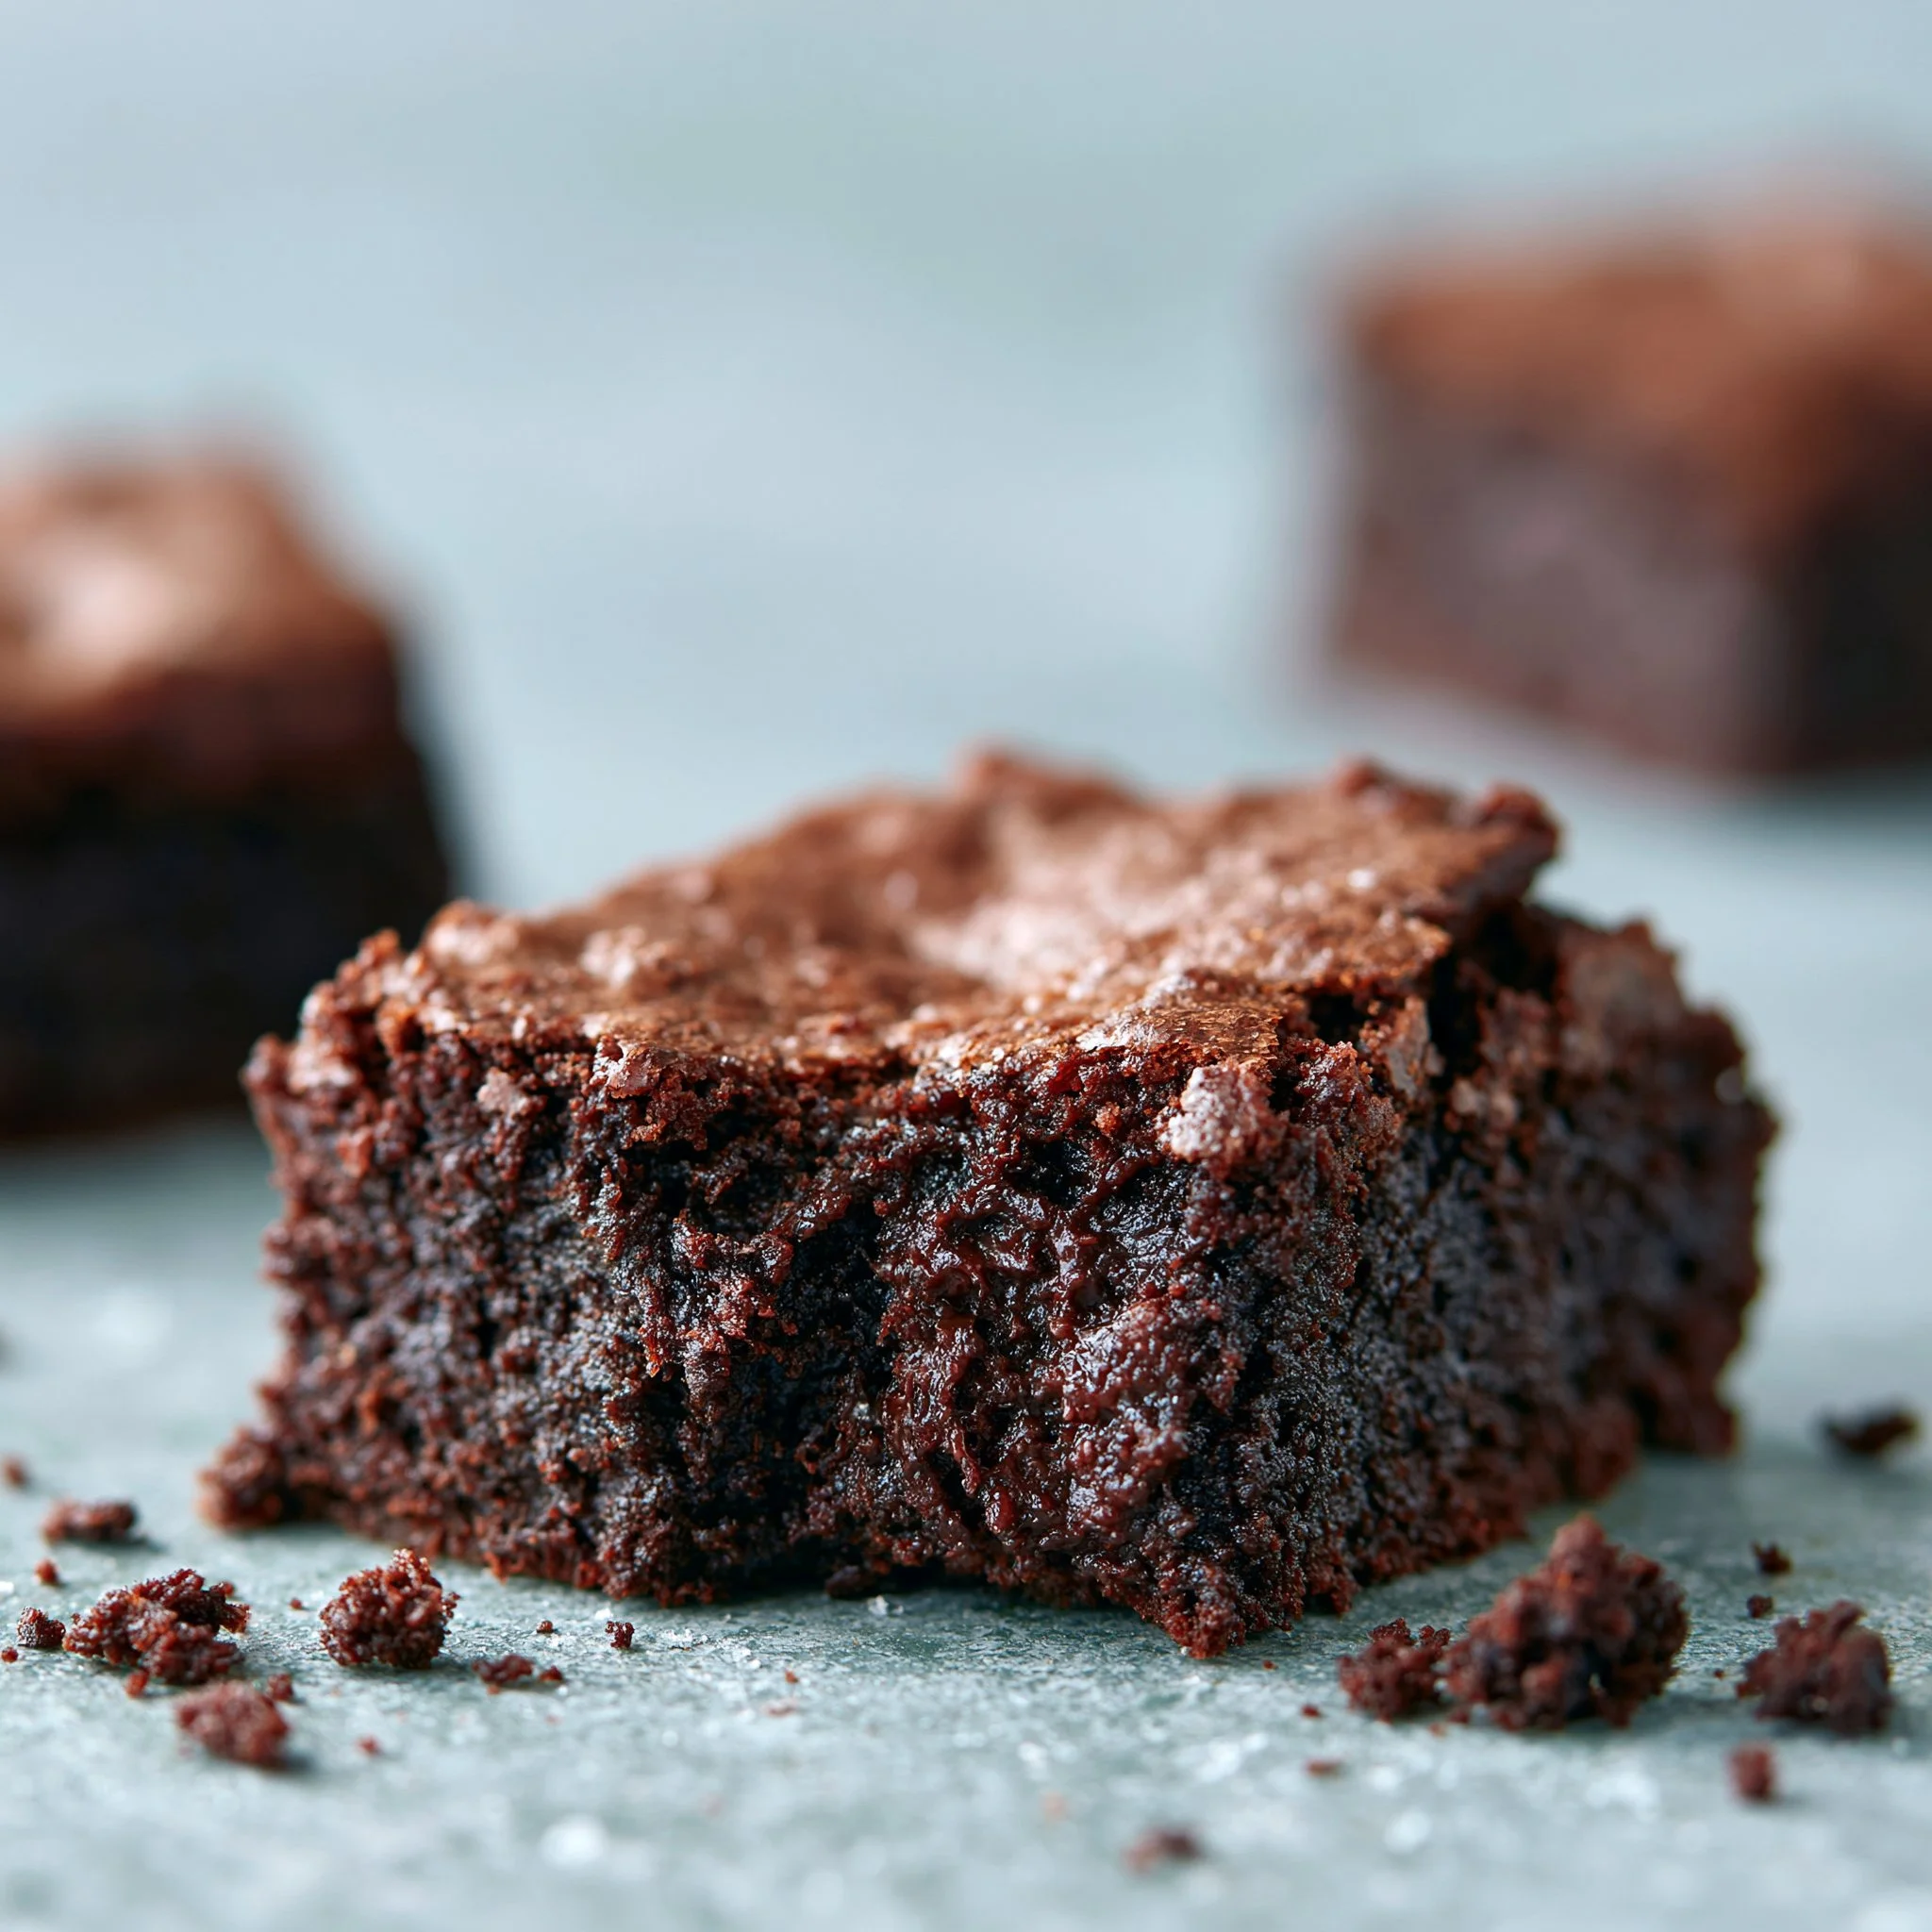
What It Tastes Like
These brownies taste like dark cocoa with warm vanilla in the background. The texture lands between fudgy and cakey: moist and dense in the middle, with slightly firmer edges once cooled. If you add chocolate chips, you’ll get little bursts of melted chocolate and a sweeter finish; without them, the cocoa flavor reads cleaner and more “brownie-pantry classic.”
Ingredients
Greek yogurt is the base here—it keeps the batter creamy and helps the brownies stay moist as they bake. Cocoa powder provides the main chocolate flavor, while honey or maple syrup sweetens and rounds out bitterness. Coconut oil adds richness and a smoother bite (melt it so it blends cleanly). Whole wheat flour plus baking powder gives just enough lift so the center sets without drying out; chocolate chips are optional for extra richness. If you’re choosing between sweeteners, honey tastes slightly more floral and round, while maple syrup leans warmer and more caramel-like—both work.
- 1 cup Greek yogurt
- 1/2 cup cocoa powder
- 1/2 cup honey or maple syrup
- 1/4 cup coconut oil, melted
- 1 teaspoon vanilla extract
- 1/2 cup whole wheat flour
- 1/2 teaspoon baking powder
- 1/4 teaspoon salt
- 1/4 cup chocolate chips (optional)
Step-by-Step Instructions
- Preheat and prep the pan. Heat the oven to 350°F (175°C). Grease a baking dish well, especially at the corners (brownies love to stick there).
- Mix the wet ingredients until smooth. In a large bowl, stir together the Greek yogurt, cocoa powder, honey (or maple syrup), melted coconut oil, and vanilla. Keep mixing until the batter looks uniform and glossy with no streaks of cocoa—this is where the cocoa hydrates, so take the extra 30 seconds.
- Whisk the dry ingredients. In a second bowl, whisk the whole wheat flour, baking powder, and salt so the baking powder is evenly distributed (this helps the brownies rise evenly instead of doming in one spot).
- Combine wet + dry (don’t overmix). Gradually add the dry mix into the wet mix, stirring just until you don’t see dry flour. The batter will be thick and spreadable.
- Optional: Fold in the chocolate chips with a few gentle turns. If you like a cleaner top, save a pinch to sprinkle right after you spread the batter.
- Spread into the baking dish. Pour the batter into the prepared dish and smooth it into an even layer. Use a spatula to push batter into the corners; thickness affects bake time, so an even layer matters.
- Bake. Bake for 20–25 minutes. Start checking at 20. You’re looking for a set surface and a center that doesn’t look wet. A toothpick inserted in the middle should come out clean.
- If you’re on the fence at minute 20–22, give it another 2–3 minutes; underbaked brownies can fall as they cool.
- Cool before slicing. Let the brownies cool in the dish before cutting into squares. The crumb firms up as it cools, so you’ll get cleaner slices and a more brownie-like bite—similar to the set you get with these Greek yogurt brownies once they’ve had time to rest.
Common Mistakes to Avoid
- Overmixing after adding flour: it can make the brownies bake up tougher. Fix: stir just until the last streak of flour disappears.
- Skipping a thorough pan grease: these brownies can cling to corners. Fix: grease the dish well, especially edges and corners.
- Pulling them before the center sets: a wet middle can sink as it cools. Fix: check with a toothpick in the center; it should come out clean.
- Overbaking “just to be safe”: they can dry out fast in the last few minutes. Fix: start checking at 20 minutes and stop as soon as the toothpick test passes.
- Cutting while hot: warm brownies crumble and smear. Fix: cool fully for clean squares (a trick I also use with this Greek yogurt brownie version when I’m packing them).
Variations and Swaps
- Honey vs. maple syrup: both work. Honey reads a bit brighter; maple gives a warmer, deeper sweetness.
- Chocolate chips: keep them optional. Fold in for melted pockets, or skip for a more cocoa-forward square.
- Cocoa intensity: for a stronger chocolate impression, choose the darker, more intense cocoa you already have—no other changes needed.
- Texture preference: for slightly firmer edges, bake closer to 25 minutes; for a softer center, aim closer to 20–22 minutes, but still use the toothpick test for “clean.”
Serving Suggestions
- Slice into small squares for an afternoon snack with coffee or tea—these are rich enough that smaller pieces feel satisfying.
- For a more dessert-style plate, serve as squares on their own (chocolate chips help here), especially when you want something simple and no-fuss.
- If you’re packing lunches, tuck a square alongside something savory and filling; I often pair it with a simple meal prep and a treat like these Greek yogurt brownies for a similar “grab-and-go” format.
Storage and Meal Prep
Store cooled brownies in an airtight container in the fridge to keep them moist and easy to slice. If you’re meal-prepping, cut them into squares once fully cooled, then stack with parchment or wax paper between layers to prevent sticking. For a softer bite, let a square sit at room temperature briefly before eating; they’re especially clean-cut and packable when chilled.

FAQs
Can I make these ahead for the week?
Yes. Bake, cool completely, slice, and refrigerate in an airtight container so the texture stays moist and the squares hold their shape.
Do I have to use chocolate chips?
No. They’re optional. Without chips, the brownies taste more purely cocoa-forward; with chips, you’ll get sweeter pockets of melted chocolate.
Why did my brownies turn out dry?
They likely baked a bit too long. Start checking at 20 minutes and pull them as soon as a toothpick in the center comes out clean.
Why did my brownies sink in the middle?
That usually happens when the center is still underbaked. Make sure the surface looks set and the toothpick test in the center comes out clean before cooling.
Final Tip
Mix the cocoa thoroughly into the yogurt mixture before you add any flour—when the wet base looks smooth and glossy, the brownies bake up more evenly and you’re less likely to get dry cocoa pockets in the finished squares.
Conclusion
If you want to compare approaches, it’s helpful to see how other cooks handle similar yogurt-based batters—this is a solid starting point, and you can also look at Greek Yogurt Brownies (Under 100 Calories!) – The Big Man’s World, Greek Yogurt Brownies – Foodie With Family, and Greek Yogurt Brownies (Easy Eggless Brownie Recipe) for other ingredient ratios and texture outcomes.

Greek Yogurt Brownies
Ingredients
Method
- Preheat the oven to 350°F (175°C) and grease a baking dish well, particularly at the corners.
- In a large bowl, mix together the Greek yogurt, cocoa powder, honey or maple syrup, melted coconut oil, and vanilla until smooth and glossy, with no cocoa streaks.
- In a second bowl, whisk together the whole wheat flour, baking powder, and salt.
- Gradually stir the dry ingredients into the wet mixture until just combined; do not overmix.
- Optional: Fold in chocolate chips, reserving a pinch for topping, if desired.
- Spread the batter into the prepared baking dish, smoothing it out into an even layer.
- Bake for 20 to 25 minutes, checking at 20 minutes until a toothpick comes out clean.
- Allow the brownies to cool in the dish before slicing for cleaner squares.
- Slice into small squares for serving, great with coffee or as a snack.