
When I want a dessert that feels put-together but doesn’t ask me to turn on the oven, I reach for freezer bars. These creamy vegan mango cheesecake bars are especially useful when you’re already doing meal prep (or just trying to keep cleanup low) and you want something you can slice, stash, and serve straight from the fridge.
The payoff is very practical: a press-in almond-date crust and a blender filling that sets up firm in the freezer. The flavor lands where I want it—bright mango with lemony tang, rounded out by cashews and coconut cream—without needing any baking or complicated steps. If you like the format of make-ahead bars, you might also keep a batch of sugar-free cheesecake bars in rotation for the same “grab, slice, done” convenience.
Why This Recipe Works
- No-bake, minimal cleanup: a food processor for the crust and a blender for the filling, then everything goes into one lined 8×8 pan.
- Cashews create the “cheesecake” texture: when soaked and blended, they turn silky and set up thick once frozen.
- Mango + lemon keeps it balanced: mango brings sweetness and aroma; lemon juice adds the tang that makes it read like cheesecake instead of a smoothie bar.
- A crust that actually slices cleanly: almond flour plus dates and coconut oil presses into a sturdy base that holds together once chilled.
- Make-ahead friendly by design: the bars need freezer time, so you’re naturally set up to prep them earlier and serve when you’re ready.
- Flexible sweetness: maple syrup or agave both work here, so you can use what you already have without changing the method.
Quick Kitchen Note
I like this style of recipe for weeks when the fridge is busy and the oven doesn’t need to be. Once the pan is in the freezer, it’s hands-off, and the only real “timing” is remembering to soak the cashews and give the bars enough time to firm up.
What It Tastes Like
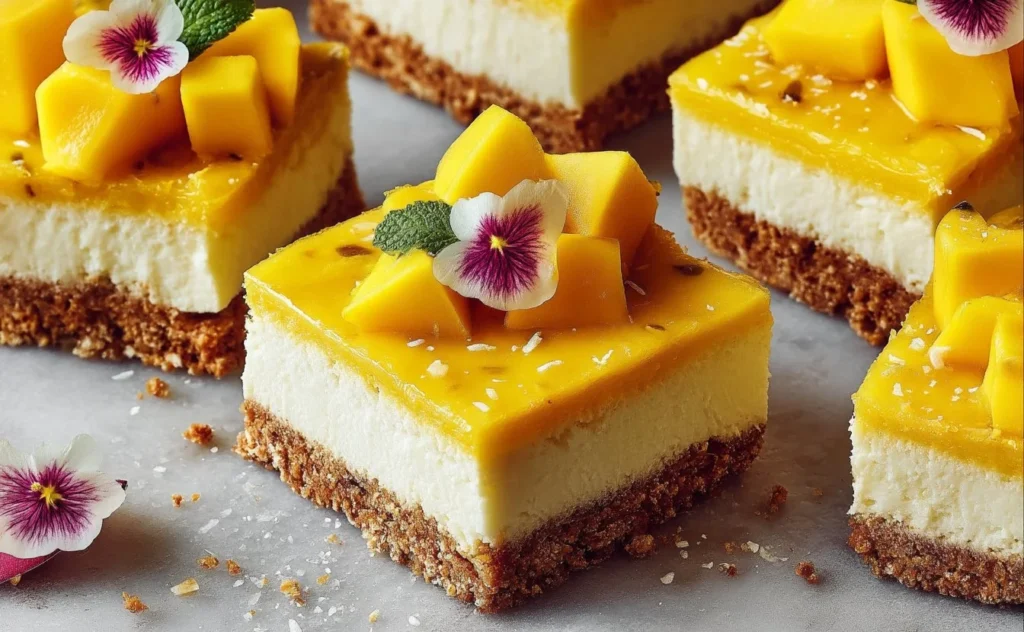
These bars taste like a mango-forward cheesecake: fruity and fragrant, with a clean lemon finish that keeps the richness in check. The filling is creamy and dense (not fluffy), and the crust is gently sweet with a nutty bite. Straight from the fridge, the texture is smooth and sliceable; right from the freezer, it’s firmer and more like an ice-cream bar.
Ingredients
This recipe relies on a few key roles: soaked cashews for body, mango pulp for flavor and color, coconut cream for richness, and lemon juice to bring that cheesecake tang. For the crust, almond flour gives structure while dates and coconut oil bind everything together. If you’re choosing between sweeteners, maple syrup or agave both blend in smoothly—use whichever is on hand. If you’re looking for another bar format with a similar make-ahead rhythm, these cheesecake-style bars are a good reference point.
- 2 cups cashews (soaked for 4 hours)
- 1 cup mango pulp (fresh or canned)
- 1/3 cup coconut cream
- 1/4 cup maple syrup or agave nectar
- 1/4 cup lemon juice
- 1 teaspoon vanilla extract
- 1 cup almond flour (for crust)
- 1/4 cup dates (pitted, for crust)
- 1/4 cup coconut oil (melted, for crust)
- Pinch of salt
Step-by-Step Instructions
- Line and prep your pan. Line an 8×8-inch baking dish so you can lift the bars out later. (This matters—frozen bars are hard to pry out cleanly without a liner.)
- Make the crust in a food processor. Add the almond flour, pitted dates, melted coconut oil, and a pinch of salt. Pulse until the mixture looks like damp, sandy crumbs that hold together when you pinch them. If you still see large date pieces, keep pulsing until they’re chopped and evenly distributed.
- Press and chill. Tip the crust mixture into the lined pan and press firmly into an even layer (pay attention to the corners). Chill the crust for 30 minutes so it firms up before you add the filling.
- Blend the filling until silky. Drain the soaked cashews well. In a blender, combine the cashews, mango pulp, coconut cream, maple syrup (or agave), lemon juice, and vanilla extract. Blend until completely smooth and creamy—no grit. This can take a few minutes depending on your blender; stop and scrape down as needed.
- Fill the pan. Pour the mango filling over the chilled crust. Spread into an even layer. You’re aiming for a smooth surface and consistent thickness so the bars freeze evenly.
- Freeze until fully set. Freeze for at least 4 hours, or until the center feels firm to the touch and doesn’t give when you gently press it.
- Slice and serve chilled. Lift the slab out of the pan, cut into bars, and serve chilled. For the cleanest slices, cut when fully firm and use steady, confident downward pressure.
Common Mistakes to Avoid
- Not soaking the cashews long enough: the filling can stay slightly grainy instead of creamy. Fix: soak for the full 4 hours, then drain well before blending.
- Under-processing the filling: even soaked cashews need time to turn silky. Fix: blend longer and scrape down; stop only when the texture is completely smooth.
- Pressing a loose, uneven crust: thin spots can crumble when sliced. Fix: press firmly into an even layer, especially at the edges and corners.
- Skipping the crust chill: a warm/soft crust can mix with the filling at the bottom. Fix: chill the crust for the full 30 minutes so it’s set before pouring.
- Cutting before the bars are fully firm: you’ll get smears and ragged edges. Fix: freeze at least 4 hours; if the center still dents, give it more time.
Variations and Swaps
- Sweetener: use maple syrup or agave nectar interchangeably in the same amount. Choose maple for a warmer sweetness; agave stays more neutral.
- Mango pulp: fresh or canned both work. If your pulp is very thick, just blend patiently until the mixture loosens and turns creamy.
- More tang: keep the ingredients the same, but if you want a sharper cheesecake feel, make sure you’re using the full 1/4 cup lemon juice—it’s doing important balance work here.
- Different bar vibe: if you prefer a more classic cheesecake flavor profile (less fruit-forward), try a batch of simple cheesecake bars another week and keep this mango version for when you want something brighter.
Serving Suggestions
- Serve straight from the fridge for a creamy, sliceable texture, or slightly colder for a firmer “frozen bar” bite.
- Cut into smaller pieces for a dessert tray or into larger bars for a grab-and-go treat.
- If you’re planning a mixed menu, pair these with something savory and simple earlier in the day (I often do easy protein-and-veg breakfasts like creamy baked eggs, then pull these out later as the no-cook dessert).

Storage and Meal Prep
- Freezer: This recipe is built for the freezer. Keep the bars frozen until you’re ready to serve, then slice as needed.
- Fridge: After the bars are set, you can keep them chilled for a softer, creamy texture. If they start to feel too soft to slice cleanly, return them to the freezer until firm again.
- Meal prep approach: Freeze the full slab first (for clean slices), then cut into bars and store them so you can take out only what you need.

FAQs
Do I have to use an 8×8-inch pan?
That’s the pan size this method is written for. A different size will change the thickness and how long it takes to firm up.
Can I use fresh mango or canned mango pulp?
Yes—either works. The key is blending until completely smooth so the texture sets up creamy.
Why is my filling not smooth?
Usually it’s either under-soaked cashews or not blending long enough. Soak the full 4 hours, drain well, and blend until there’s no grit.
How do I know the bars are fully set?
After at least 4 hours in the freezer, the center should feel firm and not leave an indentation when lightly pressed.
Final Tip
Before you pour in the filling, run your finger around the top edge of the chilled crust to check for thin spots—patch them now while it’s easy. A level, well-pressed base is what makes these bars slice neatly instead of crumbling at the first cut.
Conclusion
If you want to compare approaches for no-bake mango cheesecake bars, it’s helpful to see a few methods side by side—this version stays streamlined with a simple crust, a blender filling, and a straight freeze to set. For more inspiration, you can look at Rainbow Nourishments’ mango bar variation, Well Vegan’s mango cheesecake bar approach, or Lazy Cat Kitchen’s vegan mango bars to see how others handle texture and flavor balance.

Vegan Mango Cheesecake Bars
Ingredients
Method
- Line an 8x8-inch baking dish with parchment paper.
- In a food processor, combine the almond flour, pitted dates, melted coconut oil, and a pinch of salt. Pulse until the mixture resembles damp, sandy crumbs.
- Press the crust mixture firmly into the lined pan evenly, paying attention to the corners. Chill the crust for 30 minutes.
- Drain the soaked cashews and add them to a blender along with the mango pulp, coconut cream, maple syrup (or agave), lemon juice, and vanilla extract. Blend until completely smooth.
- Pour the mango filling over the chilled crust and spread it into an even layer.
- Freeze for at least 4 hours, or until the filling is firm to the touch.
- Once set, lift the bars out of the pan, slice into bars, and serve chilled.


