
The Practical Why Behind It
Sugar Free Vanilla Marshmallows are not just a “healthier swap,” they solve a handful of very real kitchen and lifestyle problems. If you’re living low-carb or diabetic-friendly, classic corn syrup and sugar-based marshmallows are basically off the table. This version gives you those same bakery-style, bouncy cubes without the glucose spike, so you can still enjoy hot cocoa toppers, holiday candy trays, and s’mores-style treats with far less compromise. I also like that each piece is incredibly low in calories, which makes portion control easier when you want “just one more.”
From a cooking standpoint, this recipe removes a lot of the stress that usually comes with homemade marshmallows. You don’t need to babysit a candy thermometer, hit an exact soft-ball stage, or worry that you’ve crystallized the sugar and ruined the batch. Agar-agar and a granulated sugar substitute like Splenda are much more forgiving: if you can simmer, whip, and pour, you can make Sugar Free Vanilla Marshmallows. That means less time troubleshooting, and more time cutting neat squares and dusting them in your favorite sugar free powdered coating. If you’ve ever avoided marshmallows because they felt “fussy,” this method brings them firmly into weeknight-treat territory.
There’s also a big practical payoff for planners, hosts, and anyone who meal-preps sweets alongside dinners. These marshmallows keep their structure better than many store-bought sugar free versions, so you can portion them into gift boxes, snack jars, or dessert boards without worrying they’ll melt into a sticky mess. The neutral vanilla base makes them easy to pair with other recipes, like low-carb hot chocolate or a sugar free cheesecake parfait, and you can flavor or color them by batch for different holidays. Instead of a one-off “diet candy,” Sugar Free Vanilla Marshmallows become a flexible building block for lighter desserts all year long.
Step-by-Step Method for Fluffy Sugar Free Vanilla Marshmallows
Start by preparing your pan so your Sugar Free Vanilla Marshmallows don’t stick. Lightly dust a non-metal baking dish with sugar free powdered sweetener, tapping and tilting the dish so the bottom and corners are coated. In your mixer bowl, stir together the unsweetened agar-agar powder and 1/2 cup of cold water until everything looks hydrated and slightly thick. Let this sit to bloom while you make the hot syrup—this step helps the agar-agar dissolve evenly, so you don’t end up with rubbery or grainy pockets.
Next, set a saucepan over medium heat and add your Splenda (or preferred sugar-free sweetener), the remaining 1/2 cup of water, and a pinch of salt if you like. Stir as it heats, watching for the mixture to go from cloudy to clear and then start to just barely bubble around the edges, usually at the 8–10 minute mark. You don’t want a full rolling boil; aim for a steady gentle simmer so the sweetener doesn’t scorch or crystallize. Remove the pan from the heat and immediately stir in the vanilla bean paste until it’s fully mixed in and fragrant.
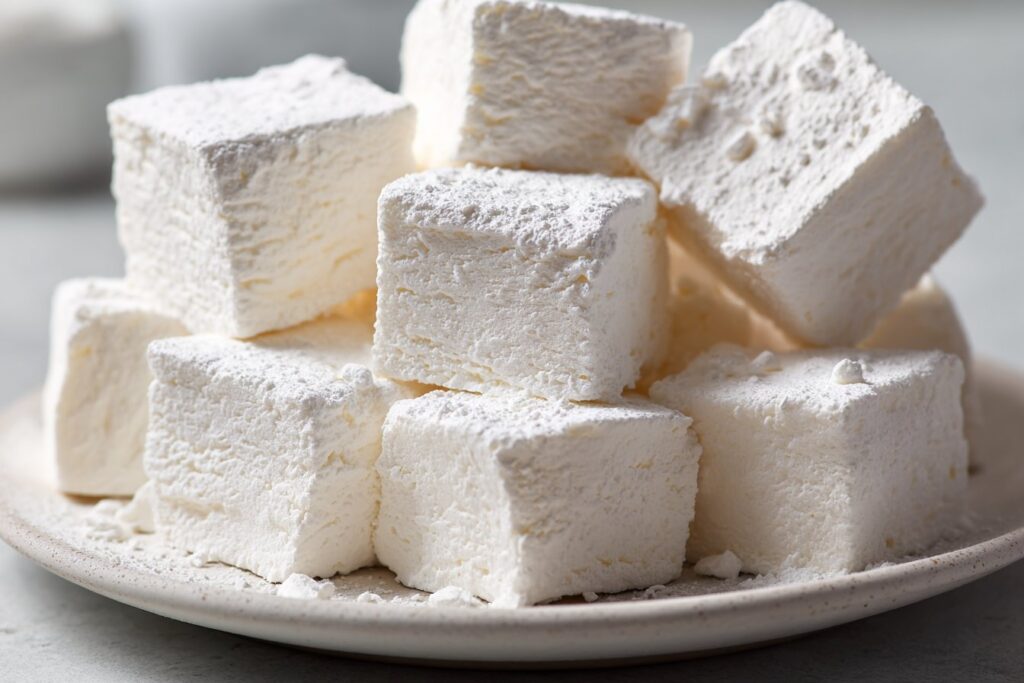
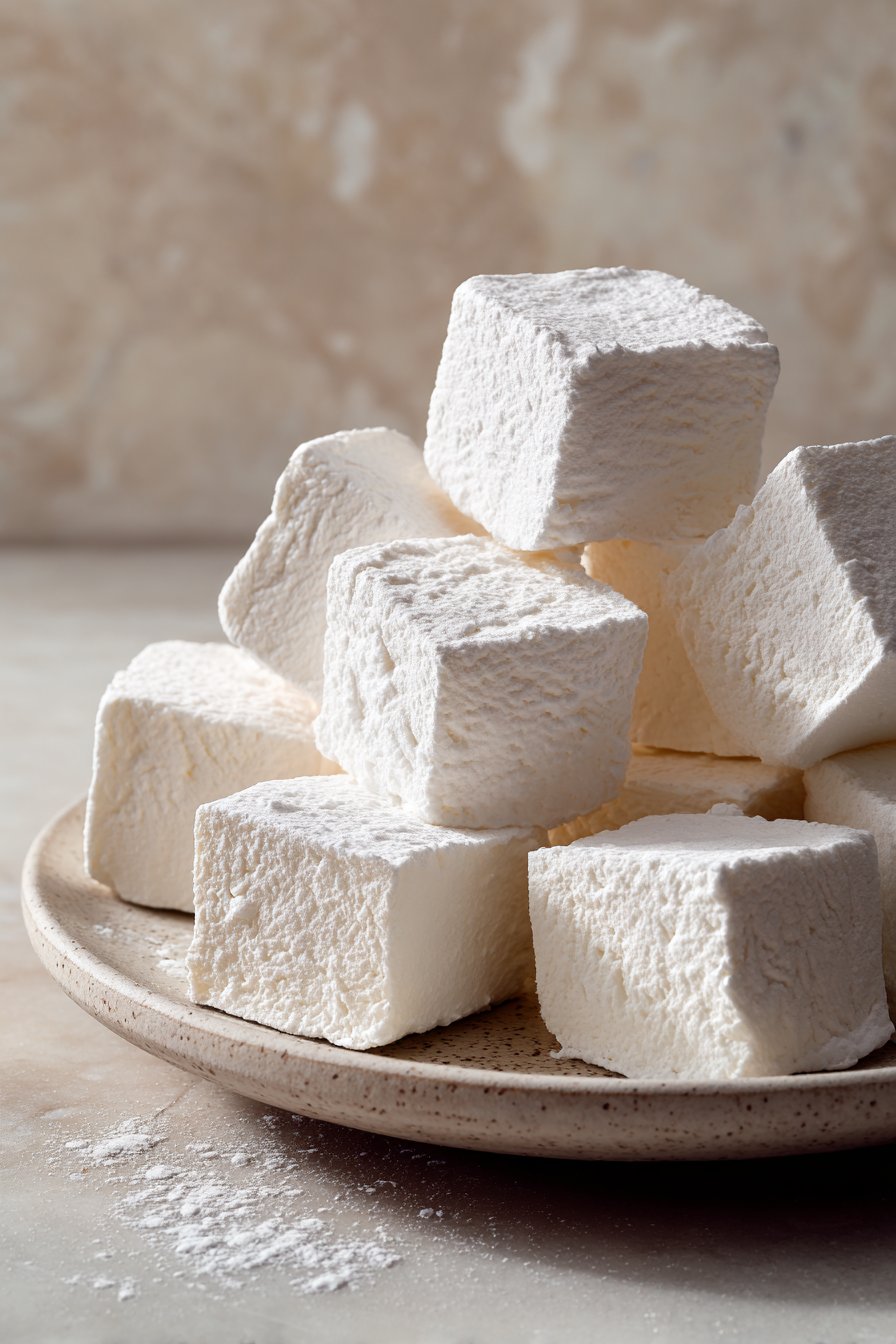
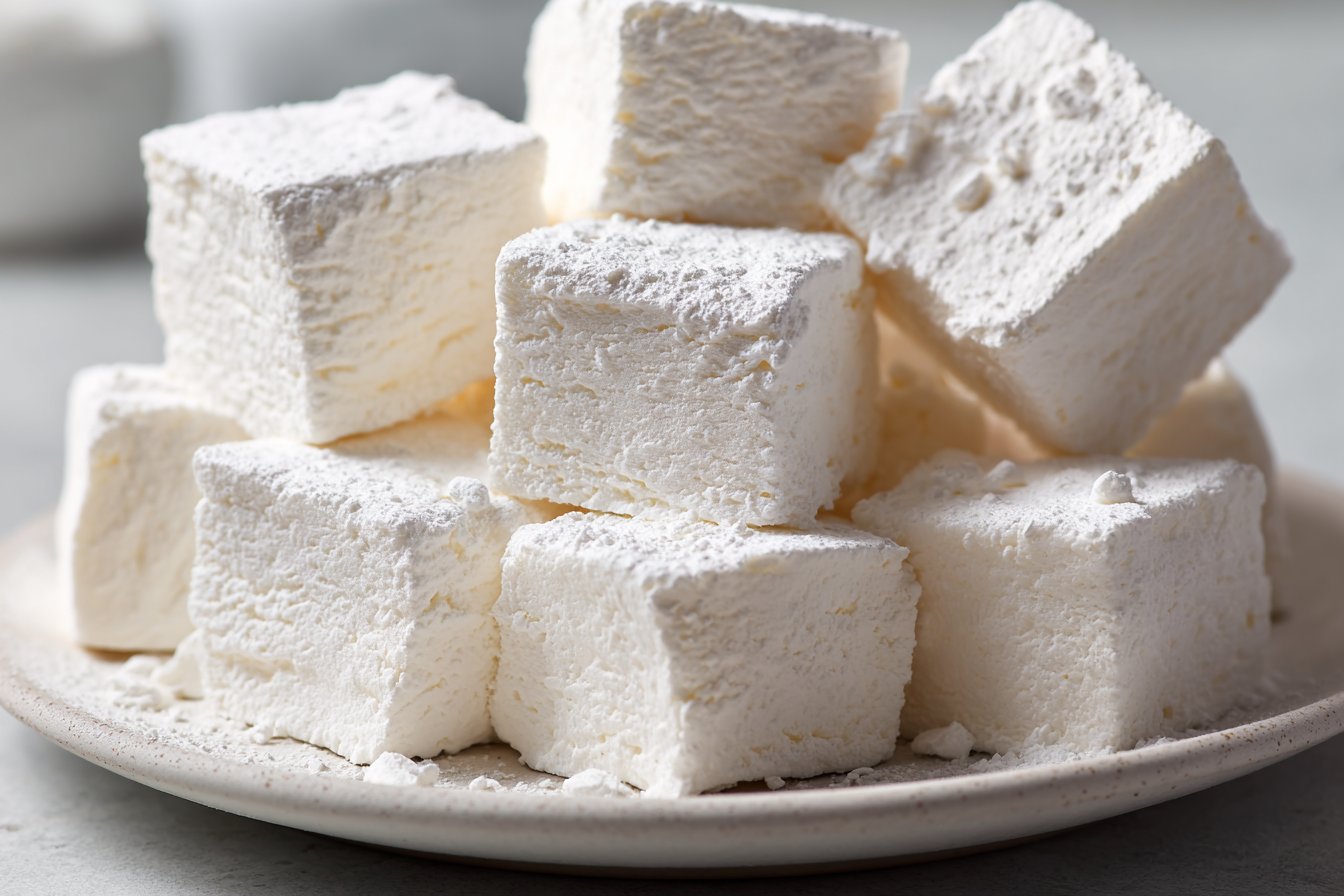
With your mixer on low, carefully pour the hot vanilla syrup in a thin, steady stream into the bloomed agar-agar mixture. Once it’s all in, gradually increase the mixer speed to high and whip until the mixture becomes thick, glossy, and at least doubles in volume; this usually takes several minutes, and the bowl will feel slightly warm but not hot. If it looks a bit loose at first, keep whipping—it thickens suddenly toward the end. When you have a light, marshmallowy texture, quickly scrape the mixture into your prepared baking dish and smooth the top with a greased spatula. Sprinkle a little more powdered sweetener over the top if you like, then let your Sugar Free Vanilla Marshmallows cool uncovered at room temperature until fully set and easy to cut into clean squares.
Make-Ahead and Storage Notes for Sugar Free Vanilla Marshmallows
Sugar Free Vanilla Marshmallows are very make-ahead friendly, which makes them perfect for holidays, gifting, and dessert prep. Once the marshmallow slab is fully set and cut, dust all sides lightly with sugar free powdered sweetener to create a dry, non-sticky coating. Store the pieces in a shallow, airtight container at cool room temperature for up to 5–7 days. Keep the layers separated with parchment or wax paper so they don’t fuse together into one big marshmallow brick. Avoid humid spots in the kitchen (right next to the stove or dishwasher, for example), since moisture can make them tacky and slightly weepy over time.
Because this recipe uses agar-agar instead of agar-agar powder, your Sugar Free Vanilla Marshmallows hold their shape better at room temperature but can dry out a bit faster if exposed to air. If you plan to make them more than 24 hours ahead, I recommend cutting them closer to serving time: store the uncut slab wrapped well in parchment, then in plastic wrap, and slice when you’re ready. You can refrigerate them if your kitchen runs hot, but bring them back to room temperature before serving so the texture softens and the vanilla flavor blooms. Freezing is possible, but not ideal—the structure can become slightly rubbery as they thaw, a bit like over-set panna cotta. For treats like layered low carb bars or a sugar free rocky road, it’s best to freeze the finished dessert, not the plain marshmallows alone.
Variations and How to Serve It
You can spin these Sugar Free Vanilla Marshmallows in a lot of directions without making the recipe fussy. For a deeper flavor, swap half the vanilla bean paste for almond or coconut extract, or add ½ teaspoon of maple extract for a “bakery” twist that still keeps things sugar free. If you like a chocolate finish, dust the cut pieces in unsweetened cocoa powder mixed with a little powdered sweetener, shaking off the excess so they don’t taste bitter. For a swirl effect, gently fold in 1–2 drops of natural food coloring just before you pour the marshmallow mixture into the pan—use a skewer to create ribbons rather than fully mixing it in. You can also cut them into mini cubes for topping desserts, or go extra-classic with jumbo squares for toasting.
Serving Sugar Free Vanilla Marshmallows is where they really shine. Drop a couple into a mug of hot coffee or sugar free hot chocolate and let them slowly melt for a creamy, foamy layer on top. Layer them into a low-carb dessert board with nuts, dark chocolate squares, and fresh berries for an easy, no-bake sweet tray. For a “s’mores” style treat, toast them under the broiler (watch closely) and sandwich between sugar free cookies with a square of very dark chocolate. You can even dice them small and fold them into a vanilla yogurt parfait or a simple sugar free chocolate mousse for a light, cloud-like texture. However you serve them, keep a few pieces in an airtight container at room temperature so you always have a quick, bakery-style finishing touch ready to go.
Serving of Sugar Free Vanilla Marshmallows
Conclusion
Homemade marshmallows feel a little bit magical, don’t they? You start with simple ingredients, add some patience and a bit of care, and end up with a light, bouncy treat that disappears faster than you expect. These Sugar Free Vanilla Marshmallows are one of those recipes that make people pause, smile, and say, “Wait…you made these?” It’s a small victory that turns an ordinary day into something a little more special.
I love how a tray of these brings people into the kitchen—kids sneaking tastes, friends lingering with coffee mugs, family building the “perfect” hot chocolate. Whether you’re making them for a cozy night in, a party platter, or just to keep in the pantry for when a sweet craving hits, they have a way of creating little moments you’ll remember.
If you’ve been on the fence about trying homemade marshmallows, this is the time to go for it. Follow the steps, trust the process, and enjoy the result—you might be surprised how simple it feels once you’ve done it once.
For more delicious recipes like this, follow us on social media!

Instructions Process of Sugar Free Vanilla Marshmallows
Are these Sugar Free Vanilla Marshmallows OK for diabetics and keto diets?
These Sugar Free Vanilla Marshmallows use Splenda or another low- or zero-calorie sweetener instead of regular sugar, which keeps the carbs much lower than classic marshmallows. That makes them a better fit for many people managing blood sugar or following a keto-style plan. However, everyone responds differently to sugar substitutes, so portion size still matters. Always check your specific sweetener’s nutrition info and any added ingredients like maltodextrin. If you’re diabetic or on a strict medical plan, confirm with your healthcare provider before making them a regular treat.
Which sugar substitutes work best in Sugar Free Vanilla Marshmallows?
This recipe works best with bulk granulated sweeteners that measure cup-for-cup like sugar, such as Splenda, erythritol blends, or monk fruit blends. Pure stevia drops or very concentrated sweeteners usually will not work alone because they don’t provide enough volume or structure. If you swap the sweetener, follow the brand’s conversion chart and start with their “like sugar” measurement. Expect small differences in sweetness and texture; erythritol can make marshmallows a bit firmer, while some blends taste slightly cooler. If the mixture tastes too sweet or not sweet enough before setting, you can adjust it next batch by 2–3 tablespoons.
How do I get the best texture when using agar-agar?
Agar-agar needs to fully hydrate, or “bloom,” in cold water first so it dissolves smoothly later. If you skip this step, you risk rubbery bits or uneven setting in your Sugar Free Vanilla Marshmallows. After blooming, make sure the agar mixture heats and dissolves completely with your sweetener mixture before whipping. If you still see tiny grains or strings, keep it on low heat and stir a bit longer until the liquid looks completely clear and uniform. Once whipped, work fairly quickly, because agar sets faster than agar-agar powder as it cools.
Recipe
Sugar Free Vanilla Marshmallows
Ingredients
Method
- Lightly dust a non-metal baking dish with sugar free powdered sweetener, coating the bottom and corners, then set aside.
- In the bowl of a stand mixer, combine the agar-agar powder and 1/2 cup cold water, stirring until fully moistened, and let it sit to bloom while you prepare the syrup.
- In a medium saucepan over medium heat, combine the Splenda, 1/2 cup water, and optional pinch of salt, stirring until the mixture turns clear and begins to gently simmer around the edges, about 8 to 10 minutes.
- Remove the saucepan from the heat and immediately stir in the vanilla bean paste until evenly combined and fragrant.
- With the mixer on low speed, carefully pour the hot vanilla syrup in a thin, steady stream into the bloomed agar-agar mixture.
- Increase the mixer speed to high and whip until the mixture becomes thick, glossy, and at least doubles in volume, 4 to 6 minutes; it should look like soft marshmallow fluff.
- Quickly scrape the mixture into the prepared baking dish and smooth the top with a lightly greased spatula.
- Dust the top lightly with more sugar free powdered sweetener and let the marshmallows cool uncovered at room temperature until fully set, about 45 to 60 minutes.
- Once firm, loosen the slab from the pan, transfer to a cutting board, and cut into 36 squares, dusting all sides with additional powdered sweetener to prevent sticking.
Notes
- If the mixture looks thin while whipping, keep going; agar-agar sets quickly once it starts to thicken.
- Cut with a sharp knife lightly coated in powdered sweetener for clean edges.
- Store marshmallows in an airtight container at cool room temperature for up to 5–7 days, separating layers with parchment or wax paper.


